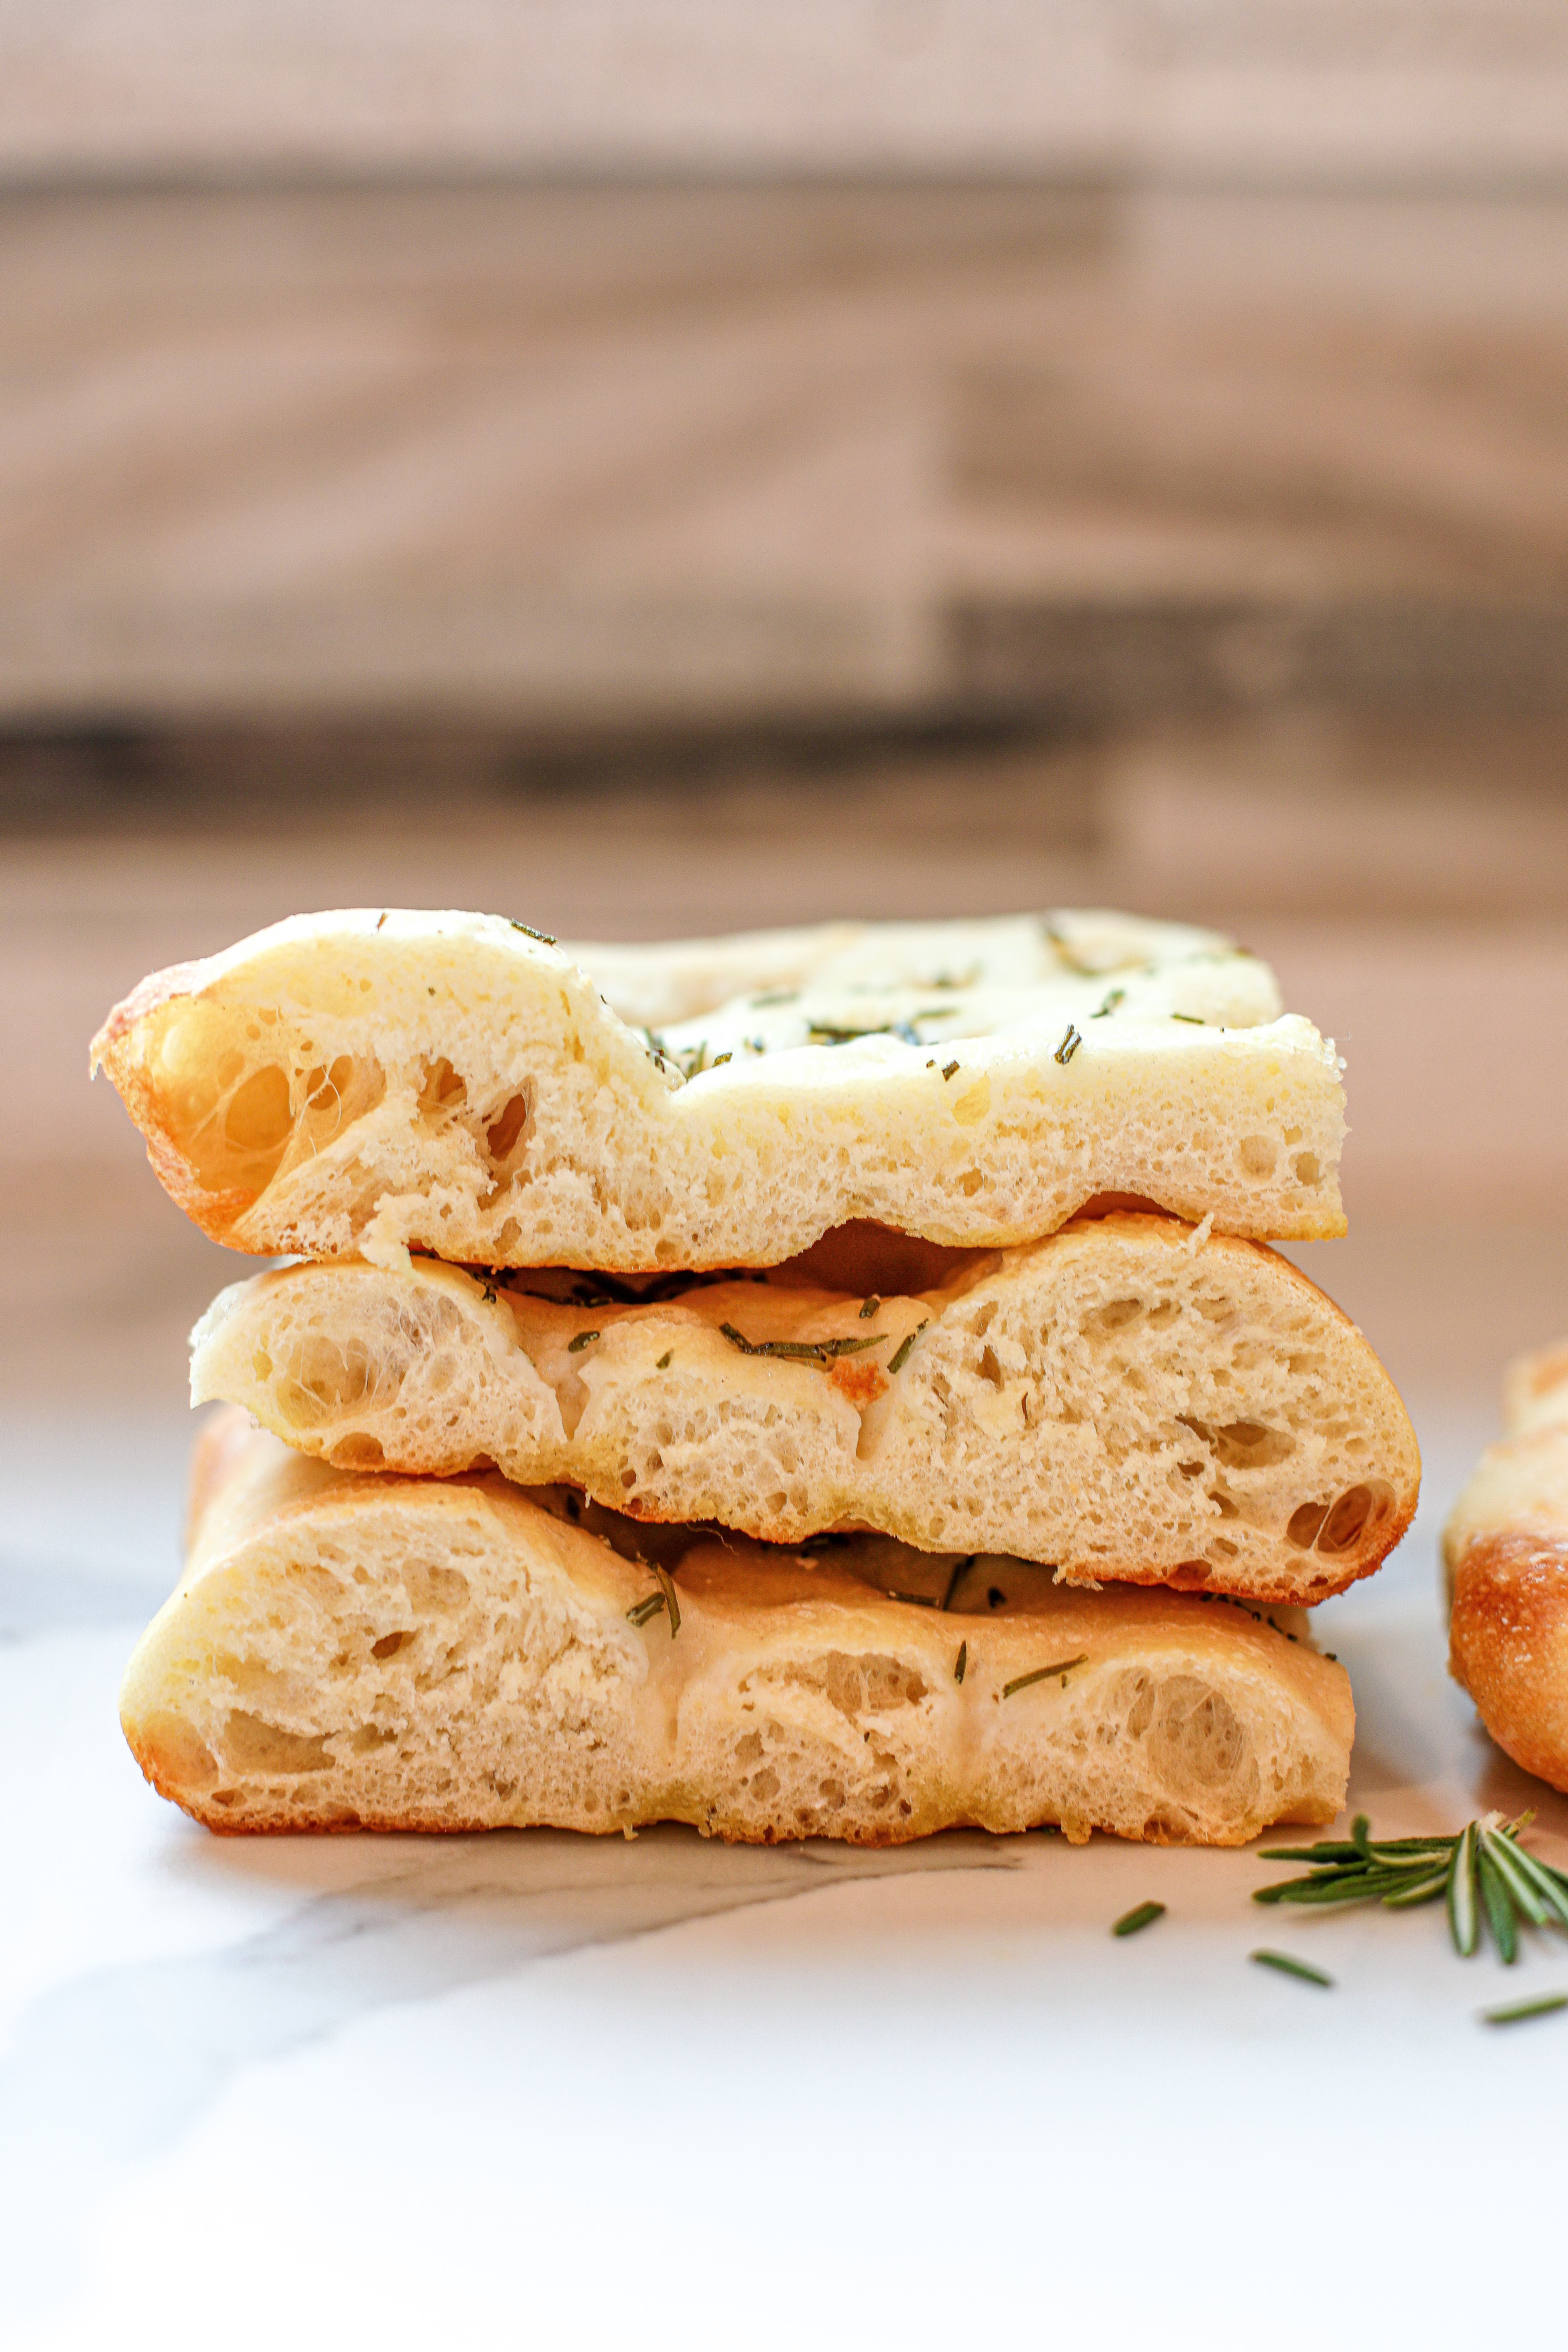
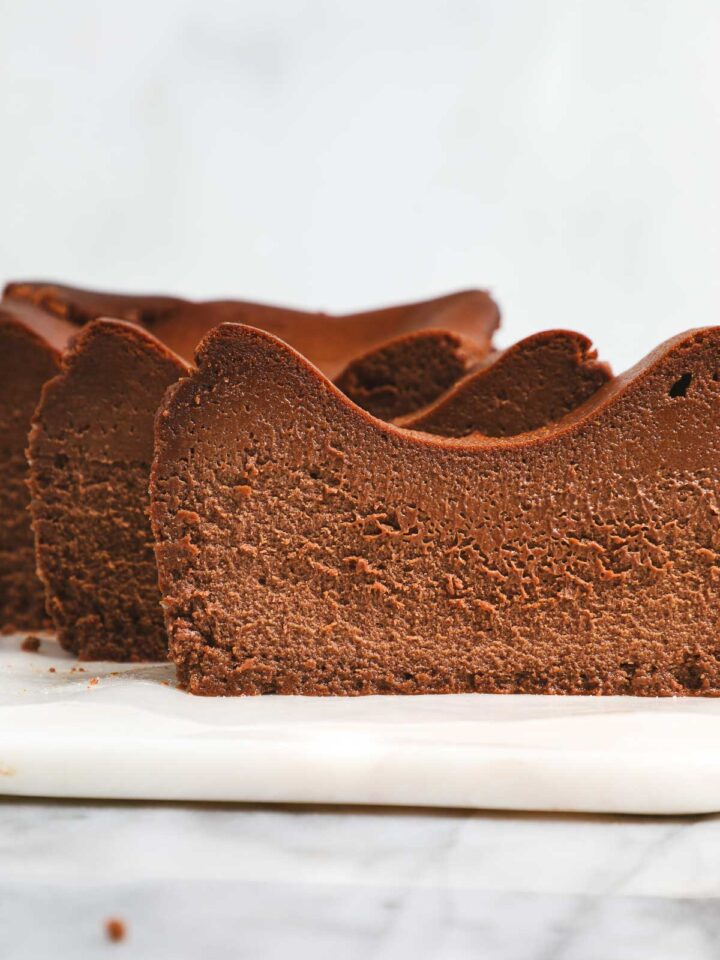
Poolish Pizza Dough is chewy with a crispy air-bubble-filled crust and a thin yet sturdy center. It can hold up to all sorts of toppings and gets its classic chewy texture from making the starter, or poolish, the night before. This is key.
I have included detailed step-by-step instructions with plenty of tips and tricks below. You'll find information about the ingredients in the recipe, such as 00 flour (easy to find), as well as the techniques used and everything I have learned from making this dozens of times - for pizza-making success!
We love to make pizza on Friday nights, and this is one of our go-to pizza dough recipes. It is as close as you'll get to authentic Neapolitan pizza from Naples.
The best pizza that I've ever had by far was in Naples, Italy. Growing up in NY and traveling all over Italy, I've had a lot of pizza. The pizza in Naples was so good that we went twice in two days and we each ordered 1 ½ enormous pizzas.
Our other favorite pizza dough is the dough used to make Grandma Pie Pizza or sheet pan pizza, which is great for entertaining or serving a lot of people with low stress. We also love to make Potato Rosemary Pizza or Broccolini Pizza with this Neopolitan poolish dough recipe.
Jump to:
- 00 Flour and Bread Flour
- Poolish
- Recipe Inspiration
- Kitchen Scale & Weighing Ingredients
- Poolish and Pizza Dough Ingredients
- Making the Starter or Poolish
- Making the Poolish Pizza Dough
- Stretching Out the Dough
- Tips for Sauce and Toppings
- Tips for Baking the Pizza in Your Home Oven
- Top Tips for Making Poolish Pizza Dough
- Neapolitan Poolish Pizza Dough FAQs
- You May Love These Other Italian Recipes:
- Poolish Pizza Dough
00 Flour and Bread Flour
This Poolish Pizza Dough, which is Neapolitan in style, uses a combination of bread flour and 00 flour. 00 flour is called 00 flour because it refers to flour that has been ground to the finest level or 00 as opposed to 0, 1, or the highest level 2. The recipe also uses bread flour which has a higher protein content than all-purpose flour.
00 Flour has become increasingly popular and can now be found at many regular grocery stores, as well as at Whole Foods.
Poolish
This recipe requires a bit of planning ahead because the poolish, or starter, needs to be made the night before. This is one of the elements that contributes to that really chewy pizza crust which will make the pizza stand out. Making the poolish takes all of a few minutes, if not less. It can be done after you get home from work, after the kids have gone to bed, or while you’re watching TV at night.
A poolish is a type of preferment, which is a smaller amount of dough that is made or fermented ahead of the final dough. There are a number of different types of preferments, each having its own unique aspects. Here are three common preferments:
- Poolish: A very wet preferment, often made with an equal amount of flour and water in terms of weight.
- Biga: A drier or stiffer preferment of Italian origin.
- Sourdough: Increasingly common in home bread baking, but sourdough starters have been around (and continuously used) for hundreds of years, passed down through generations.
Recipe Inspiration
This Naples-style pizza dough recipe is based on the recipe from Vito Iacopelli, a well-known Neopolitan Pizza maker with a channel on YouTube. He is a joy to watch and really is an expert at his craft. I highly recommend watching him on his YouTube channel as well as this full tutorial on making pizza at home as hosted on Pro Home Cooks.
I adjusted his recipe by decreasing the salt, using a packet of yeast to make things easier, and simplifying some of the steps in the process.
Kitchen Scale & Weighing Ingredients
Introducing a kitchen scale can be a barrier to entry for many people. Not everyone has one in their kitchen or may feel intimidated using one.
For that reason, this is the only recipe to date on Elle & Pear that requires a kitchen scale. There are lots of upsides to using a kitchen scale, the biggest of which is precision. For this recipe in particular, I think it is important to be precise. The best way to do that is with a kitchen scale and a recipe that is written in terms of grams rather than cups and teaspoons.
Poolish and Pizza Dough Ingredients
Below are the ingredients to make the poolish, the star ingredient in the Poolish Pizza Dough with the full pizza dough ingredients further below.

- Water
- Honey
- Yeast: Use one packet of instant yeast, which makes the process easier, rather than buying the yeast in larger quantities and measuring by weight.
- 00 Flour: The type of flour can be found at most grocery stores, including Target and Whole Foods. The two most common brands are King Arthur and Caputo, which is an Italian company that supplies 00 flour to pizzerias all over Italy. I use both brands depending on what is available.
See the recipe card below for full information on ingredients and quantities.
Below are the ingredients to make the Poolish Pizza Dough.

- Poolish: Made ahead of time the day before.
- Bread Flour: This type of flour can be found at most grocery stores.
- 00 Flour
- Water
- Salt
See the recipe card below for full information on ingredients and quantities.
Making the Starter or Poolish
Below are the step-by-step ingredients and photos for how to make the Poolish.
Note: The recipe card with instructions, ingredient list, and quantities is included further below these step-by-step photos including below the How to Make the Poolish Pizza Dough section.
To make the pizza dough, you first make the poolish or starter. Think of making a loaf of homemade sourdough bread, you always start with a sourdough starter. It’s the same with this pizza dough. You make your own starter, or poolish, that sits in the fridge overnight.

Step 1. To make the poolish combine the water, honey, yeast, and 00 flour, and do a quick easy stir to combine the ingredients.

Step 2. Then let the starter sit uncovered for 15 minutes.
Step 3. Cover, let sit out for an hour, and then store in the fridge overnight (and not more than 24 hours).
Making the Poolish Pizza Dough
Below are the step-by-step instructions for making the dough.

Step 4. The next day, add the poolish from the night before (Image 4-1), bread flour, 00 flour, water, and salt (Image 4-2). It will be a very, very wet dough (Image 4-3). It might even seem so wet that you feel like you measured something incorrectly. You didn’t. It’s just a super wet dough. It will firm up as you work the dough and as you let it rest. Though it will still stay very soft and pliable.

Step 5. Instead of kneading the dough, you will need to work the dough. I do this by holding the dough in one hand, and while still holding it toss the other end of the dough so that it flops and smacks the counter.

Step 6. Then scoop up the dough again in one hand and repeat. Do not add any more flour. You can add a little bit of olive oil to your hands to make it easier to “flop” the dough on the counter rather than stick to your fingers.
Work the dough like this for 10 minutes.

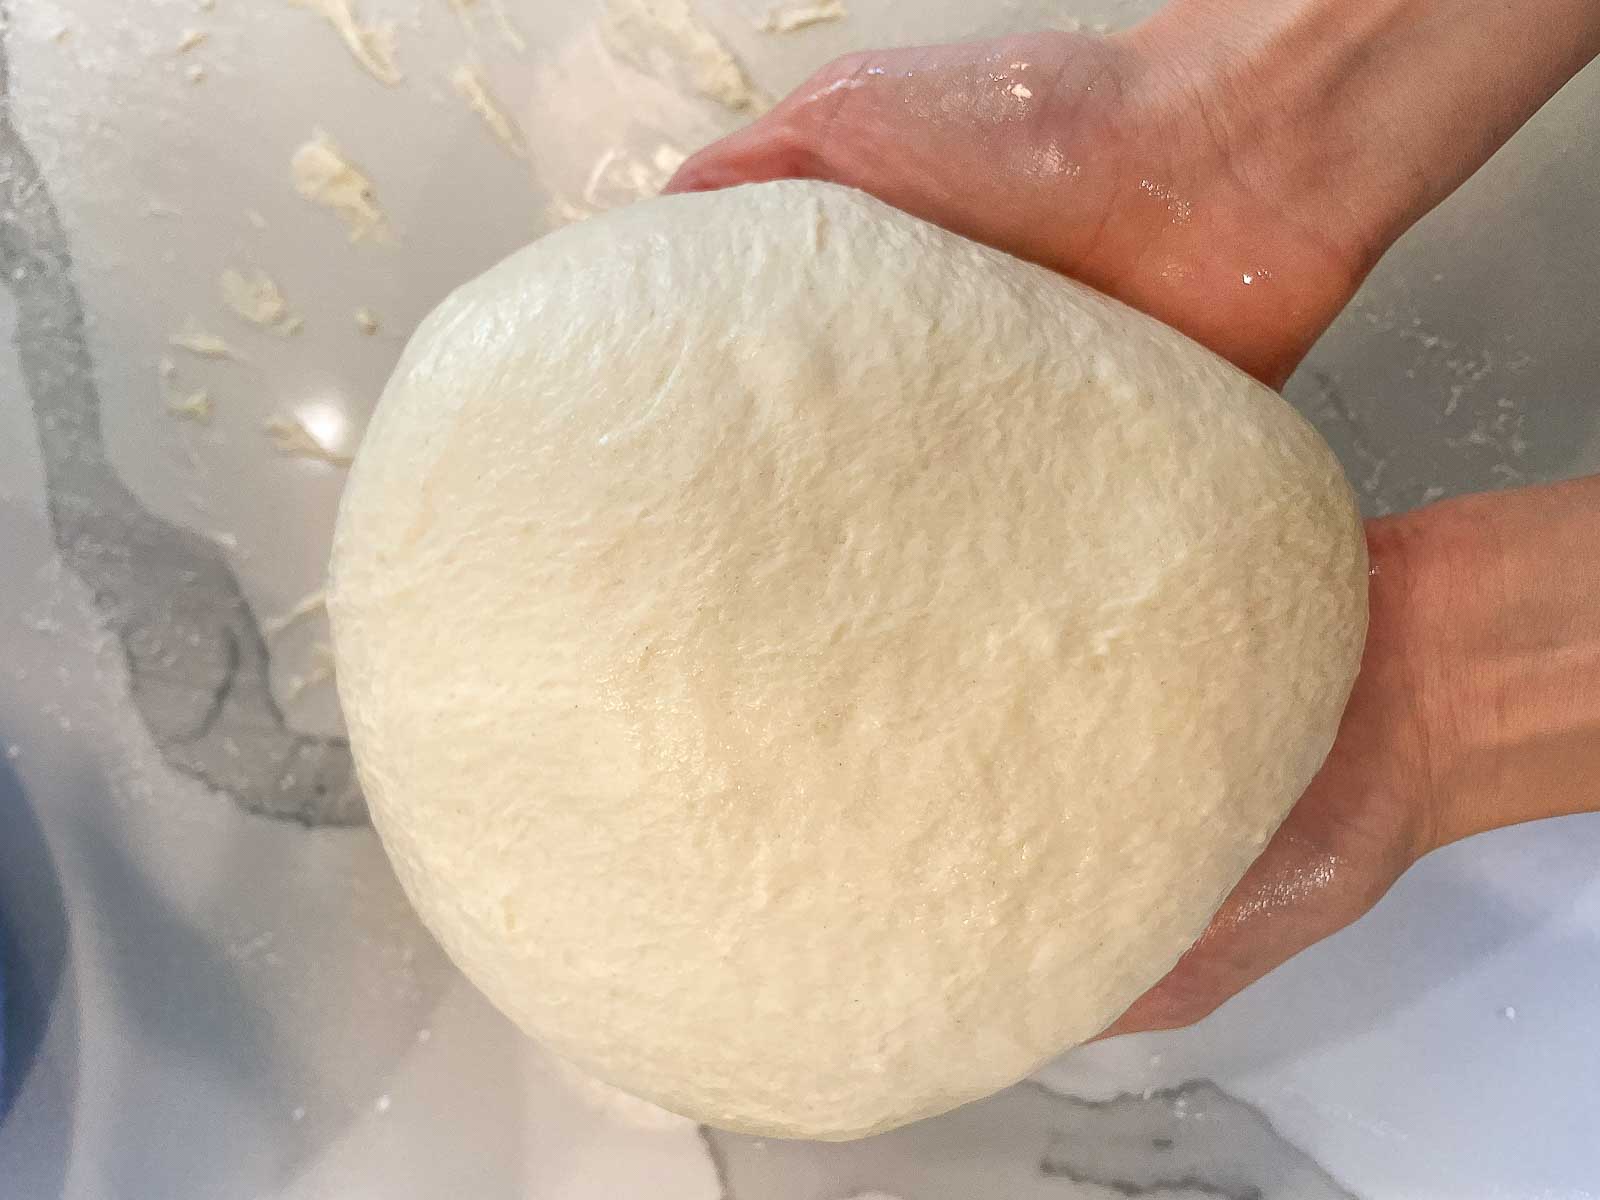
Step 7. Then let the dough rest for 10 minutes on the counter (Image 7-1). Shape the dough into a round ball by tucking any rough pieces underneath and into the bottom of the dough (Image 7-2).

Step 8. Place the dough in a separate large bowl. Cover with a small amount of olive oil (Image 8-1). Then cover the bowl with a dry kitchen towel (Image 8-2). Let rise in a warm place for 1-2 hours or until doubled.
Stretching Out the Dough
Below are the step-by-step instructions and photos for stretching out the dough.

Step 9. Lightly flour the counter or a clean smooth work surface. Divide the dough into three balls. Then stretch and shape the dough into round smooth balls, tucking the rough edges underneath (Image 9-1). Select one round of dough to work with (Image 9-2). Then cover the remaining two with a dry kitchen towel.

Place the dough on the counter and lightly press dimples into the center of the dough with your fingers (Image 10-1), pressing outwards towards the edges slightly (Image 10-2). Flip the dough over and repeat (Image 10-3).

More firmly, press the dough from the center outwards encouraging any air to move towards the outer edges of the dough (Image 11-1). This will form the crust. Then press and pinch the dough around the edges to seal the air into the crust (Image 11-2). This will create a crust that is crunchy and full of satisfying air bubbles.
There are many ways to stretch out the dough, but I like to place the dough on the back of my fists and gently stretch it out (Image 11-3).

Step 12. Continue to stretch out the dough with the back of your fists, turning the dough as you go so that it is roughly the size of your pizza peel.
There is also a method where you place the dough on the counter and your hand facing down on the middle of the dough, then pull back part of the dough over your hand and forearm turning your hand palm side up and raising the dough off the counter stretching the dough in the process.
I find this difficult to do because my fingernails pierce the dough creating holes. Do what works for you as long as you are using your hands and not using a rolling pin which will prevent that crispy air-bubble-filled crust from forming.

Step 13. Check the size of the dough to ensure it is roughly the size of the pizza peel (Image 13-1). If not continue to stretch the dough. Dust the pizza peel with flour (this can be bread flour, 00 flour, all-purpose flour, whole wheat flour, or even cornmeal). Make sure there is a decent amount of flour on the peel. Not too much that the flour scorches on the pizza stone, but enough so that the dough can slide. This is what helps the pizza slide off the peel onto the pizza stone in the hot oven. Place the dough on the pizza peel (Image 13-2).
Ensure that at least 1 inch of the dough is hanging off the edge of the pizza peel (Image 13-3). This will enable the dough to "catch" on the pizza peel allowing you to slowly slide the dough off the peel onto the pizza stone with the help of tongs if needed.
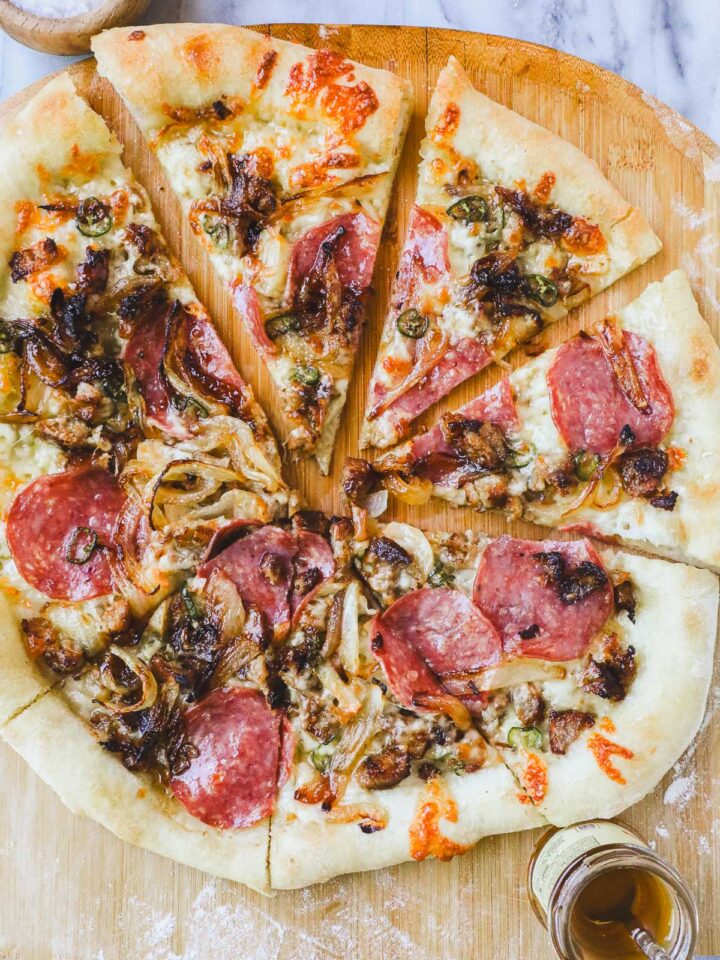
At this point layer your dough with the sauce and the toppings of your choosing, though not too many so that it does not add so much weight that you have trouble sliding it off the pizza peel. Bake as desired (typically at 550°F for 7-8 minutes).
Tips for Sauce and Toppings
- Authentic Naples-Style Pizza: Use San Marzano tomatoes imported from Italy. This makes ALL the difference. No substitutes are acceptable. San Marzano tomatoes are grown in Italy in the fertile volcanic ash of Mt. Vesuvius. Even San Marzano tomatoes grown in the US will not make the cut and will not taste the same. Imported San Marzano tomatoes can be found at most grocery stores, just check the label. If you're having trouble finding it, check Whole Foods or Costco.
- Mozarella: Use fresh mozzarella, not low moisture. If possible, use mozzarella di bufala, or mozzarella cheese from the milk of water buffalo. This is a specific designation in Italy but Buffalo mozzarella can be purchased at some specialty food stores in the US, otherwise, any good quality fresh mozzarella will be great.
- Basil: Add any fresh basil after the pizza has been removed from the oven, otherwise it will burn. Alternatively, you can coat the basil in olive oil to prevent it from burning in the oven.
- Other Toppings: this Naples-style pizza dough works with a wide variety of toppings.
- Classic: San Marzano tomatoes, fresh mozzarella and basil
- Alternatives
- prosciutto, pepperoni, meatballs, salami, bacon
- bell peppers, spicy peppers, caramelized onions, pineapple
- ricotta, gorgonzola, buratta
- Pick a few of your favorites or try this Potato and Rosemary Pizza.
- Be careful not to weigh down the pizza with too many toppings making it challenging to get it onto the pizza stone.
Tips for Baking the Pizza in Your Home Oven
- Naples-style pizza is baked in a 900°F wood-fired oven for 60-90 seconds total. The oven is so hot that it cooks the dough quickly, yet won’t burn the cheese or toppings.
- At home, place a pizza stone in your oven and preheat to the highest temperature it will go, typically 550°F. Allow the oven to preheat for 1 hour. Then add your pizza. It'll typically bake for 7-10 minutes.
- Place the dough on a lightly floured pizza peel allowing ½ an inch of the crust to fall off the edge. This will allow the edge to “catch” on the pizza stone so that you can remove the peel (sometimes in one quick motion, sometimes you need to do this slowly, inch by inch) and the pizza and toppings will remain on the stone. This takes some practice and finesse. Don’t worry if it doesn’t work out quite right. You can use tongs to adjust the pizza on the pizza stone in the oven. Even if parts of the pizza get folded over, or you have to scoop toppings off the stone back onto the pizza it will still taste great. Just be careful not to burn yourself on the oven.
- Add the toppings to the pizza after you have it laid out on the pizza peel. Transfer from the peel to the stone in the oven.
- To take the pizza out of the oven, use a pair of tongs to pull the pizza back onto the pizza peel while gently sliding the peel slightly underneath the pizza.
- If you do not have a pizza stone, you can make your pizza on a baking sheet. However, you'll need to heat your oven to a much lower temperature since many baking sheets will not hold up to a 550°F oven. Preheat the oven to 450°F.
Top Tips for Making Poolish Pizza Dough
- Make a poolish or starter the night before.
- Use a combination of 00 flour and bread flour.
- Use a kitchen scale to weigh the ingredients.
- Do not add extra flour to the dough, it should be a very wet dough.
- When shaping the dough, press the air from the center into the crust, pinching the crust closed to fill it with air, creating that air bubble-filled crust.
- Do not use a rolling pin, use only your hands to stretch the dough.
Neapolitan Poolish Pizza Dough FAQs
Using a poolish to make pizza dough creates a crust that has a greater depth of flavor, and a better and lighter texture. It helps to create those large crispy and chewy air bubbles in the crust. It also helps make it easier to stretch the dough.
Poolish takes 12-24 hours to ferment. When it is ready it will have lots of small bubbles and a pleasant aroma.
The amount of flour in grams used to make the poolish should be roughly 20-30% of the flour used for the entire dough. This recipe uses 200 grams flour in the dough or 29% of a total of 700 grams of flour.
You May Love These Other Italian Recipes:


If you tried this Poolish Pizza Dough or any other recipe on my website, please leave a 🌟 star rating and let me know how it went in the 📝 comments below. Thanks for visiting!

Poolish Pizza Dough
Ingredients
Poolish
- 200 grams water
- 5 grams honey
- 1 packet ¼ oz instant yeast
- 200 grams 00 flour
Pizza Dough
- poolish
- 300 grams bread flour
- 200 grams 00 flour
- 300 grams water
- 15 grams salt
Instructions
- Poolish: Combine the water, honey, yeast, and flour in a medium Tupperware. Let sit uncovered for 15 minutes. Cover and let sit at room temperature for 1 hour. Place in the fridge overnight for 12-24 hours.
- Making the Dough: Combine the poolish, bread flour, 00 flour, water, and salt. It will be very loose and wet. So much so that you may think you did something wrong – you haven’t. It’s just a very wet dough.
- Work the dough on the counter for 10 minutes. Do not add any more flour. You can add a little olive oil on your hands to help prevent the dough from sticking to your hands. Gather the dough in one hand and using a flick motion smack it on the counter, then gather it up again and repeat. Feel free to get creative here. Let sit for 15 minutes. Shape into a round ball tucking any rough edges up and underneath the dough. Place the ball of dough in a large bowl, add a tablespoon of olive oil over the top, and cover with plastic wrap or a kitchen towel. Allow to rise in a warm place until doubled in size, 1-2 hours.
- Stretch out the Dough: Place the dough on a lightly floured counter. Divide into three. Working one at a time, with your fingers, press the middle of the dough down and out slightly towards the edges. Flip and do the same on the other side.
- Create the crust: Press the air from the middle of the dough out towards the edge and pinch to seal the air into the crust. Place the dough over your two fists and stretch out the dough until it is thin. Place on a lightly floured pizza peel, with ½ inch of dough hanging off the side and add toppings as desired.
Notes
- Tips for making the Dough:
- Make a poolish or starter the night before.
-
- Use a combination of 00 flour and bread flour.
-
- Use a kitchen scale to weigh the ingredients.
-
- Do not add extra flour to the dough, it should be a very wet dough.
-
- When shaping the dough, press the air from the center into the crust, pinching the crust closed to fill it with air, creating that air bubble-filled crust.
-
- Do not use a rolling pin, use only your hands to stretch the dough.
- Place the dough on a lightly floured pizza peel allowing ½ an inch of the crust to fall off the edge. This will allow the edge to “catch” on the pizza stone so that you can remove the peel. Sometimes you need to do this slowly, inch by inch. This takes some practice and finesse. Don’t worry if it doesn’t work out quite right. You can use tongs to adjust the pizza on the pizza stone in the oven. Just be careful not to burn yourself on the oven.
- Add the toppings to the pizza after you have it laid out on the pizza peel. Transfer from the peel to the stone in the oven.
- To take the pizza out of the oven, use a pair of tongs to pull the pizza back onto the pizza peel while gently sliding the peel slightly underneath the pizza.
- If you do not have a pizza stone, you can make your pizza on a baking sheet. However, you'll need to heat your oven to a much lower temperature since many baking sheets will not hold up to a 550°F oven. Preheat the oven to 450°F.

Charity says
I have tried twice to follow Vito's recipe and it never came out right. Your directions and pictures made this one so easy to follow. The pizzas came out perfect with a chewy crust and all those little air bubbles throughout. My family raved about it and this is now the only dough I'll make! It is so worth all the effort. Thank you!
Lauren says
Hi Charity,
Wow, thank you so much for your kind words! There's not much better than hearing that you and your family loved the recipe and that the step-by-step directions were helpful!❤️
Kecia says
No matter how much I knead the dough it’s still very sticky. What’s the deal? Should it be this way ? This is the second time I’ve made this recipe and each time it’s sticky. What am I doing wrong. Yes I weigh every ingredient. What’s the deal?
Lauren says
Hi Kecia,
Thanks so much for the question! Yes, the dough should be very sticky - you're not doing anything wrong. Its the kind of dough thats so sticky that it may make you wonder if there should have been more flour or that there's something missing. But its exactly this kind of wet (high hydration) dough that makes for such a good pizza crust.
Rather than kneading the dough, the dough should be "worked" by using whats sometimes called the French Method or the Slap and Fold method, which you can get a sense of from Step #5 in the Step-by-Step Instructions and Photos. Your hands will get pretty sticky and coated in the dough, but the fast slapping or flicking motion of the dough onto a counter helps to prevent it from getting stuck on the counter - then scoop it back up with your hand.
After doing this for 10 minutes, let the dough rest for 10-15 minutes, then shape it into a ball to let it rise (see all the step-by-step photos). At this point the dough will be very soft, but you should be able to pull the edges of the dough around and tuck them under the ball to form a relatively smooth ball. The dough then goes into a bowl, covered with a thin layer of olive oil and allowed to rise (1-2 hours).
Then its time to divide and stretch the dough. At this point the dough should not be nearly as sticky, just very soft and pliable. If its slightly sticky dust your hands and the work surface only very slightly with flour to help you stretch out the dough.
Please let me know if you have any other questions, I'd love to help!