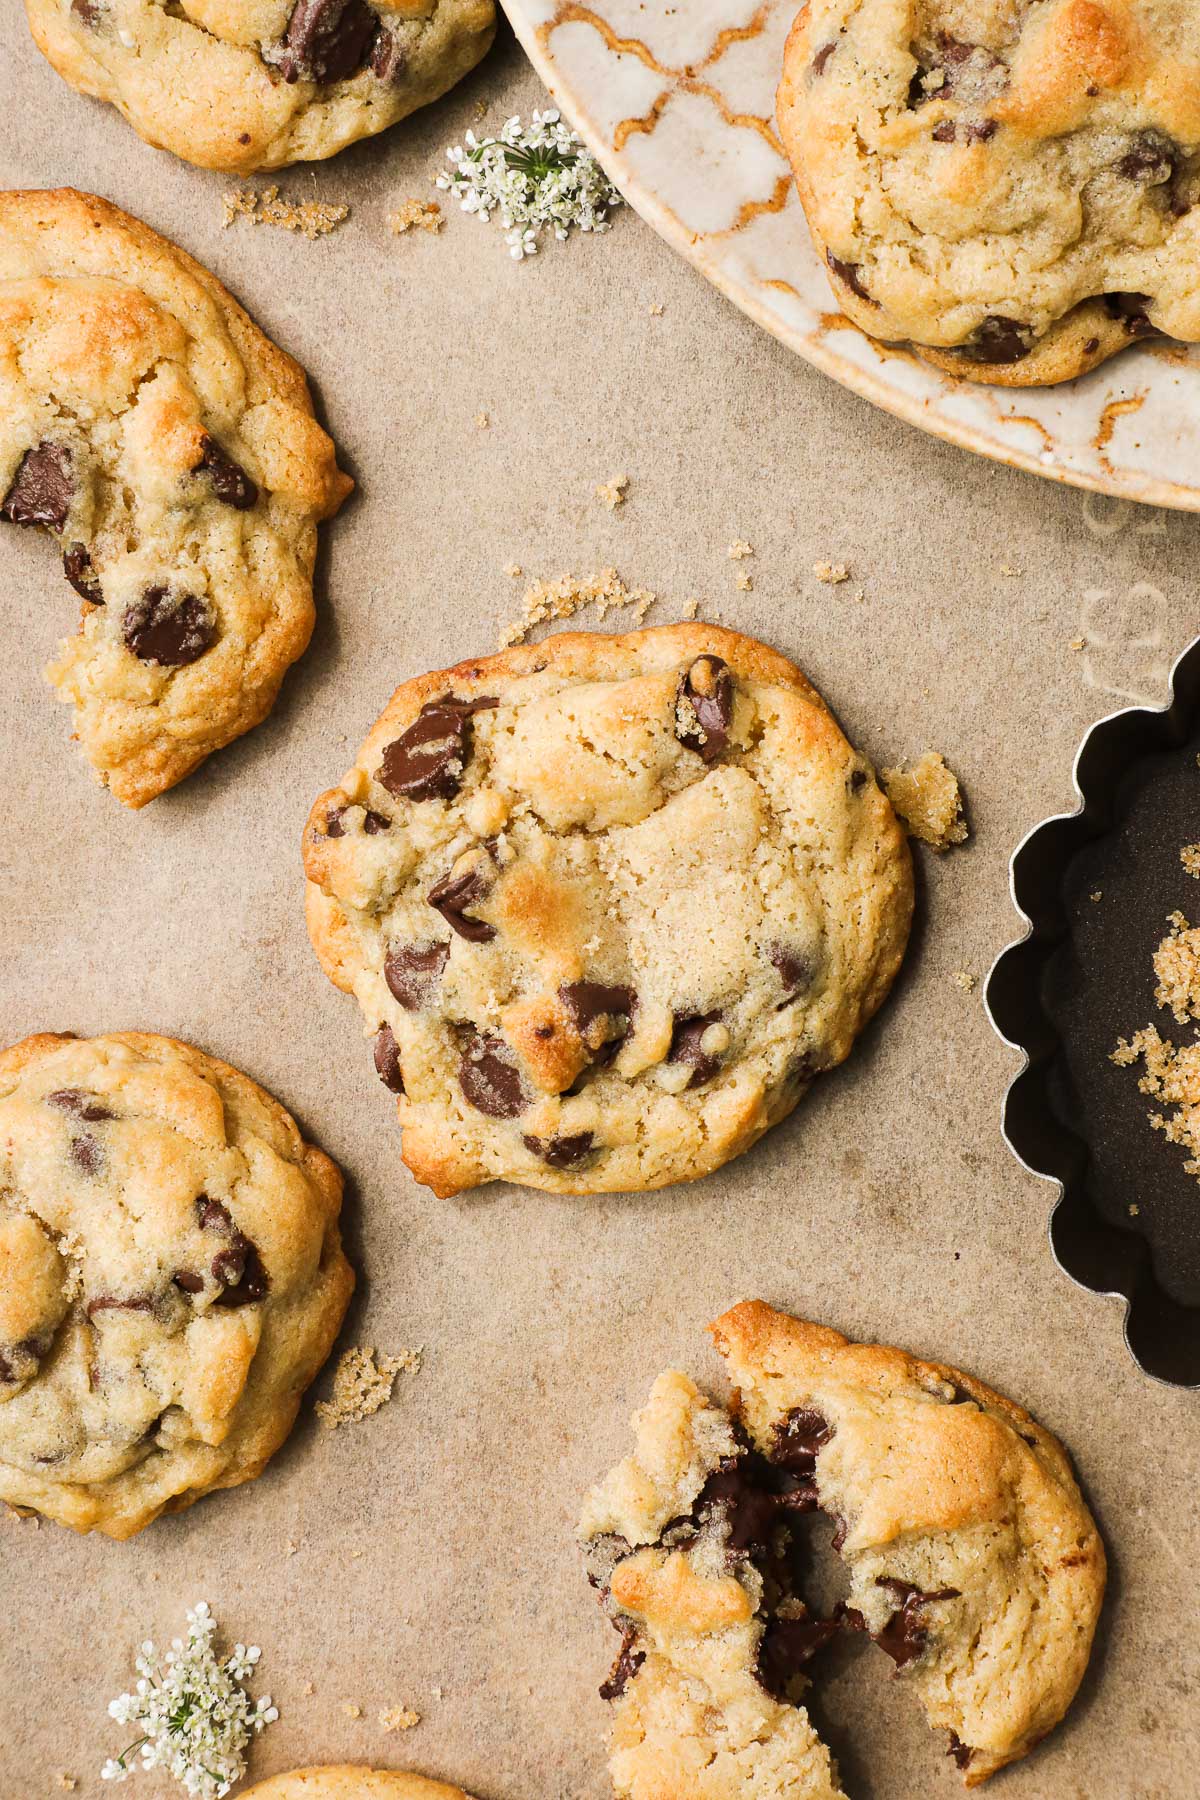
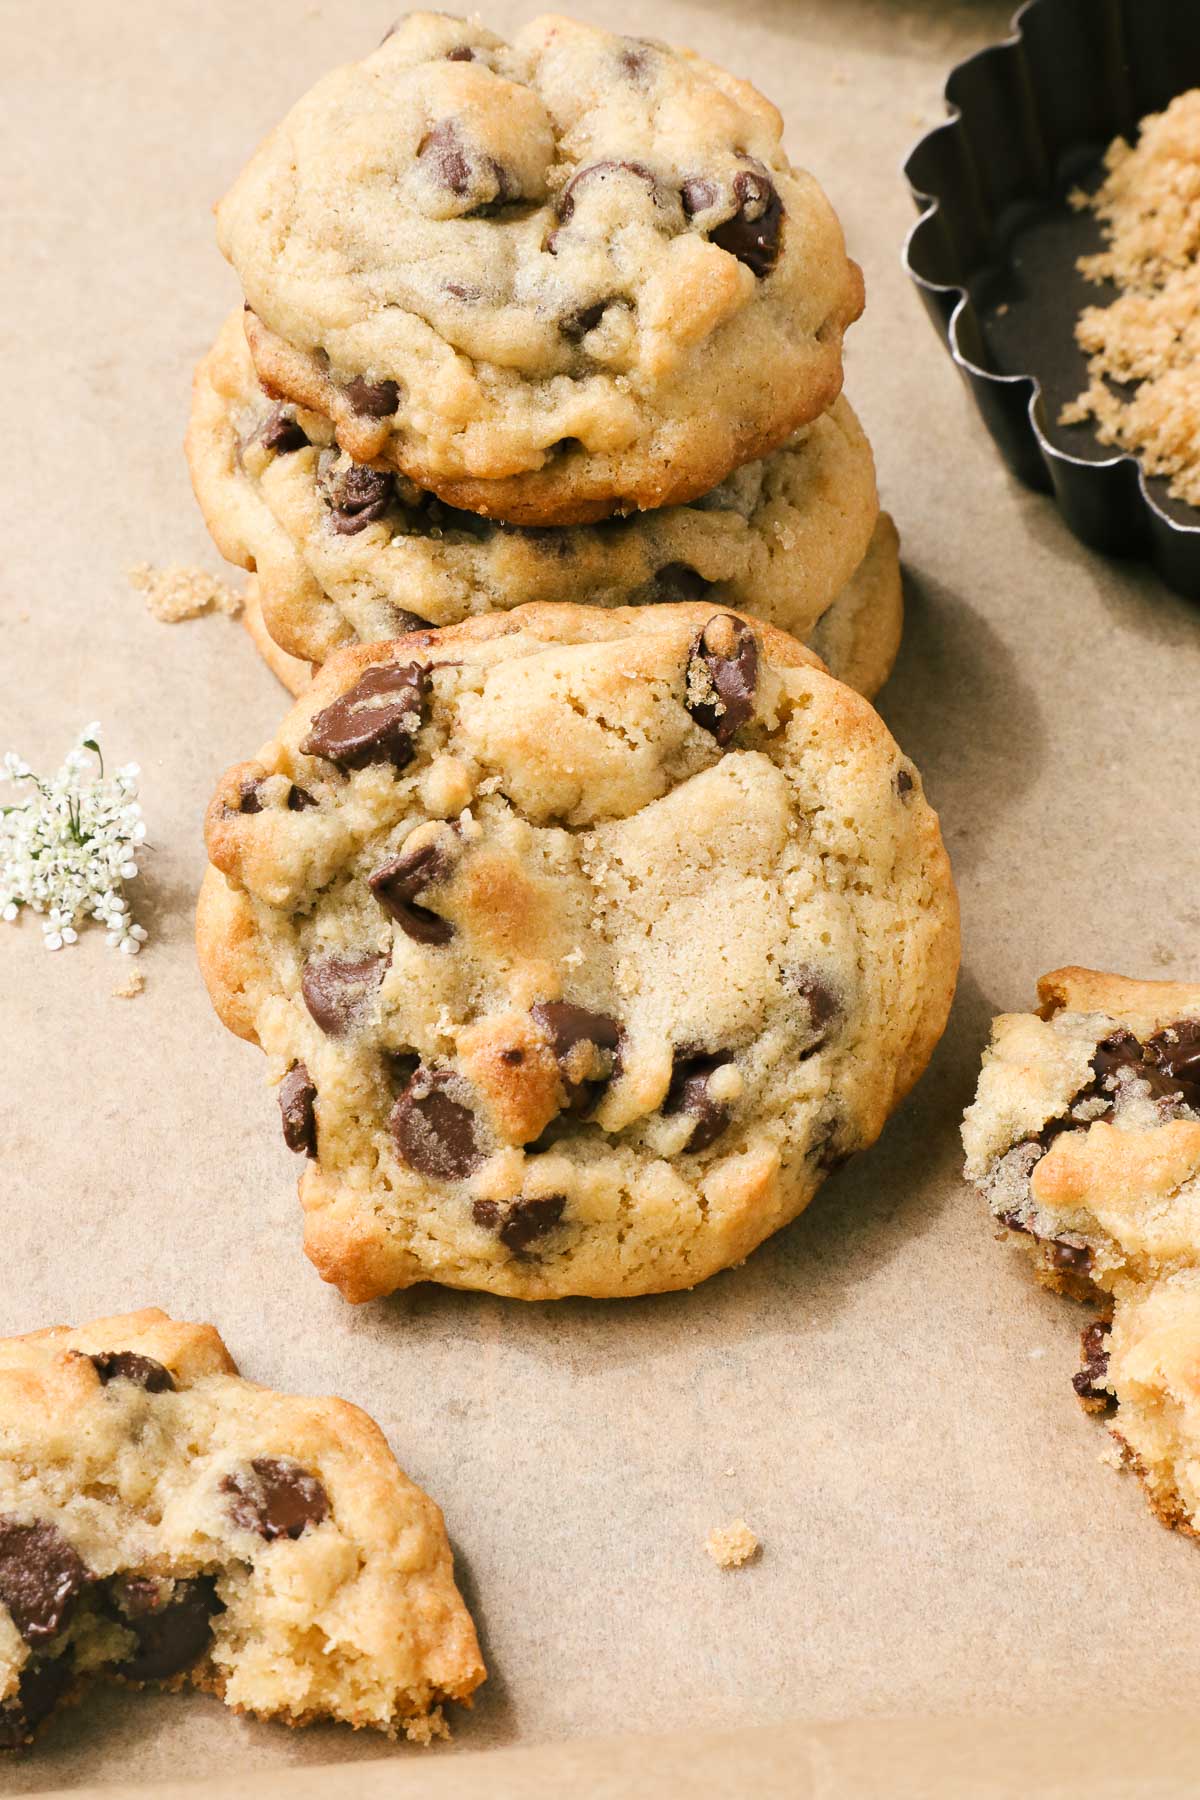
These Chocolate Chip Cookies Without A Mixer are classic chewy chocolate chip cookies made without a hand mixer or stand mixer. All you need is a mixing bowl and a spoon (one bowl, no chill time, ready in 20 minutes).
This recipe is designed for those of us who have limited space, small kitchens, move frequently, are students, have limited budgets, and just don’t own lots of kitchen gear but still want to make great cookies.
I have made these classic chocolate chip cookies for about a decade before I ever had a mixer in my kitchen. I lived in tiny apartments, moved every few years, and didn’t have space, or a budget, or even time to think about a mixer. But I still craved a good chocolate chip cookie.
I will show you step-by-step how to make great chocolate chip cookies without needing to cream butter and sugar or needing to combine other ingredients with a mixer. These cookies honestly do not take much longer than when using a stand mixer, and they have their own advantages, too.
Advantages To Not Having a Mixer
- Cookies made without a mixer are chewy, melty, and soft.
- Creaming butter and sugar with a mixer creates air pockets in the final batter, which can be a plus if you like cookies that are more crisp. However, not using a mixer creates cookies that are soft and chewy, like the classic melty cookies that everyone craves and are excellent for dipping in milk.
- The cookies are much less likely to be overmixed and develop gluten.
- Developing gluten creates tough, unpleasant cookies.
- This is also helpful when making Cake Without a Mixer.
- There's no lugging around a heavy stand mixer.
- There's no need to store extra kitchen equipment.
- There's less to clean.
- Using just a mixing bowl and a large spoon means they can easily go straight in the dishwasher.
Want to make a cheesecake but don’t have a springform pan? Try this Cheesecake Without A Springform Pan.
Variations
These are not the only chocolate chip cookies that you can successfully make by hand. All of the following chocolate chip cookie variations can be made by hand without a mixer.
- Small Batch Oatmeal Chocolate Chip Cookies: Oatmeal chocolate chip for when you only need a few.
- Small Batch Crispy Chocolate Chip Cookies: Lots of crispy chocolate cookie ripples. Excellent dunked in milk.
- Café Style Chocolate Chip Cookies: For when you are craving a more professional-style cookie.
- Rice Krispie Chocolate Chip Cookies: A classic, with the twist of crunchy Rice Krispies.
- Espresso Chocolate Cookies: For an elevated cookie with a hint of coffee.
Ingredients
Below are the ingredients needed to make Chocolate Chip Cookies Without A Mixer.
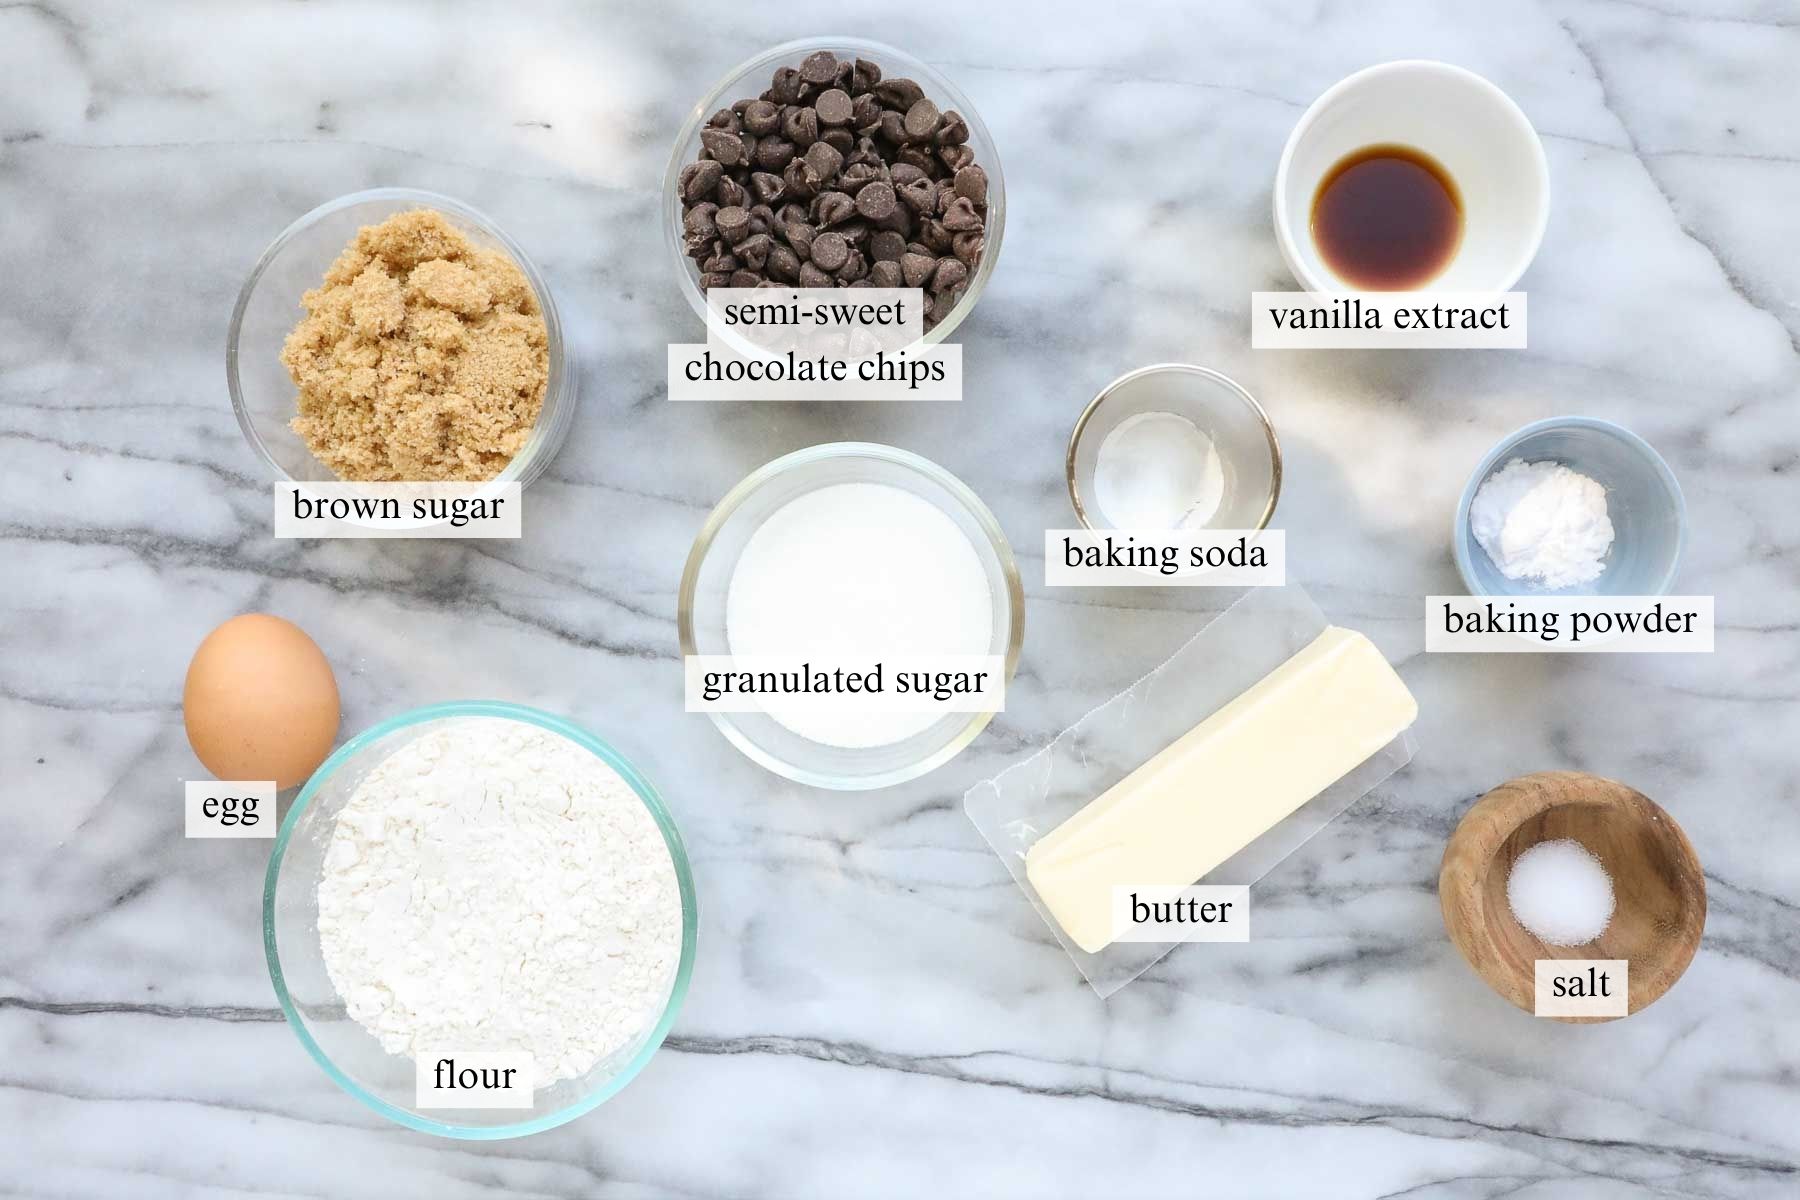
- Butter: Ensure that your butter is softened to room temperature. This can be done by leaving it out until soft, or placing it in a large microwavable mixing bowl and microwaving for 30 seconds at 20% power, flipping it over, and repeating until soft. Be sure not to let the butter melt. Using melted butter, while making it easier to mix, creates a softer dough that's more prone to spreading. Using softened butter gives you more control over the dough's spreading and a cookie that's chewy.
- Sugar: Using more brown sugar than granulated sugar adds more flavor and moisture.
- Egg: Use one large egg.
- Vanilla Extract: Use real vanilla extract, not imitation vanilla. Wholesale stores, like Costco, sell large bottles for a low price per unit volume.
- Baking Powder and Baking Soda: For leavening.
- Salt: Brings out and balances flavor.
- Flour: Use all-purpose unbleached flour.
- Semi-sweet chocolate chips: These are the classic chocolate chips for chocolate chip cookies, but you could of course use milk chocolate or bittersweet chocolate chips depending on your preference.
See the recipe card below for full information on ingredients and quantities.
How to Make Chocolate Chip Cookies Without A Mixer
Below are the step-by-step instructions for how to make Chocolate Chip Cookies Without A Mixer.
Note: The recipe card with instructions, ingredient list, and quantities is included further below these step-by-step photos.
Prep: Preheat the oven to 350°F.
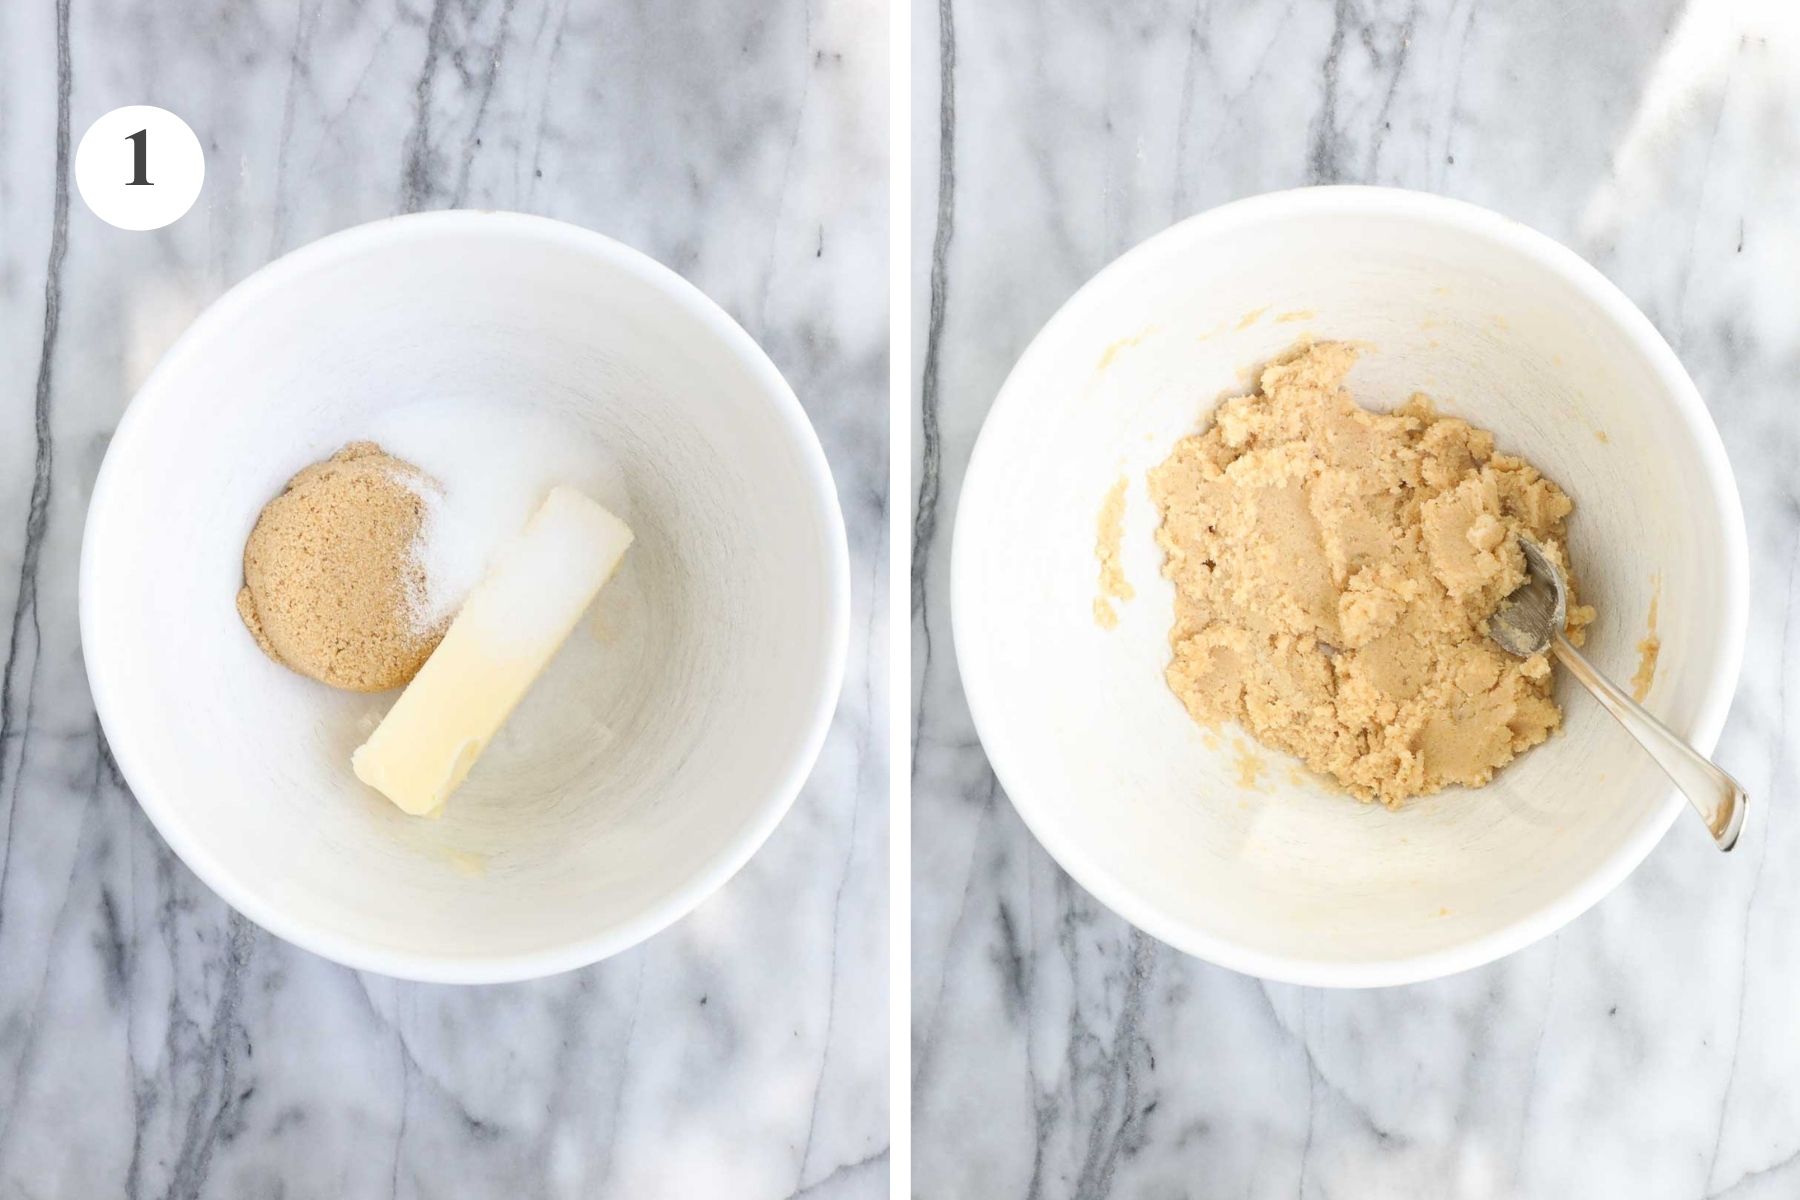
Step 1. Butter and Sugar: In a large bowl, use a large spoon or spatula to combine the butter, brown sugar, and granulated sugar. Mash the butter into the sugar as needed until the butter and sugar are thoroughly combined.
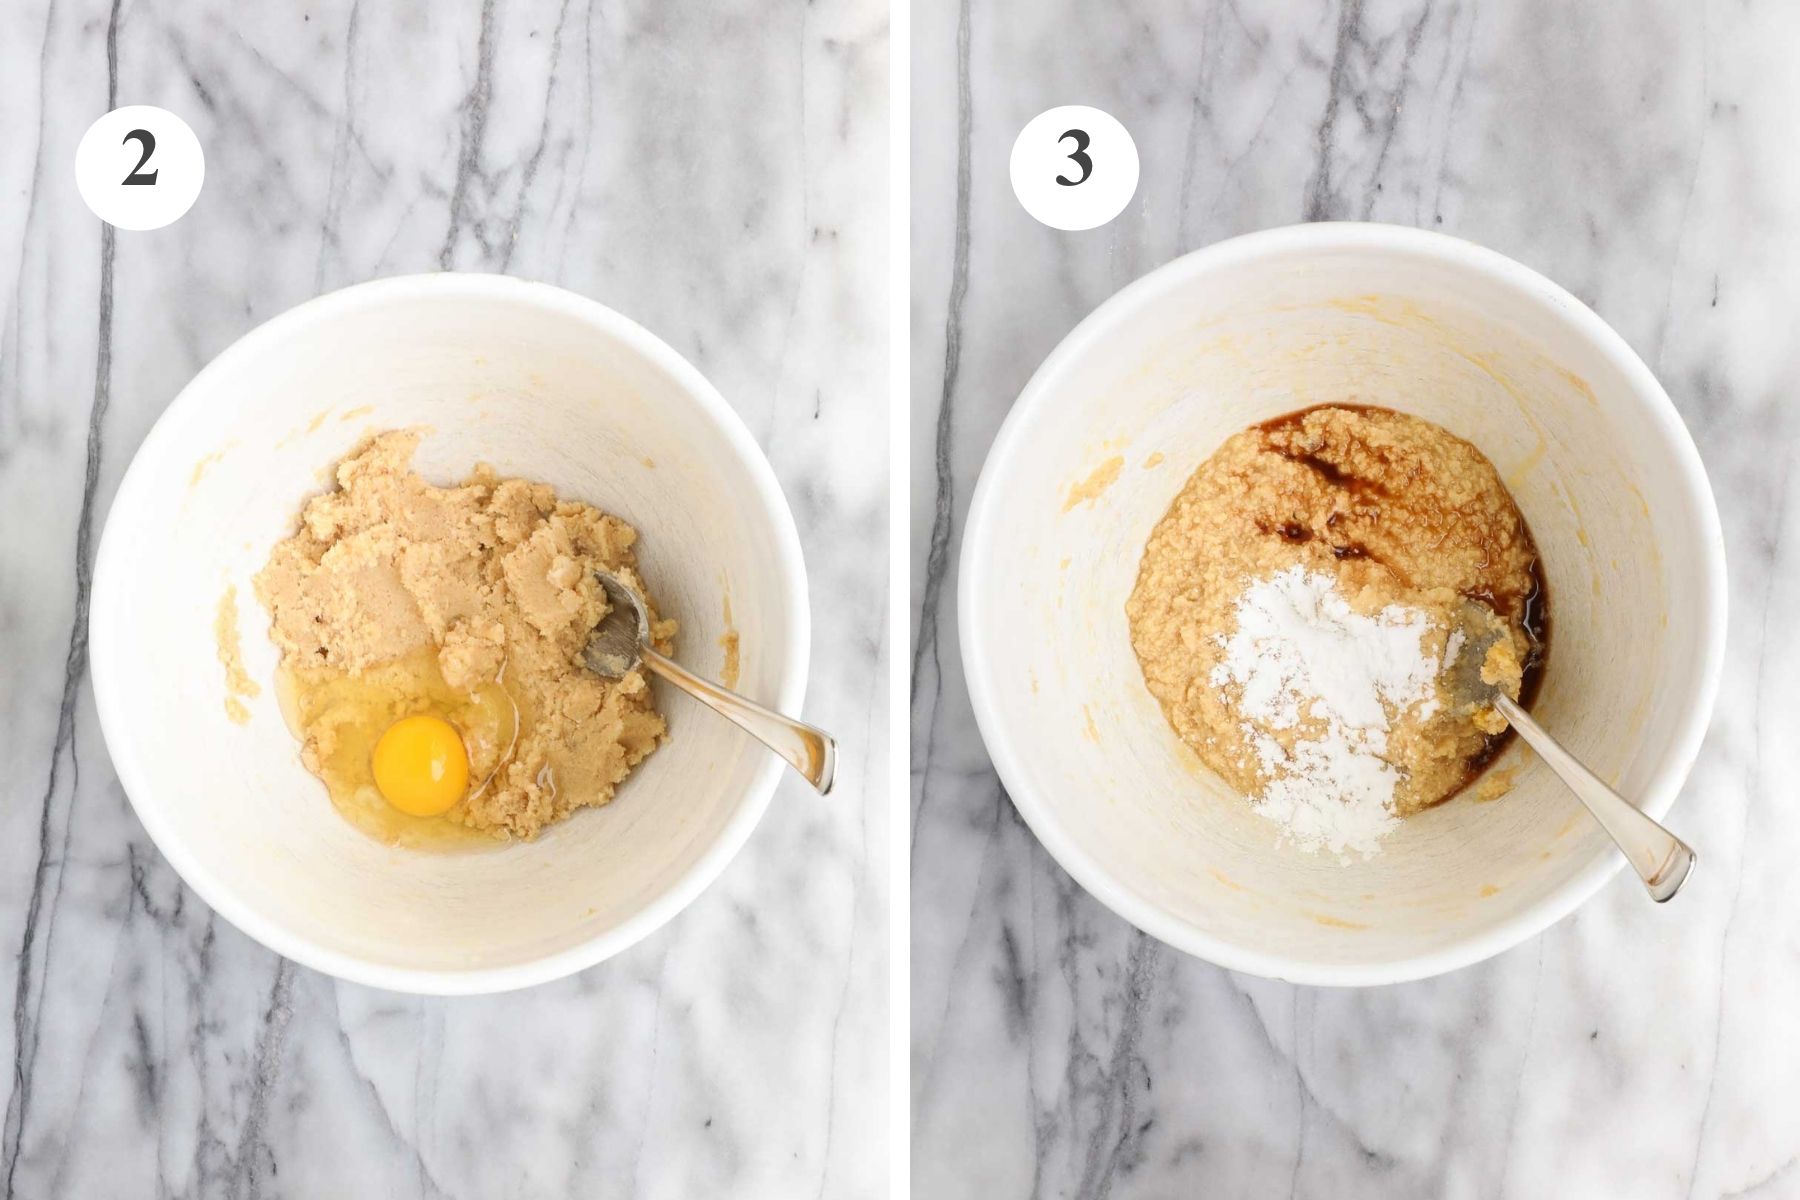
Step 2. Egg: Add the egg and mix with the spoon to combine.
Step 3. Vanilla, Baking Powder, Baking Soda, and Salt: Add the vanilla extract, baking powder, baking soda, and salt, and combine.
Tip: Rather than using a separate bowl to first mix the dry ingredients. Add the ingredients to one bowl in stages. First, butter and sugar, then add the vanilla, baking powder, baking soda, and salt into the wet ingredients to ensure that they are incorporated evenly, then add the flour. That ensures that the ingredients are evenly incorporated and avoids using a second bowl.
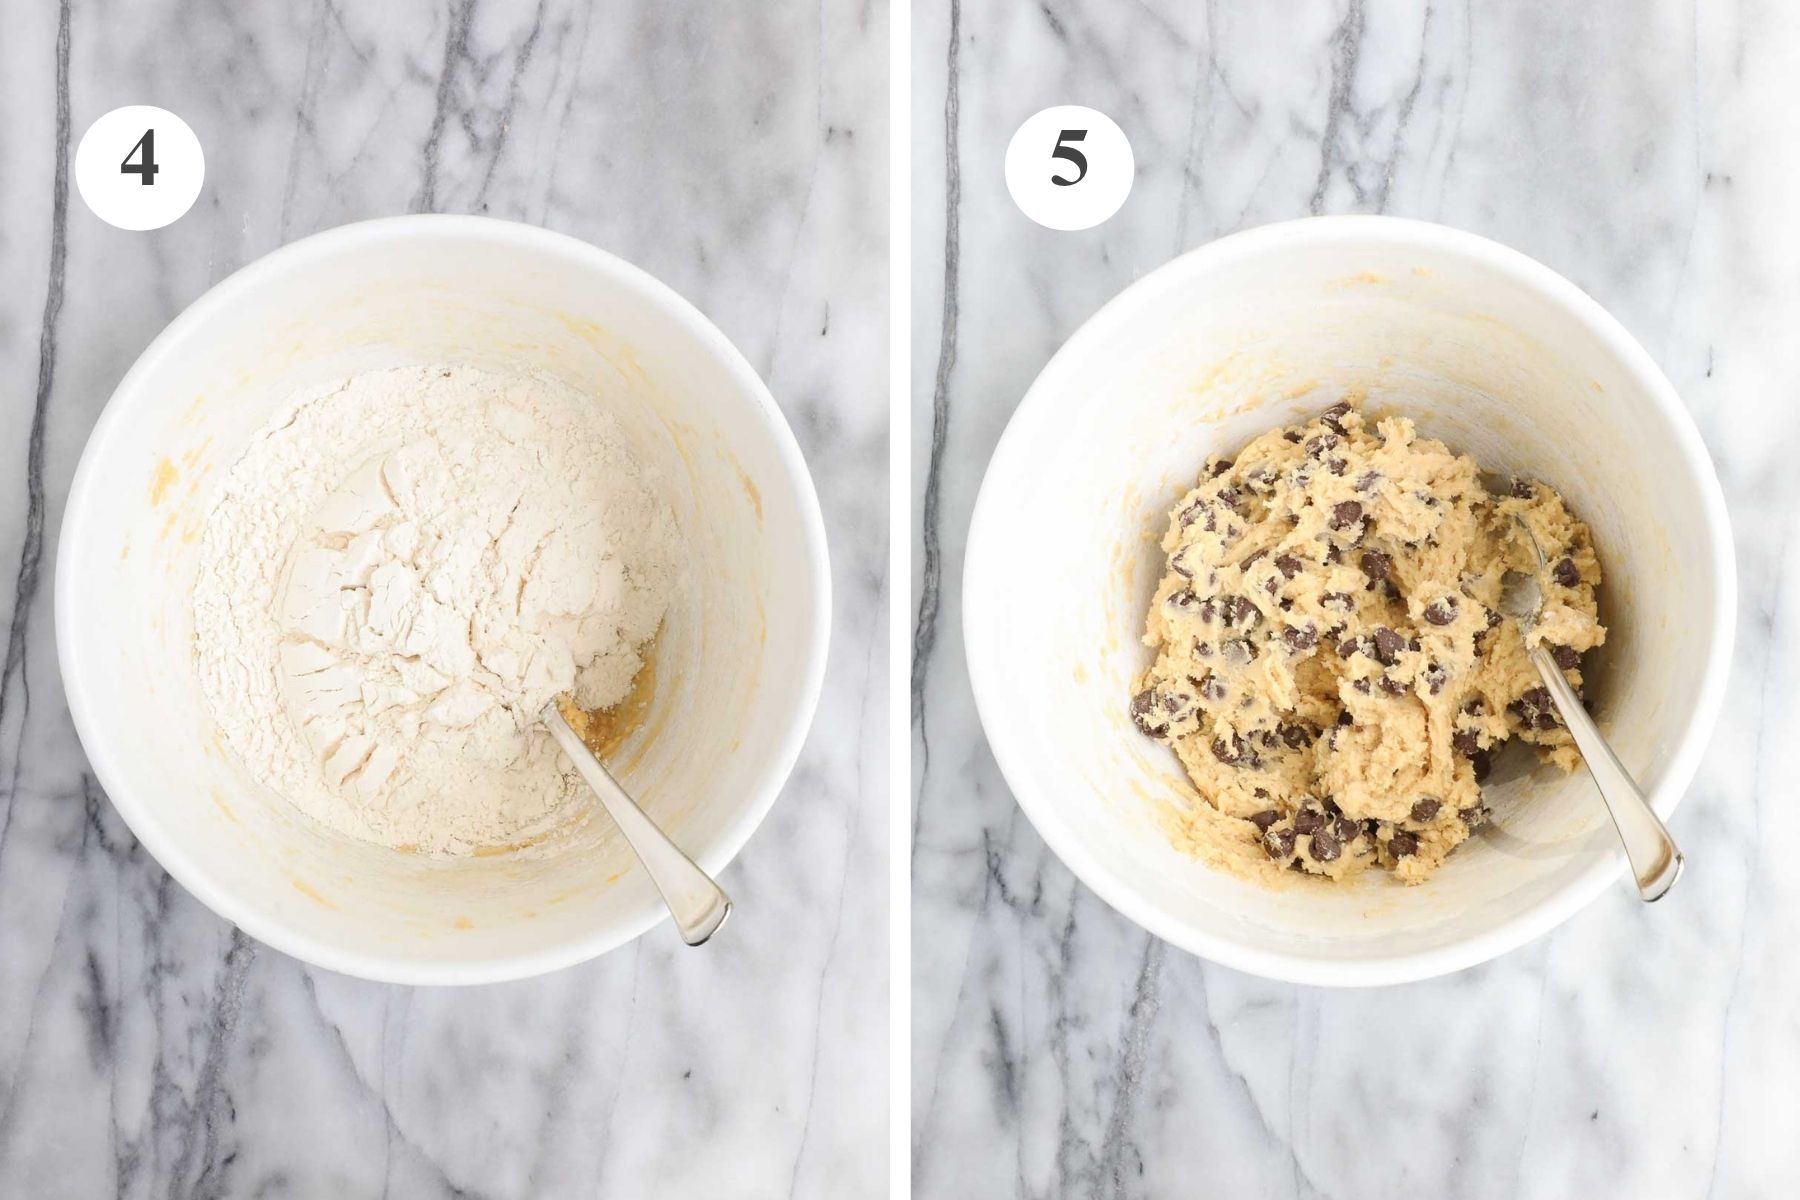
Step 4. Flour: Add the flour and combine with the spoon until just incorporated. Do not overmix (it is much harder to overmix by hand than it is with a hand-held mixer or stand mixer).
Step 5. Chocolate Chips: Add the semi-sweet chocolate chips and mix to combine.
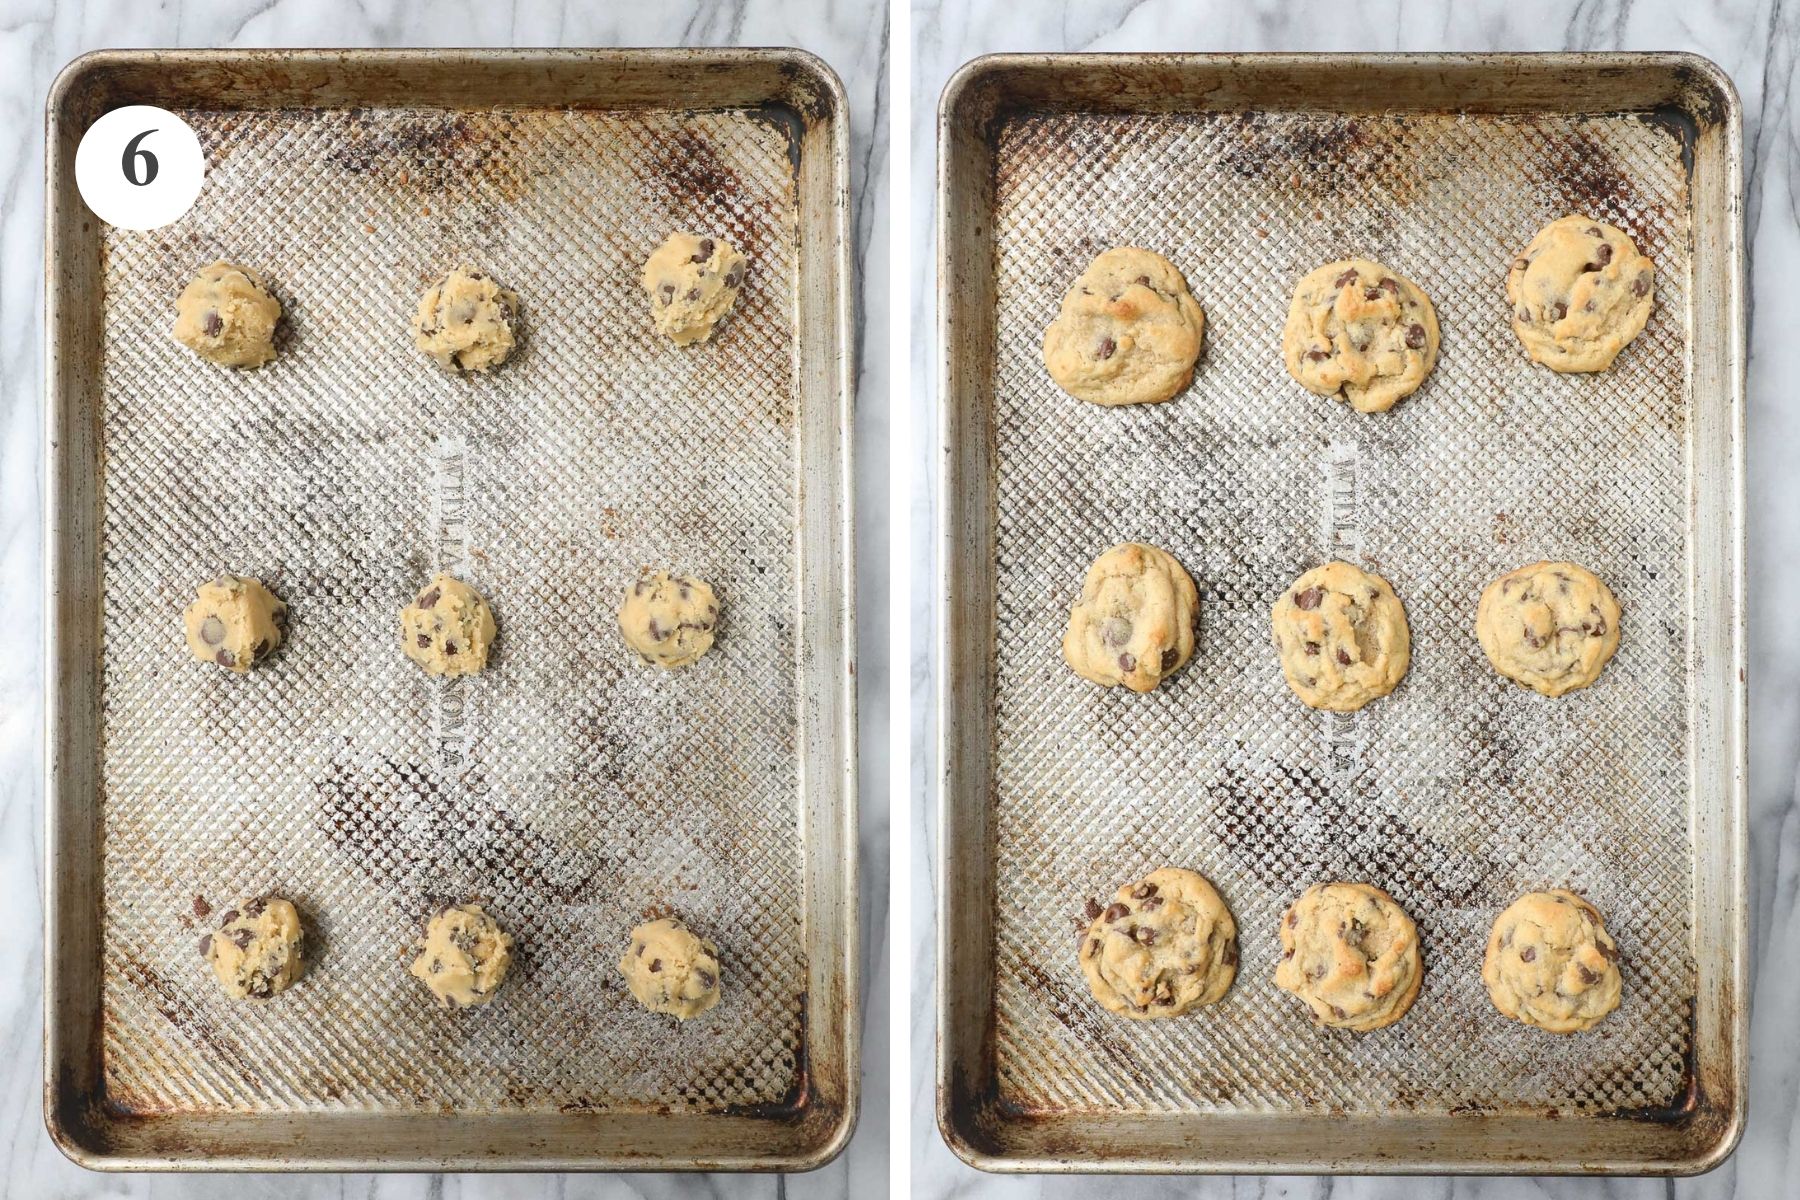
Step 6. Bake: Place two tablespoons worth of dough per cookie on a baking sheet, placing 9-12 cookies on a baking sheet.
Bake at 350°F for 9-10 minutes. The edges of the cookies should be lightly brown but the cookies should still look soft and not yet set in the middle. This ensures chewy and soft, rather than cakey cookies.
Let cool slightly on the baking sheet, then transfer to a wire rack to cool fully.
Tips For Making Great Cookies By Hand
- Order of Operations: Mix the ingredients in the order stated in the recipe. Combine the butter and sugar first, then the egg and vanilla extract, ending with the dry ingredients. This helps to incorporate the ingredients evenly.
- Measuring Flour: If you have a kitchen scale (this is not common), you’ll get the best results by weighing the flour. If not, that's perfectly okay. Use America’s Test Kitchen's approach to measuring flour using the “dip and sweep” method. I use a conversion of 140g of flour per cup.
- Use a Large Spoon: This can be any large spoon, a large cereal spoon, a serving spoon, or a silicone spatula or bowl scraper. You'll need to use a little effort (elbow grease) when combining the butter and sugar.
- Scrape Down the Bowl: Be sure to scrape down the bowl with your spoon or spatula and evenly incorporate all the ingredients.
- Test Cookie: Whenever making a cookie recipe for the first time, I always recommend making a test cookie first. Bake one cookie on its own before the rest to give you an indication of any changes you need to make. Every oven is different (some run hot or cold, take longer to preheat, or have hot spots), and small variables like ingredient temperatures and measuring can change.
- Do you need to add or reduce the baking time?
- Was the butter too soft, and the cookies are spreading, so the dough needs to chill in the fridge?
- Is the amount of flour off, and a little more needs to be added?
- If the Cookies Spread Too Much: If the cookies are spreading too much, try the following in this order:
- Refrigerate the dough for 15-30 minutes. The butter may have been too soft.
- Roll the cookie dough into round balls before baking. The surface tension created will help prevent the cookies from spreading.
- Last option: Add an additional 2-4 tablespoons of flour. The dough may be too wet and need additional flour.
- For More Tips: See my Guide to Making the Best Homemade Cookies, Tips for Crispy, Cakey, and Small Batch Cookies, and A Guide to the Most Common Cookie Ingredients.
Taking Your Cookies Up A Notch
If you want to take your cookies up a notch, try these tricks:
- Use Chopped Chocolate: Instead of chocolate chip morsels, roughly chop chocolate baking bars. Chocolate bars have different melting properties than chocolate morsels. The dough adheres to this chocolate better, and the chocolate melts and distributes into the cookie better.
- Refrigerate Your Dough Overnight. This is completely and totally optional, but it does make for exceptional cookies. The dough hydrates when refrigerated overnight, soaking up the extra liquid content (butter, eggs, etc.) and allowing the flavors to meld, like a good lasagna that tastes better the second day.
- Sprinkle With Flaky Sea Salt: The combination of sweet, chocolatey, and a hint of salt is pretty unbeatable.
Storage and Freezing Tips
- To Store: Store the cookies at room temperature in an airtight container for up to 3 days.
- To Freeze: Place in a gallon or quart-sized freezer bag and freeze for up to 3 months. Thaw at room temperature or gently heat in the microwave at low power.
For More Sweet Recipes You May Love


If you've tried these Chocolate Chip Cookies Without A Mixer 🥄 or any other recipe on my site, please leave a 🌟 star rating and let me know how it went in the 📝 comments below. I'd love to hear from you!

Chocolate Chip Cookies Without A Mixer
Ingredients
- ½ cup butter, softened 113g
- ½ cup brown sugar 106g
- ¼ cup granulated sugar 50g
- 1 large egg
- 1 teaspoon vanilla extract
- ¾ teaspoon baking powder
- ½ teaspoon baking soda
- ½ teaspoon salt
- 1½ cups all-purpose flour 210g
- 1½ cups semi-sweet chocolate chips 255g
Instructions
- Preheat the oven to 350°F.
- In a large bowl, combine the softened butter, brown sugar, and granulated sugar with a large spoon or spatula. Mash the butter into the sugar as needed until they are thoroughly combined.Use a Large Spoon: This can be any large spoon, a large cereal spoon, a serving spoon, or a silicone spatula or bowl scraper. You'll need to use a little effort (elbow grease) when combining the butter and sugar.
- Add the egg and combine.
- Add the vanilla extract, baking powder, baking soda, and salt, and combine. Add the flour and combine until the flour is until it is fully incorporated into the wet ingredients. Add the semi-sweet chocolate chips and combine.
- Scoop 2 tablespoons of dough per cookie, either with a spoon or with an ice cream or cookie scoop, onto a baking sheet. Place 9-12 cookies per baking sheet.
- Bake for 9-10 minutes or until very lightly browned on the edges but still soft and paler in color in the center. Allow to cool slightly, then transfer to a wire rack to cool fully.
Notes
- Order of Operations: Mix the ingredients in the order stated in the recipe. Combine the butter and sugar first, then the egg and vanilla extract, ending with the dry ingredients. This helps to incorporate the ingredients evenly.
- Measuring Flour: If you have a kitchen scale (this is not common), you’ll get the best results by weighing the flour. If not, that's perfectly okay. Use America’s Test Kitchen's approach to measuring flour using the “dip and sweep” method. I use a conversion of 140g of flour per cup.
- Use a Large Spoon: This can be any large spoon, a large cereal spoon, a serving spoon, or a silicone spatula or bowl scraper. You'll need to use a little effort (elbow grease) when combining the butter and sugar.
- Scrape Down the Bowl: Be sure to scrape down the bowl with your spoon or spatula and evenly incorporate all the ingredients.
- Test Cookie: Whenever making a cookie recipe for the first time, I always recommend making a test cookie first. Bake one cookie on its own before the rest to give you an indication of any changes you need to make. Every oven is different (some run hot or cold, take longer to preheat, or have hot spots), and small variables like ingredient temperatures and measuring can change.
-
Do you need to add or reduce the baking time?
-
Was the butter too soft, and they are spreading, so the dough needs to chill in the fridge
-
Is the amount of flour off, and a little more needs to be added?
-
- If the Cookies Spread Too Much: If the cookies are spreading too much, try the following in this order:
- Refrigerate the dough for 15-30 minutes. The butter may have been too soft.
- Roll the cookie dough into round balls before baking. The surface tension created will help prevent the cookies from spreading.
- Last option: Add an additional 2-4 tablespoons of flour. The dough may be too wet and need additional flour.


Leave a Reply