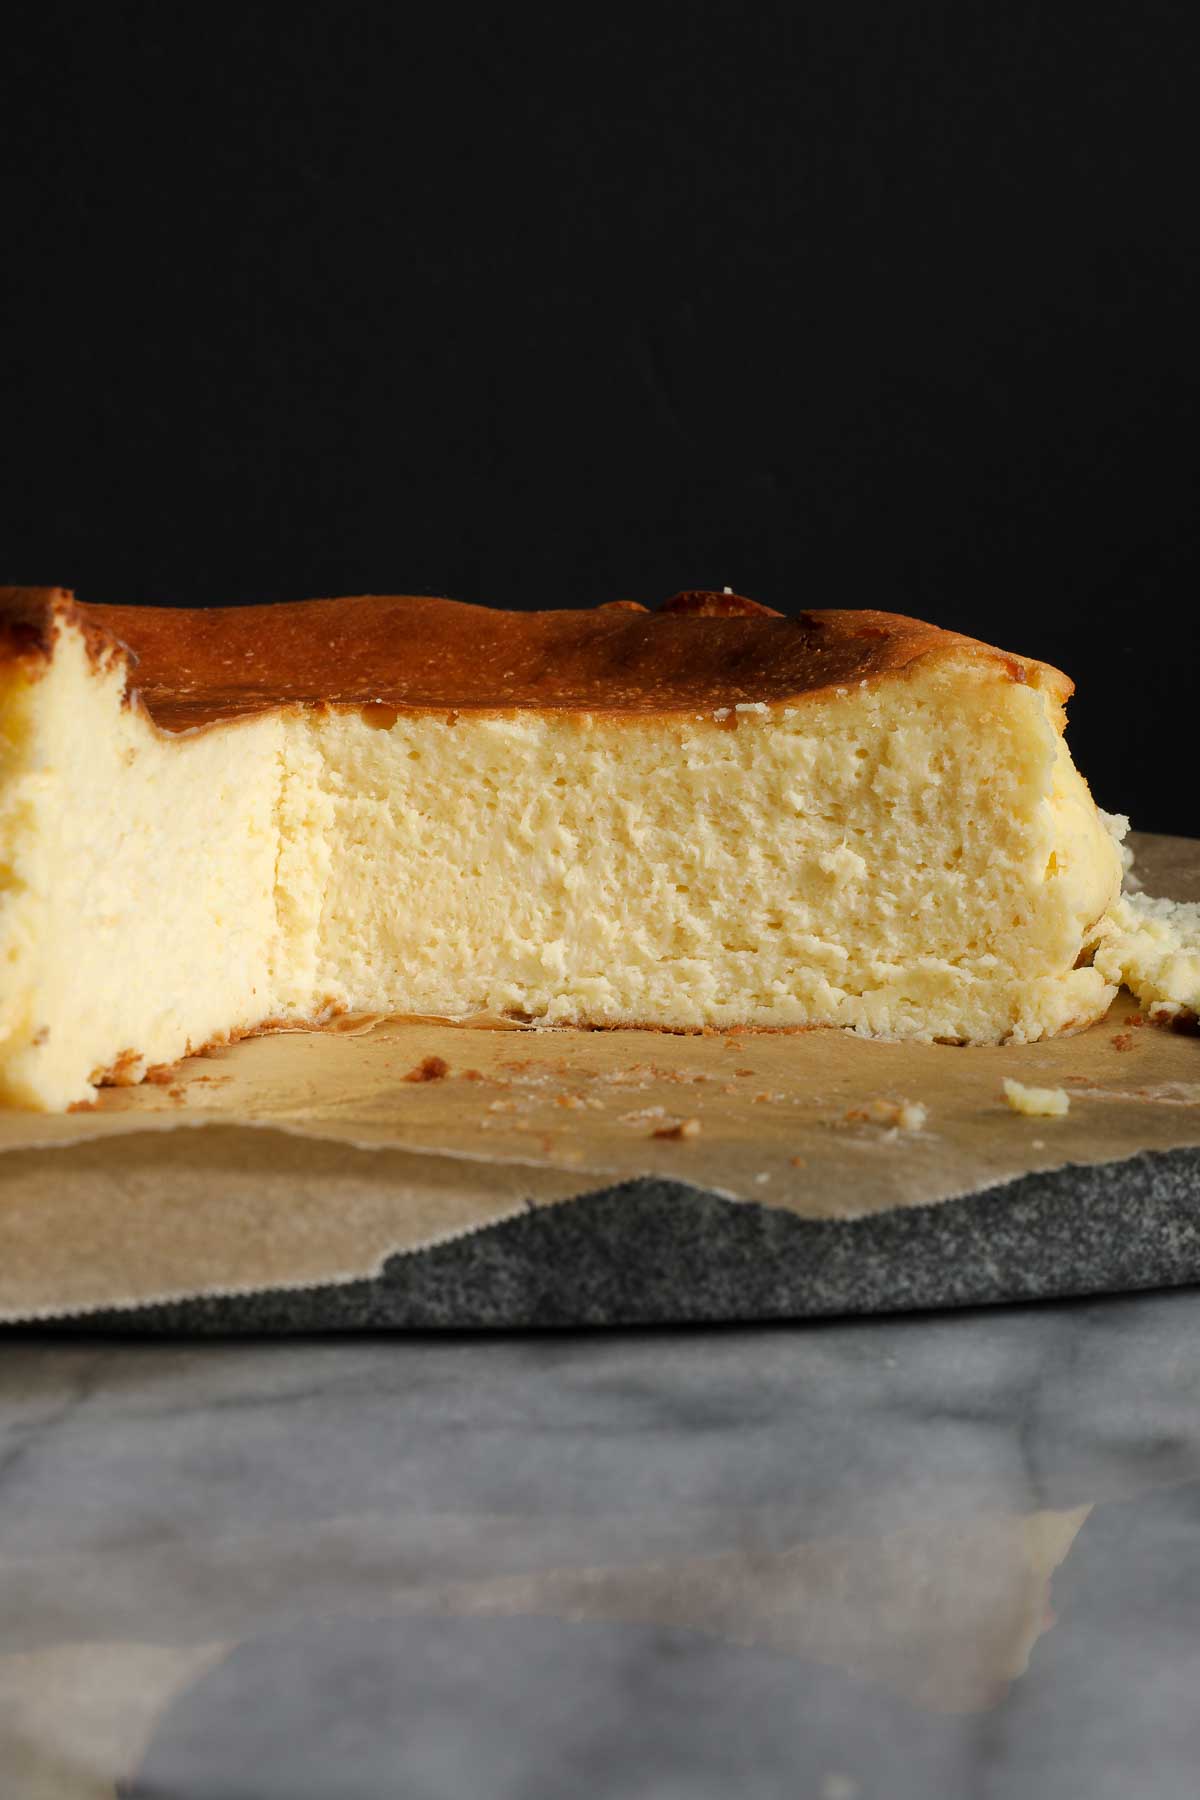
Loaf Pan Basque Cheesecake is a creamy and decadent Basque-style cheesecake made in a standard-sized loaf pan.
It is made without a bottom crust and without a water bath. It is easy, fuss-free, and does not require any special techniques or ingredients. Yet it is deeply rich, caramelized on the top, and creamy throughout.
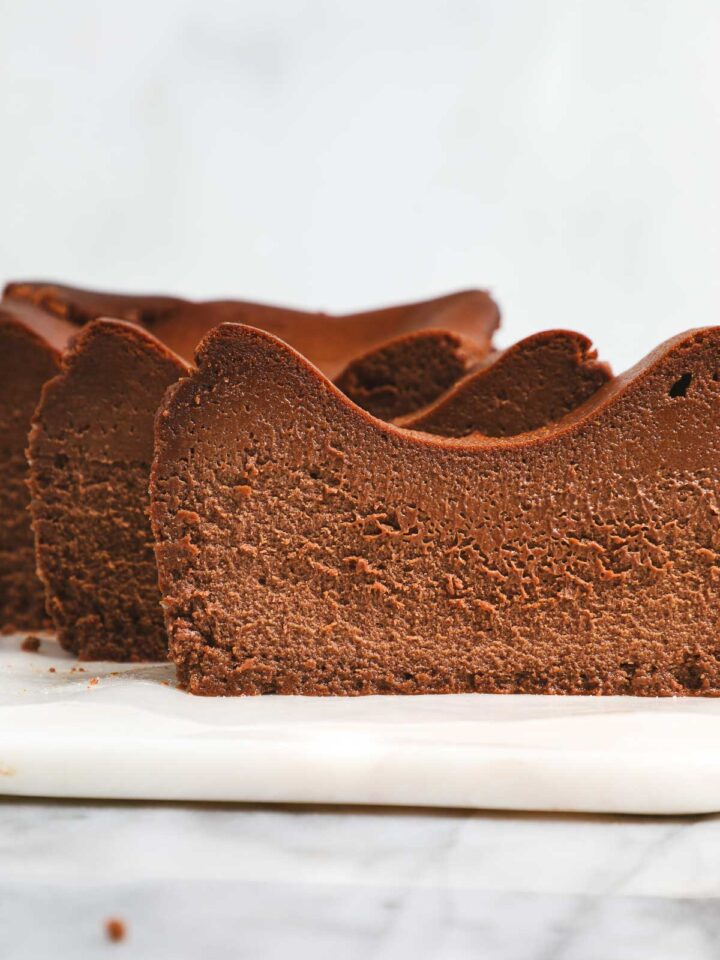
For a chocolate version, try Chocolate Loaf Basque Cheesecake.

This style of cheesecake is one of the easiest cheesecakes you will ever make, and it is very adaptable. If you don't have a loaf pan or are interested in how to adapt this recipe to another pan (a square baker, a cake pan, a pie dish, etc.), see my Guide to Basque Cheesecake Without a Springform Pan.
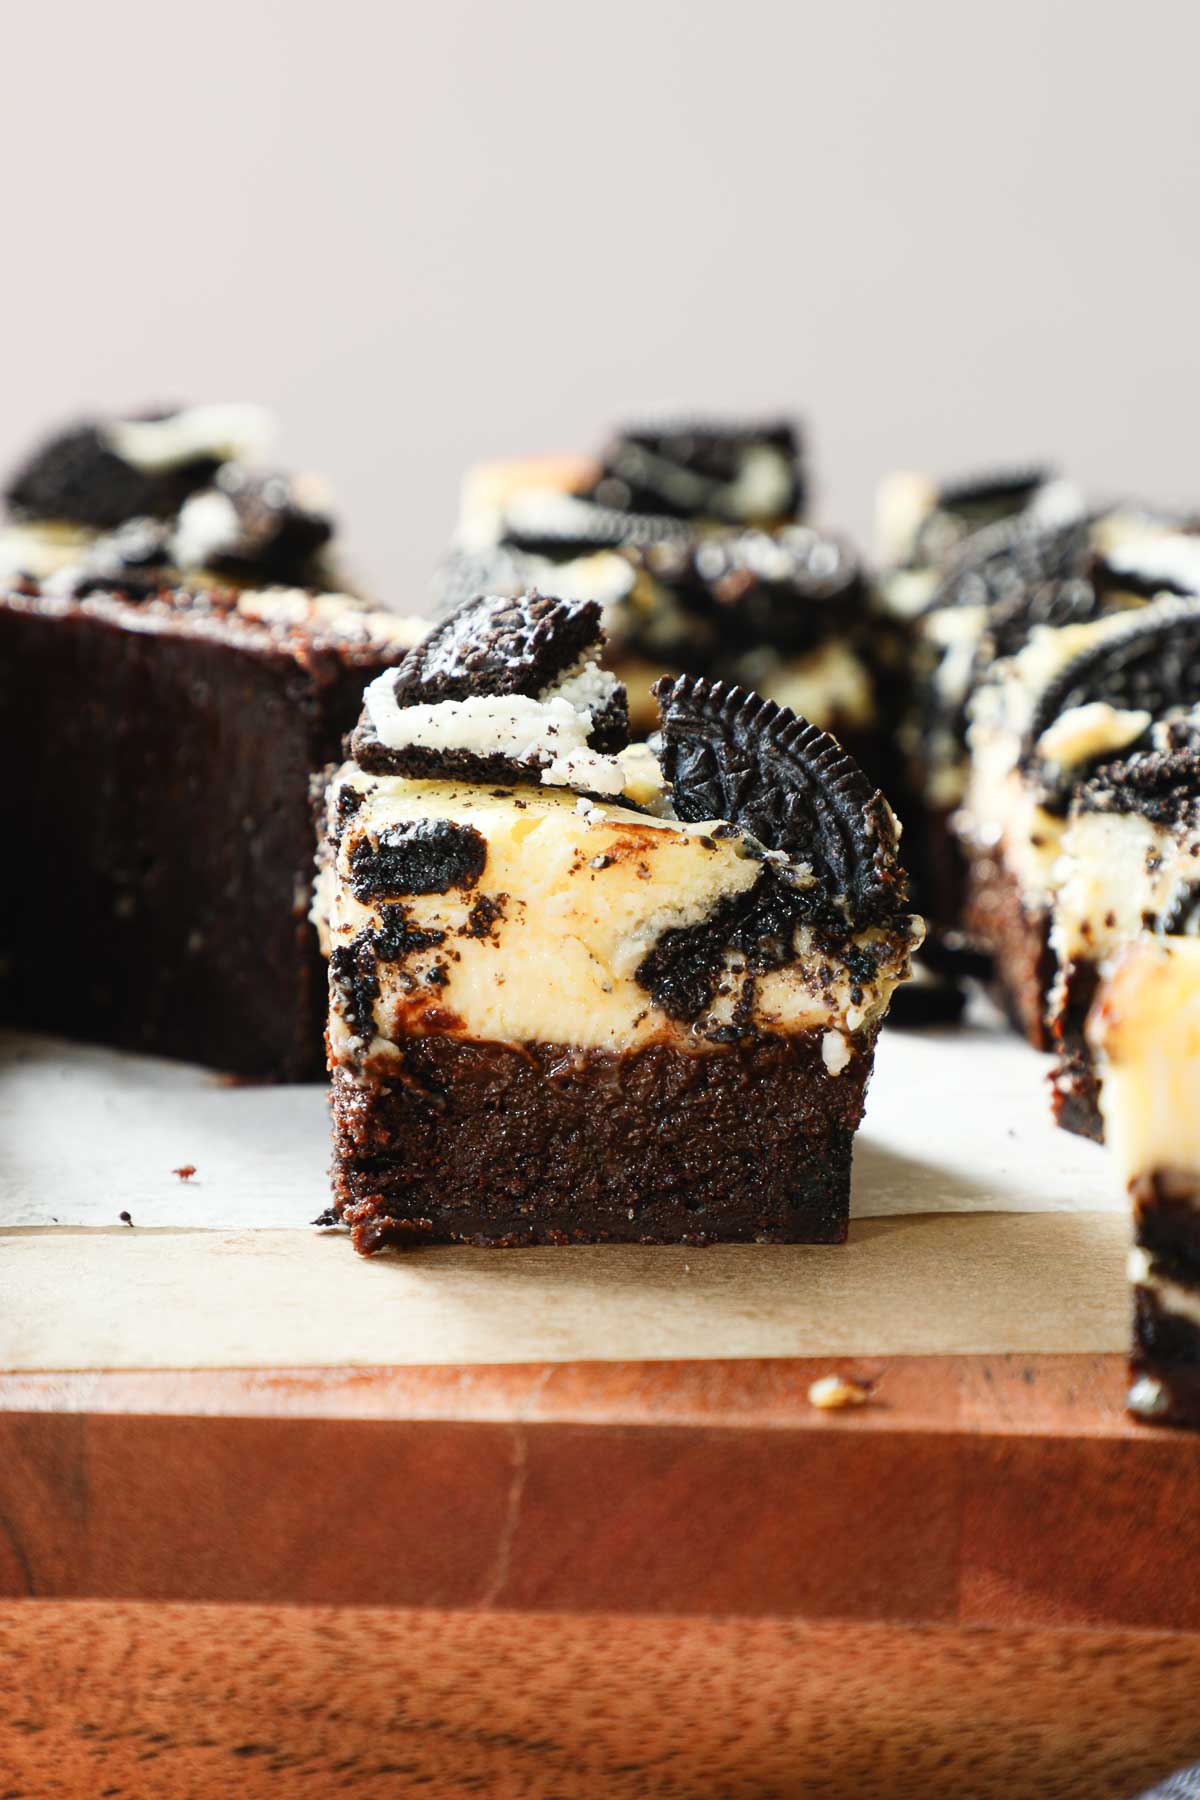
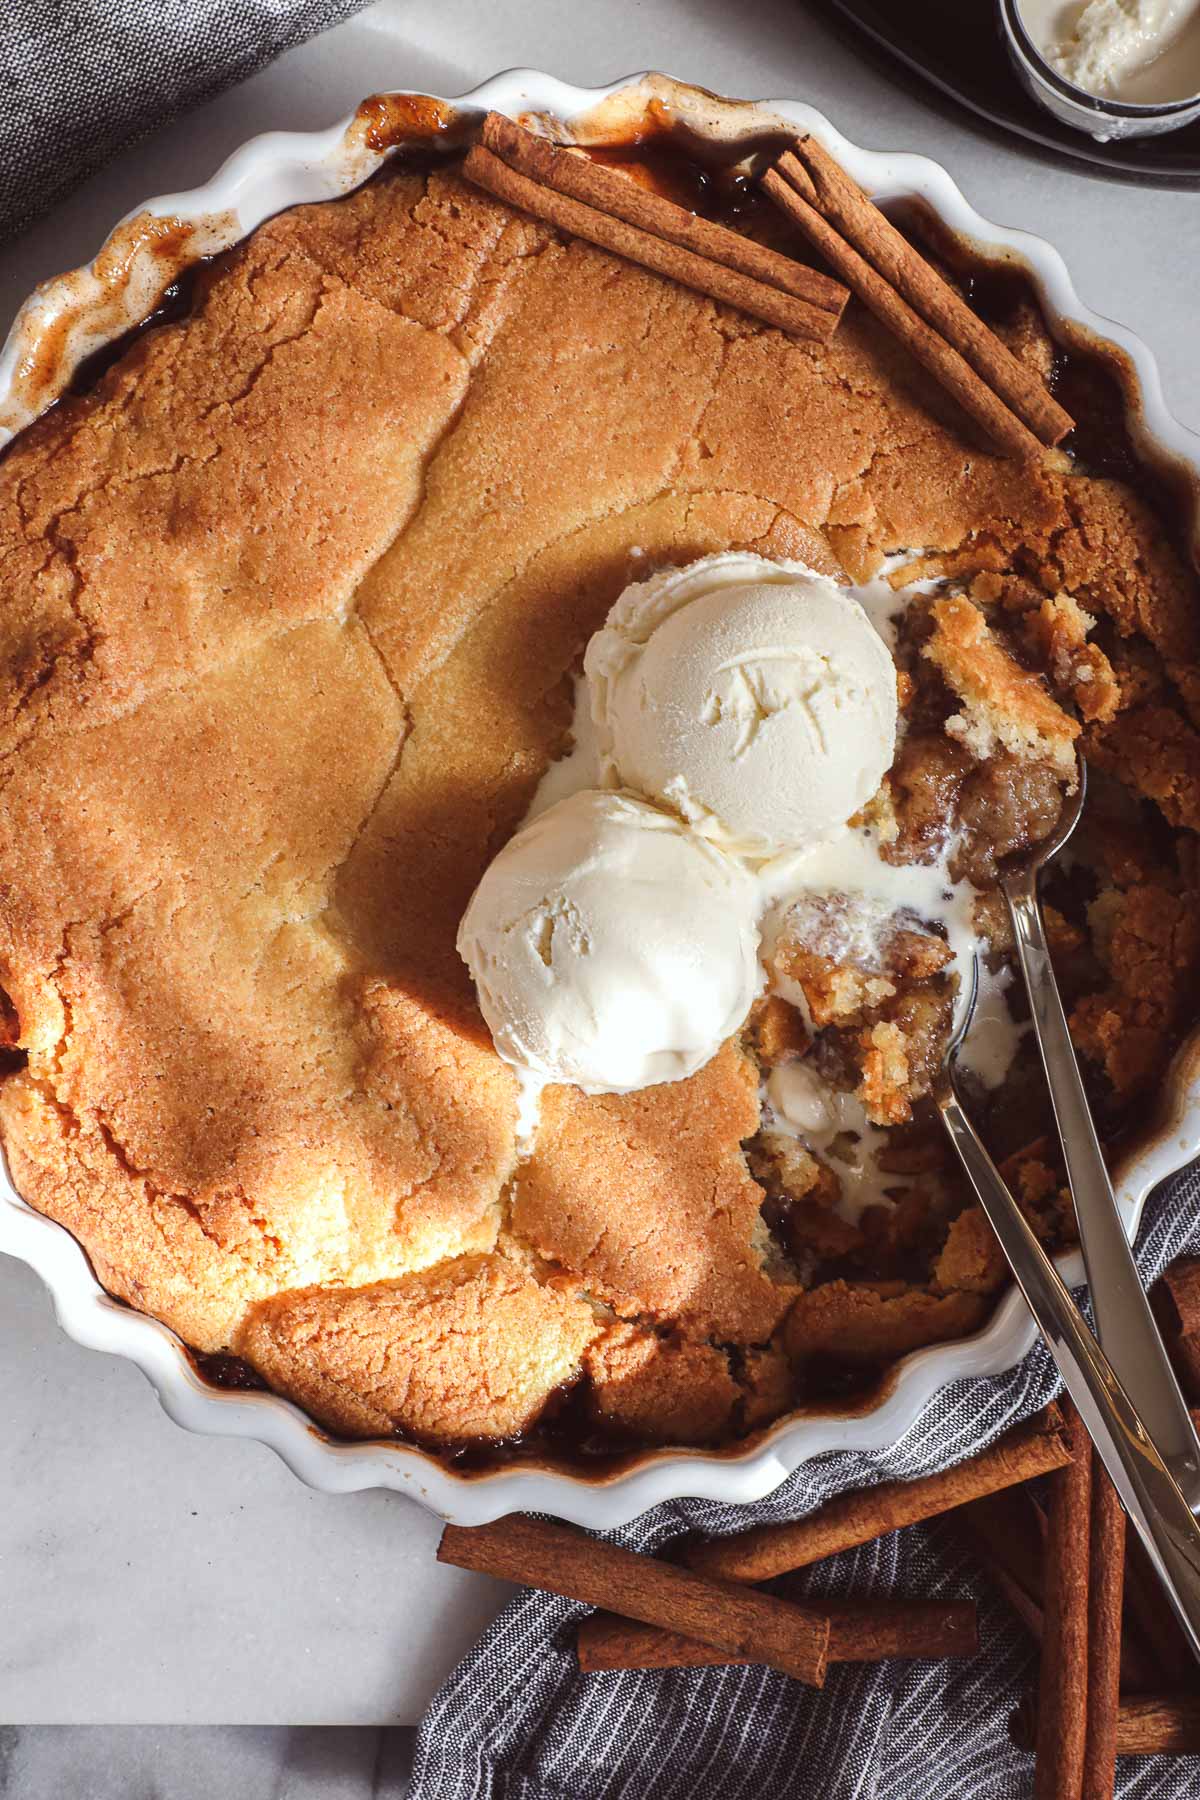
It can also be adapted and used in layer desserts, like this Oreo Brownie Cheesecake, add fall spices for a Pumpkin Basque Cheesecake, make miniature versions with Mini Basque Cheesecakes, large versions with Cheesecake in a 9x13 Pan, or simply add good quality chocolate for a Chocolate Basque Cheesecake.
Jump to:
💡Recipe Inspiration
This Basque style of cheesecake is inspired by the Basque Cheesecake made at a restaurant called La Vina in San Sebastian, Spain and detailed by Marti Buckley in her book, Basque Country. Basque Country is a region along the northern coast of Spain that sits on the Bay of Biscay (and has a counterpart in France).
While I lived in Spain, I visited San Sebastian and spent the days wandering around, hopping from bar to bar eating pintxos (bite-sized tapas), and listening to live Jazz music floating through the town from a nearby outdoor music festival.
If you’re interested in visiting this area, check out my Travel Inspiration Guide to San Sebastian and Travel Inspiration Guide to Bilbao, as well as more on our experience eating pintxos.
🌟 Why You'll Love This Recipe
Made in a Loaf Pan: This Basque cheesecake is specifically made in a loaf pan, making it easy to throw together even if the only baking dish that you have is a loaf pan. You do not need a springform pan, it is very easy to slice, and it’s also easy to store.
Creamy and Caramelized: It is creamy throughout with a thin, dark brown caramelized top.
Easy and No-fuss: This style of cheesecake is super easy, without any special techniques (no water bath) or fancy ingredients. It’s great for beginner and experienced bakers.
🛒 Ingredients
Below are the ingredients needed to make Loaf Pan Basque Cheesecake.

- Cream Cheese: Use full-fat cream cheese bars, not spreadable cream cheese. Just like butter, cream cheese bars have oz. markings on the packaging that you can reference to know exactly how much to use for a recipe.
- Granulated Sugar: This recipe calls for 1 cup of granulated sugar, the perfect balance to the creamy indulgent cream cheese.
- Salt: Just a pinch, to bring out flavor.
- Vanilla Extract: adds a very subtle vanilla flavor. If you don’t have real vanilla extract you can skip this ingredient, it will turn out great without it too.
- Eggs: Adds richness, use pasture-raised if possible.
- Heavy Cream: Use heavy whipping cream.
- Flour: Adding a small amount of flavor imparts a nice texture to the cheesecake. Be sure to add it slowly through a fine mesh strainer. Don’t dump it in all at once.
See the recipe card for full information on ingredients and quantities.
📝 How to Make Loaf Pan Basque Cheesecake
Below are the step-by-step instructions and photos for how to make Loaf Pan Basque Cheesecake.
*Note: The recipe card with instructions, ingredient list, and quantities is included further below these step-by-step photos.
Prep. Preheat the oven to 400°F.
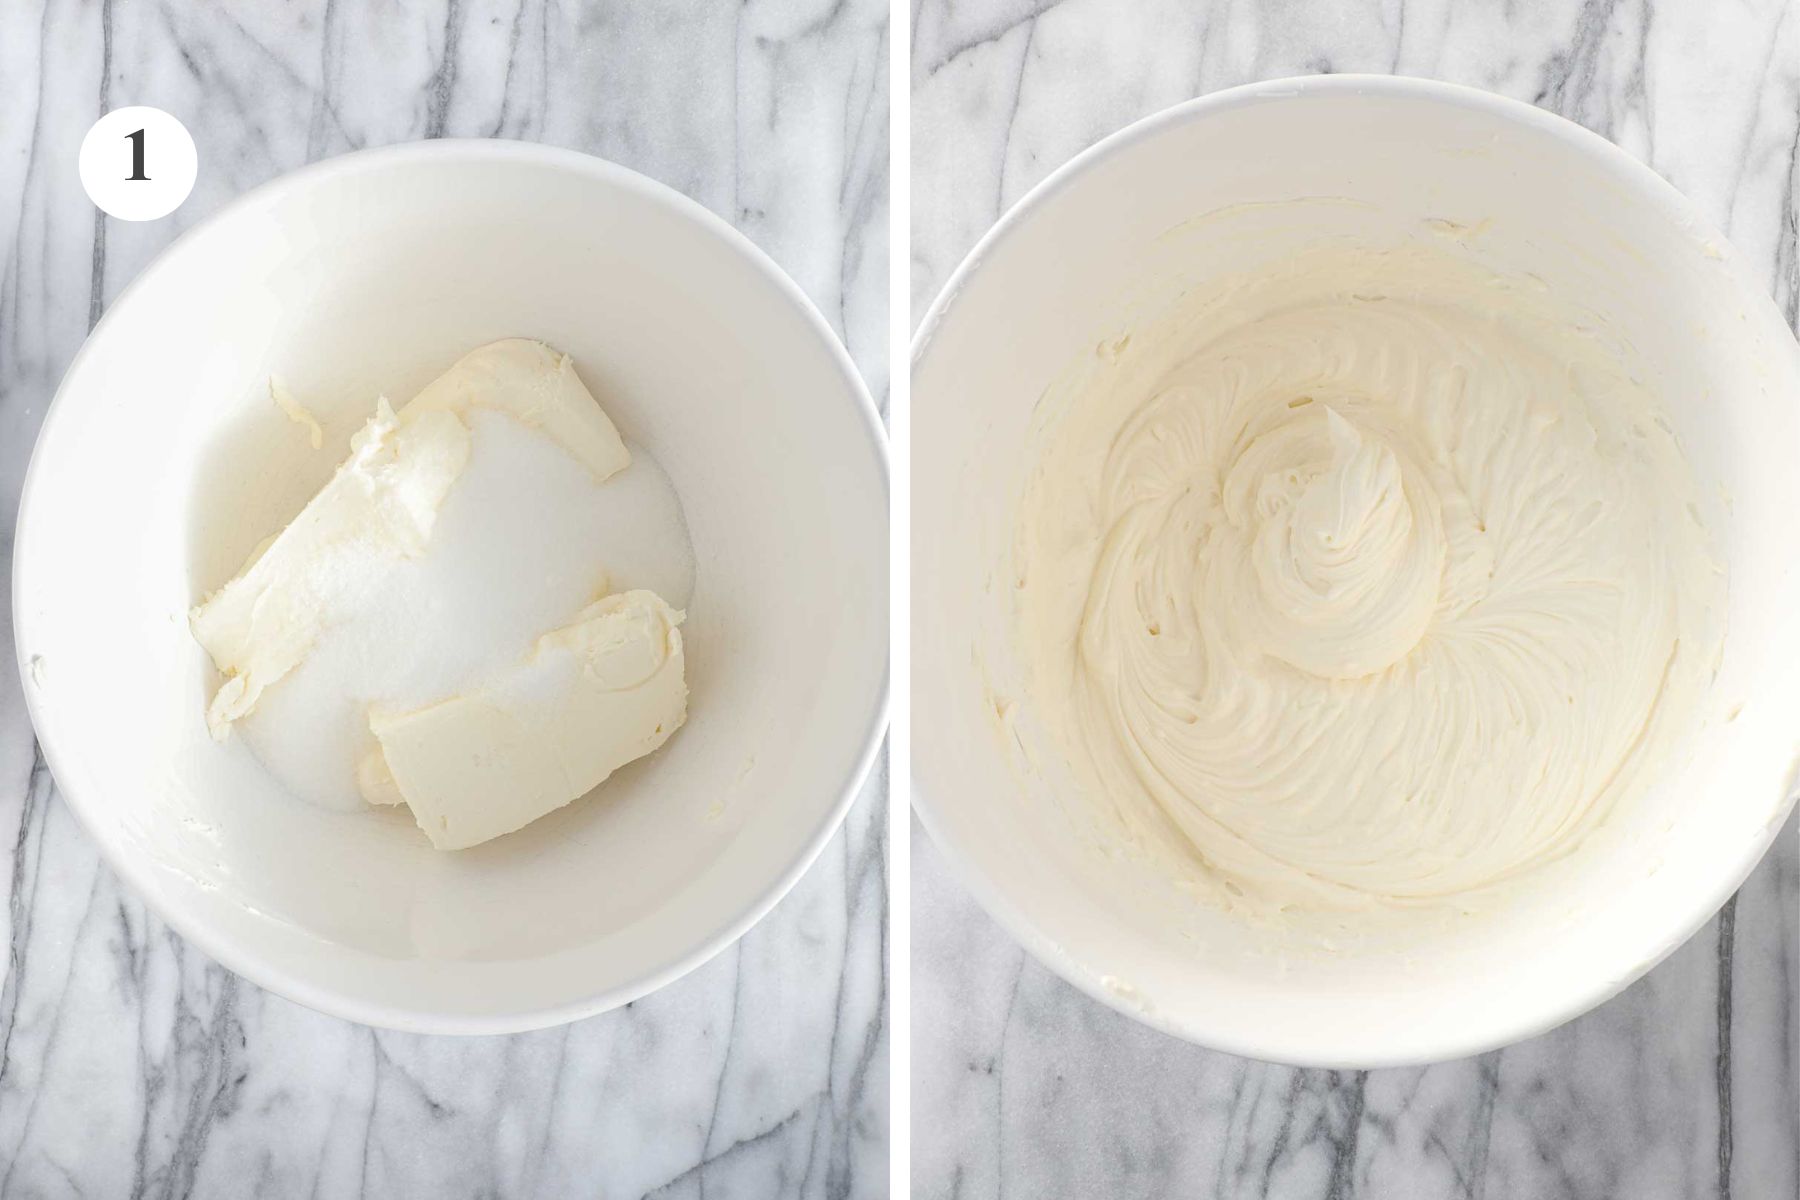
Step 1. Combine Cream Cheese and Sugar: In a large mixing bowl, combine the softened cream cheese and sugar, using a hand mixer or a stand mixer at low-medium speed for 5 minutes. Using a hand mixer, beat the cream cheese and sugar for 1 minute at low speed, then increase the speed to a setting of 2 (on a 3 speed mixer) for an additional 4 minutes.

Step 2. Add the Eggs: Add the eggs one at a time. To do this, add one egg and mix until fully incorporated, about 10 seconds. Then add the second egg and mix until fully combined. Repeat with the remaining two eggs.

Step 3. Whisk In Heavy Cream: Add the heavy cream, vanilla extract (if using), and salt and whisk to combine.
Tip: The vanilla extract is optional. If you have real vanilla extract on hand, add it. It adds a subtle creamy vanilla flavor. But if you don't have it on hand its not worth going out to buy it.
Vanilla extract can be quite expensive. If you do bake a lot, consider buying a large bottle of vanilla extract at Costco. It is often less expensive than a small bottle.

Step 4. Sift in Flour: Add the flour to a fine mesh strainer. Slowly sift in the flour and whisk gently to incorporate.
Tip: Sifting Flour: Do not add the flour all at once, or you will not be able to incorporate it evenly (it will be lumpy). To sift the flour, gently tap the edge of the fine mesh strainer over the bowl to create a dusting of flour on the top. Whisk that in gently, then repeat. Add another dusting of flour and incorporate. Continue until all the flour has been added.

Step 5. Prepare the Loaf Pan: Lightly butter the loaf pan. Then press a large sheet of parchment paper into the loaf pan. Press it firmly into all of the corners. Pour the cheesecake batter into the loaf pan.
Note: Parchment paper and wax paper are very different. Do not use wax paper. It will melt. Only use parchment paper.
Tip: Buttering the loaf pan helps the parchment paper to stick to the loaf pan. This makes it easier to pour the cheesecake batter into the parchment-lined loaf pan.

Step 6. Bake the Cheesecake: Bake the cheesecake at 400°F for 40-45 minutes. Look for the cheesecake to be very dark brown around the edges (but not burned). It will be slightly lighter in color in the center. The center will also be quite soft. It will continue to cook and firm up while cooling in the pan on the counter.
In my oven, I need to bake this cheesecake for around 43 minutes to get that dark brown color, but the timing will vary depending on your oven and the pan that you use.
Allow the cheesecake to cool fully at room temperature, then refrigerate until you are ready to serve it.
Preferably, allow it to cool in the fridge for 2-4 hours or overnight.
Timing Tip: Do not be concerned that the top is very dark in color. The top will caramelize, but the inside will still be light and creamy. If the top is not dark enough, the center will not have set.
🍴 How to Serve and Store
To Serve: Remove the cheesecake from the loaf pan and place it on a cutting board, cake plate, or large serving dish. To do so, lift it out of the loaf pan by pulling the parchment paper up on either side of the long edge of the pan.
Then cut thick slices, like you would for Banana Bread.
To Store: Wait until the cheesecake has FULLY cooled before placing it in the fridge. This helps the cheesecake to set evenly.
Additionally, if you cover and refrigerate the cheesecake before it has fully cooled, condensation will form on the inside of the cover (either aluminum foil or plastic wrap). Then, inevitably, the condensation will drop onto the cheesecake and form droplets and discoloration on the top. This is not a huge deal, but it's nice to avoid if possible.

🪄 Tips and Tricks:
- Loaf Pan Size: Not all loaf pans are the same size. Some standard 9x5 loaf pans are actually 9x10 or may have varying heights. If the entire cheesecake batter does not fit in your pan, fill your loaf pan, leaving ½ inch of room on the top. Then watch the baking time carefully. Remove the cheesecake when it is very dark brown on the edges and slightly lighter in the center.
- Overflow: If your loaf pan is very full, place it on top of a baking sheet to catch any potential overflow while baking. I have not yet had this happen, despite making dozens of Basque cheesecakes, but it may be worthwhile depending on the exact dimensions of your loaf pan.
- Cracks: Cracks in Basque Cheesecake are okay and are likely to happen. They will settle as the cheesecake cools and become less noticeable, but this is a rustic-style cheesecake, and it adds to the appeal.
If You're Looking For More Desserts, You May Love These
If you tried this Loaf Pan Basque Cheesecake or any other recipe on my website, please leave a 🌟 star rating and let me know how it went in the 📝 comments below. I'd love to hear from you!

Loaf Pan Basque Cheesecake
Video
Ingredients
- 1¾ lb full fat cream cheese bars (or 1 lb 12 oz), softened see oz marks on foil wrapping
- 1 cup granulated sugar
- 4 large eggs
- 1⅔ cup heavy cream
- 1 teaspoon vanilla extract optional
- ¼ teaspoon salt
- ¼ cup all-purpose flour
Instructions
- Preheat the oven to 400°F.
- Line a 9x5-inch loaf pan with parchment paper. To do so, lightly butter the inside of the cake pan. Then lay one long strip of parchment paper across the loaf pan and press it into the pan, such that it is pressed into the corners. There should be at least 2 inches of overhang around the entire loaf pan. Trim any excess beyond the 2-inch overhang.
- In a large mixing bowl, add the softened cream cheese and granulated sugar. Mix with a hand-held mixer at low-medium speed for 5 minutes, until smooth and creamy. You can also do this in a stand mixer.
- Add the eggs one at a time, mixing at each interval until fully combined.
- Add the heavy cream, vanilla extract, and salt, and use a whisk to combine.
- Sift in the flour and stir gently to incorporate.
- Pour the batter into the parchment-lined loaf pan. Bake for 40-45 minutes. The top should be dark brown around the edges with a slightly lighter color in the center, but it should not be burned. The center will be quite soft and wiggly. It will set while resting on the counter.
- Allow to cool fully on the counter. Cover and refrigerate until ready to serve. It's best served cool. Refrigerate the cheesecake for 2-4 hours or overnight.
Notes
- Vanilla Extract: The vanilla extract is optional. If you have real vanilla extract on hand, add it. It adds a subtle, creamy vanilla flavor. But if you don't have it on hand, it's not worth going out to buy it.
- Vanilla extract can be quite expensive. If you do bake a lot, consider buying a large bottle of vanilla extract at Costco. It is often less expensive than a small bottle.
- Sifting Flour: Do not add the flour all at once, or you will not be able to incorporate it evenly (it will be lumpy). To sift the flour, gently tap the edge of the fine mesh strainer over the bowl to create a dusting of flour on the top. Whisk that in gently, then repeat. Add another dusting of flour and incorporate. Continue until all the flour has been added.
- Preparing the Loaf Pan: Buttering the loaf pan helps the parchment paper to stick into the loaf pan. This makes it easier to pour the cheesecake batter into the loaf pan.
- Parchment Paper: Parchment paper and wax paper are very different. Do not use wax paper. It will melt. Only use parchment paper.
- Baking Time: Do not be concerned that the top is very dark in color. The top will caramelize, but the inside will still be light and creamy. If the top is not dark enough, the center will not have set.
- Loaf Pan Size: Not all loaf pans are the same size. Some standard 9x5 loaf pans are actually 9x10 or may have varying heights. If the entire cheesecake batter does not fit in your pan, fill your loaf pan, leaving ½ inch of room on the top. Then watch the baking time carefully. Remove the cheesecake when it is very dark brown on the edges and slightly lighter in the center.
- Overflow: If your loaf pan is very full, place it on top of a baking sheet to catch any potential overflow while baking. I have not yet had this happen, despite making dozens of basque cheesecakes, but it may be worthwhile depending on the exact dimensions of your loaf pan.
- Cracks: Cracks in Basque Cheesecake are okay and are likely to happen. They will settle as the cheesecake cools and become less noticeable, but this is a rustic style cheesecake, and it adds to the appeal.

C Whear says
I'm eagerly awaiting to see how this turns out, it's my 1st time attempting to make this dessert or anything like it. But...the volume of batter following the 1x recipe/smallest amts was almost 2 9x5 loaf pans, not one! I filled the 1st within 1/2 of top as you recommend, and the 2nd was almost as full...hard to tell for sure b/c my first pour caught the edge of the paper...yes I buttered pan 1st and crumpled the paper...directing some batter into pan directly and some in the paper, so started over with another pan.
Lauren says
Thanks for your notes on the recipe! I'm not sure what may have happened with the quantity and pan size, but I'm glad that you were able to find a good solution! I hope you enjoyed the cheesecake! It's a great one to start with since it doesn't have any extra complicated steps like a bottom crust or water bath.
cynthia whear says
It was delicious. I will make it again but still puzzled by the volume of the recipe.
Lauren says
Hi Cynthia, I'm glad you enjoyed it! There are two different sized loaf pans that are very close to each other, but their volumes differ by about 15%. One is 9x5 and the other is 8.5x4.5. Depending on which one you are using that may be contributing to the volume issue, but I'm glad you were able to make it work nonetheless.
Mary C says
I haven’t tried the cheesecake yet, currently (impatiently 😋) waiting for it to come out of the oven. I’m curious as to how a glass loaf pan may impact baking time? I’m a complete amateur and had to split the batter between a metal loaf pan and a glass one. Mostly asking for future reference!
Lauren says
Hi Mary, I hope you enjoyed the cheesecake! Glass takes longer to conduct heat, so it will take a little longer to bake in the oven. Since I haven't used a glass dish for this recipe before, I would add 5 minutes to the baking time, and continue to check it every 5 minutes until the edges are dark and the center is a lighter golden brown (no more than an extra 15 minutes).
Laura says
Hi Lauren,
I stumbled across this recipe a few weeks ago and just had to try it. I wasn't sure how I would feel about it being a New Yorker (misplaced - I live in Europe now) and I love NY cheesecake. Well, I was wrong. This cheesecake is absolutely lovely and super easy to make. I did goof in trying to remove it from the loaf pan too soon and it started melting into a potential puddle. With some creative scrambling, I was able to get it all back in the pan and actually put it back in the oven for an additional 15 minutes. After that and cooling, it was perfect. A total hit! Thank you.
One question, is it possible to add a touch more sugar or will that throw off the balance?
Can't wait to make it again!
Lauren says
Hi Laura,
I'm so glad to hear that you enjoyed it and were able to find a creative solution! I'm originally a New Yorker too (and lived in Europe for a couple years), and I do also love a good NY cheesecake. I think you could certainly add a little more sugar without throwing anything off. That won't always work for things like cookies, but it shouldn't cause any big changes in this recipe, as long as its not a ton of sugar. Thanks for the question and your kind note!
Sarah says
This is my third time making this, today I made it for my birthday tomorrow. It is delicious and highly praised by all. My only issue is that once it comes out of the oven, it sinks in the middle. I'm not sure why this is happening. I am in Australia and so convert the cream cheese to 800g. Is there a difference in the other measurements that might be throwing it off? Or something else I am doing wrong? Any suggestions much appreciated!
Lauren says
Hi Sarah, Happy Birthday! I hope you have a wonderful time celebrating! This Basque style of cheesecake, unlike other cheesecakes like a New York Cheesecake, is designed to not use a water bath and therefore will sink slightly in the middle. It is meant to be more rustic in look, with a dark top, but creamy middle. If you want to try to prevent it from sinking, you could bake it a little bit longer, though this will make it less creamy inside (and it won't prevent it from sinking entirely, just less), or you could consider using a water bath.
In terms of measurements for ingredients, for the standard sized cream cheese that I use (here in the US) an 8oz bar is 226 grams, so 1 3/4 lb would be 848 grams. Perhaps adding a little more cream cheese will help slightly. For the flour, I use 1/4 cup, measured at 35 grams.
I hope that helps. Let me know if you have any more questions, I'd be happy to chat about it!
Meghana says
I recently tried this recipe for my husband's birthday and it turned out amazing! We absolutely loved it.
I was wondering if I could adapt the recipe to include matcha or chocolate. Could you suggest the appropriate quantity of powder I should add for either variation?
Thank you for the wonderful recipe!
Lauren says
Hi Meghana,
Thanks for your note. I'm so glad that you loved the cheesecake! You can definitely adapt it to chocolate or matcha. For chocolate, I have a Chocolate Basque Cheesecake recipe on the site. You can use these ingredients and proportions, which includes both cocoa powder and melted bittersweet chocolate which is incorporated into the batter (this is my favorite variation!).
There are two things to keep in mind. The first is if you are using a loaf pan, the total quantity of the cheesecake batter will be more than the regular loaf pan cheesecake recipe since you are incorporating chocolate. It may not all fit in a loaf pan (it's likely not a ton of extra batter, but I haven't tried it in a loaf pan at this point). You could bake the overflow in another dish, or you could reduce the amount of bittersweet chocolate to 1/2 cup total. If you wanted to use only cocoa powder, I would suggest starting with 1/4 cup (though I have not experimented with this).
The second is that the baking time may be shorter, closer to 35 minutes for chocolate cheesecake. The best indication that it is done is for it to look very dark brown around the edges and lighter, but still dark brown in the center.
I have not tried using matcha before, though its a great idea. My suggestion would be to try 2 tablespoons of matcha powder, but this is a rough guess. If I get a chance to experiment with a matcha Basque cheesecake, I will let you know!
Meghana says
Thank you Lauren, I can’t wait to try the matcha version !!
Lauren says
You're welcome!
Mike says
This was one of the best things I’ve ever had in my life. Thank you so much for putting this together. Whoever gave this 4 stars definitely didn’t follow your instructions. lol.
Lauren says
Thanks so much, Mike! I'm so glad to hear how much you enjoyed it!
Biz says
Would it be possible to make this in a decorate loaf pan an turn it out, serving it "upside down"?
Lauren says
Hi Biz,
I think this is a really fun idea, however I'm wondering if it might be a bit tricky to get it to turn out just right. I line the pan with parchment paper which would mean that the cheesecake wouldn't pick up the decorated element at the bottom of the pan. Though, you could try to thoroughly grease and flour the pan skipping the parchment paper and then turn it upside down to remove it from the pan. It may be tricky because the top of the cheesecake is not flat, and I'm wondering if you were to turn it upside down if the decorated bottom (now top) might sink a bit in the center. Its certainly possible that it will maintain its shape, but definitely not guaranteed.
If you do give it a shot, please let me know how it goes. I'd really love to hear about it!
Lauren says
Hi Biz,
I have an update: I was so intrigued by this idea of making the cheesecake in a decorative loaf pan, that I went out and bought one and tested the recipe. I made it a couple of times, and it turns out that you absolutely CAN make this in a decorative loaf pan, and it turns out quite nicely. Its releases easily from the pan and its a beautiful golden brown color on the decorative side. Despite the cheesecake not being flat on top in the pan, it keeps its shape when it is flipped upside down to have the decorative side up.
A couple quick notes. Decorative loaf pans come in lots of different shapes and sizes. If your decorative loaf pan has a 8 or 9-cup volume, you can use this same recipe with the same ingredient amounts and timing. If you are using a 6-cup volume decorative loaf pan (it says on the packaging), you'll need to reduce the ingredient amounts by quite a bit. For 6-cup volume, use the ingredient amounts in my recipe for Mini Basque Cheesecakes (do a quick search on my homepage), but keep the baking time 40-45 minutes.
I used a brand new nonstick decorative loaf pan, so the nonstick nature of the pan was very effective. In my first attempt, I coated the pan with melted butter, but this caused butter to pool in certain places and then the cheesecake had much lighter coloring in some spots (where the pooled butter was), and much darker in other spots. The second attempt I did not use any butter or grease and it still released easily from the pan once the cheesecake had cooled to room temperature.
I hope this helps!!
Vivian says
THIS WAS PERFECT!!!! Question, can this be scaled down to a very mini loaf for the holidays? What about adding holiday flavors??? I wish I could post pictures. It’s my first time trying this and it was GREAT! I do think my oven was having issues because it took about 15-20 minutes longer and the top wasn’t quite as brown as yours. But it tasted just like an nyc cheesecake! THANK YOU!
Lauren says
Hi Vivian, I'm so glad!! Yes, I think you could absolutely do this in mini loaf pans for the holidays. I'm actually just finalizing a recipe now to make this style cheesecake in mini springform pans, which I hope to post soon.
In the meantime, here are a couple of things to look out for when making it in smaller pans. First, the baking time will be quite a bit less, but also there's less wiggle room in the baking time, so a few minutes too short or too long might make it quite a bit overdone or underdone because they're so small. The second is that because they will have a short baking time, the top might not get that really dark caramelized look on its own. In that case, rather than baking it until it darkens on its own, use the broiler but only for a minute or two because it may burn very quickly.
On holiday flavors - I do have a recipe on the site for a Pumpkin Basque Cheesecake and for a Chocolate Basque Cheesecake (I love making this one for holiday parties in December), both of which you could make in a loaf pan. I'd love to hear if you have other ideas for flavors too!
On the timing/oven temperature - you could always consider buying an in-oven thermometer to see how accurate your oven's temperature is. Some ovens can run hotter or cooler and some also just take much longer than indicated to preheat. Mine needs an extra 15 minutes beyond when it says its preheated before it gets to the actual temperature.
Stephanie Lindberg says
First time ever making cheesecake. I have always been afraid of the whole cheesecake process so when I found this recipe I knew I'd be trying it. Not only were the directions amazing to follow, the pictures helped so much, and it came put absolutely delicious! 100/10 for sure, will definitely be making this again! We topped ours with sliced strawberries and homemade vanilla whipped cream because the flavor is perfectly balanced and not sicky sweet like commercial cheesecake. My husband happy danced while eating it!
Lauren says
Hi Stephanie, This is so wonderful to hear! Thanks so much for leaving such a kind note. I'm so glad that you both loved it!!
Kaitensatsuma says
Fantastic, this feels to me like one of the two cheesecakes me and my family likes - the other being the Polish style Sernik - without having to wrestle with a ridiculous amount of leftovers, just a "cute" cheesecake that'll get you through a day or two with a nice cup of coffee
Any insights on additions like lemon zest or jam?
Lauren says
Yes, it is great along side a cup of coffee! I love hearing about the Polish style Sernik. I have never heard of that style of cheesecake before, it looks wonderful! Thanks for sharing! Adding lemon zest to the batter before baking would be a great addition. For the jam, I think it would do well if it was swirled into the batter after the batter is added to the pan, right before adding it to the oven. Drizzled in and then swirled gently with a knife to keep ribbons of jam intact. Otherwise, I'm sure it would be great spooned over top after baking and cooling.
Deedee says
Hi Lauren! Thank you for the recipe. I just made it today and there is HUGE cracks, like 3-4 big cracks on top. Any idea why would that happen? I did the exact same ingredients, quantities, temperature, time.
Lauren says
Hi Deedee, Thanks for reaching out. Its normal for this style of cheesecake to have good sized cracks when you first take it out of the oven. As it cools the cheesecake should settle and the cracks should appear less visible, but it will still have a rustic look. I have a recipe for "Cheesecake Without A Loaf Pan" that has a side by side image of a similar cheesecake right after it comes out of the oven with large cracks, and the same cheesecake a little while later once it has fully settled where the cracks are much less visible. That might be a helpful reference point.
Has your cheesecake had a change to settle? Or are you still seeing large cracks even after it has settled? Let me know and I'd be happy to chat about it further.