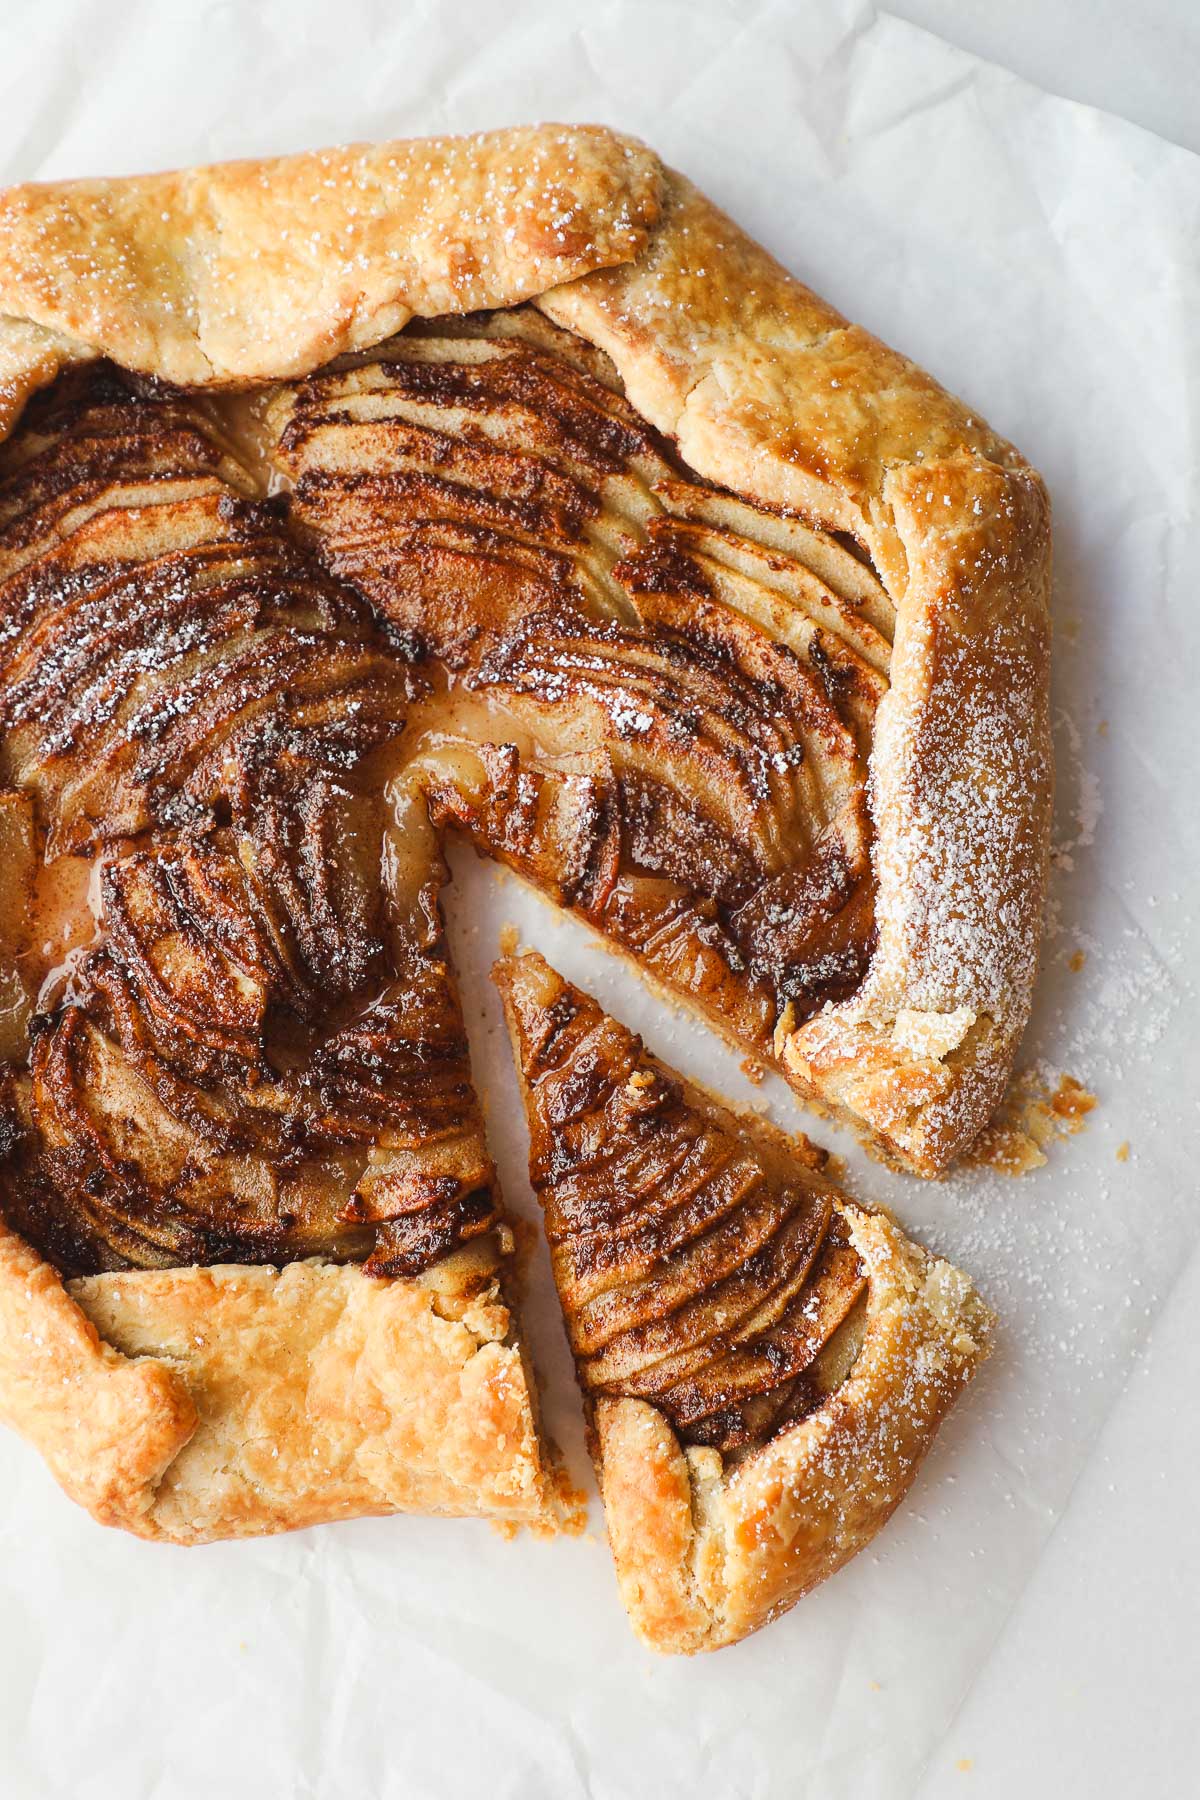
This Easy Apple Crostata is a paired-down recipe with a super simple crust (no finicky cold butter), and the apples are sprinkled with cinnamon and sugar right in the pie crust, for an easier and elegant presentation.

This is a great recipe to have in your holiday arsenal, or for those occasions where you don't want to put in all of the effort to make a traditional Apple Pie or a spiffed up pie like Dutch Caramel Apple Pie. It's simply sliced apples topped with cinnamon sugar and wrapped in an easy-peasy pie crust.
Jump to:
🍎 What is an Apple Crostata?
An apple crostata is a dessert where apples are arranged on a pie crust rolled out with the edges folded over the apples. It’s a much simpler version of an Apple Pie that can be made without a pie dish or a top crust (unlike Swedish Apple Pie which is made without a bottom crust). It's thinner, with a higher proportion of crust to apples than an apple pie.
An apple crostata is the same as an apple galette. A crostata is the Italian term for the dessert and galette is the French term.
🌟 Why You'll Love this Apple Crostata
Super Easy: This recipe is designed to be super easy. Baking doesn't have to be cumbersome or arduous to yield delicious results.
Flaky Butter Crust: Even with only a little effort it has a flaky butter crust.
Beautiful: The apples are arranged in concentric semi-circles for a beautiful presentation (this requires no extra effort!).
📓 Making it Easier
Pie Crust
- Standard: A pie crust is typically made with cold butter incorporated into flour to make a pie dough. The idea is to allow small pieces of butter to remain intact in the dough so that when the pie crust is baked the steam from the butter releases and creates flaky layers of pie crust.
- Easier: I’ve made dozens and dozens of pies, and while it does help to have cold butter to create flaky layers, you can still make an excellent flaky pie crust without cold butter. Instead, use butter softened to a cool room temperature. Make the dough and refrigerate it until it is cold. Roll it out and proceed. You’ll still get an excellent, and much easier pie crust.
Filling
- Precooked: Apples for a crostata, galette, or pie can be precooked to release extra moisture or to add extra flavor with sugar, spices, or even liquor.
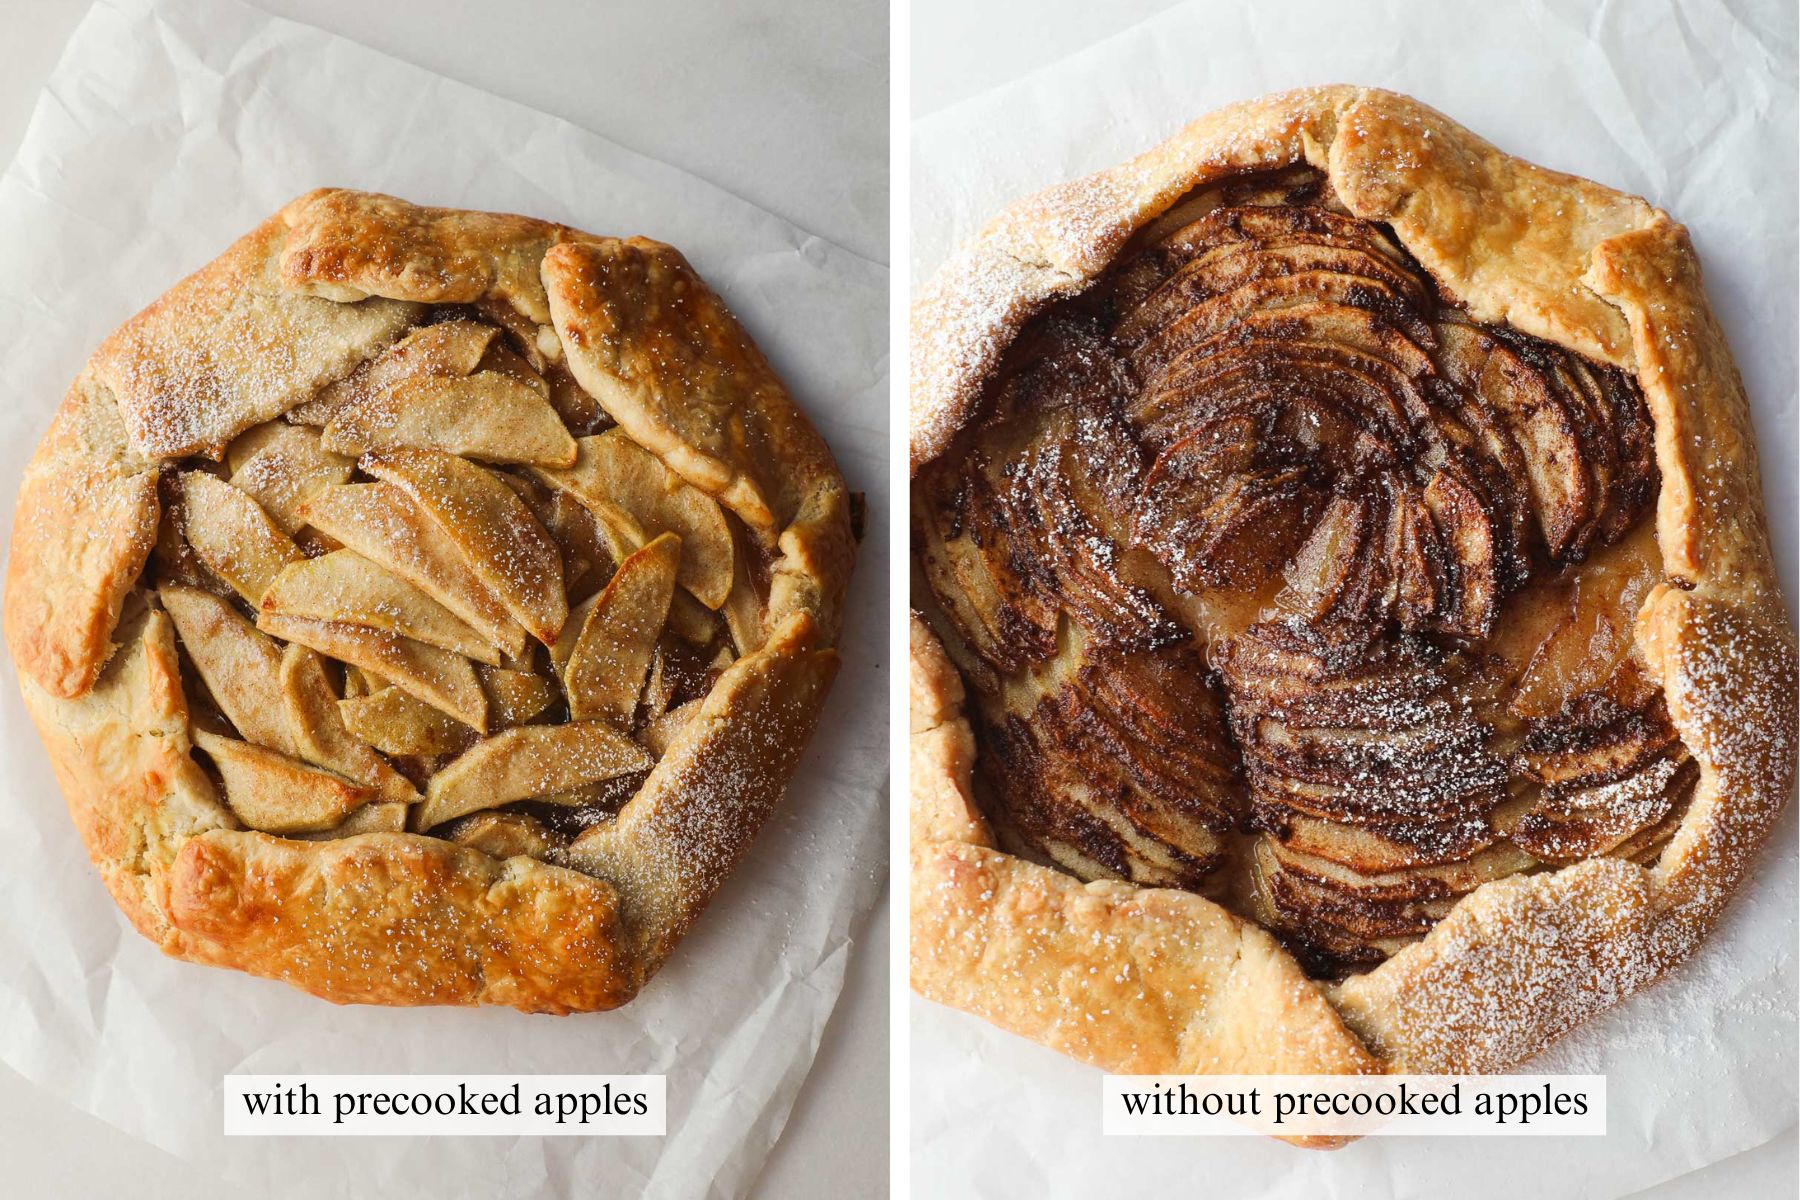
- Easier: To determine if it’s important to precook apples in a crostata, I made two Apple Crostatas side by side, one with precooked apples and one without to see if there was any difference. Ultimately there was no noticeable difference between the taste and texture of the apples or the pie crust. Keep it simple and layer the apples in the crostata without cooking them ahead of time.
Presentation
- Fancy with Effort: There are all sorts of ways to make a classic pie fancy (lattices, cookie cut-outs, crimping, fluting, etc), but crostatas (and galettes) are about keeping it simple and easy. A crostata is rustic just like a Basque Cheesecake. The imperfections are what make it look real and delicious.
- Fancy without Effort: In this crostata I show you how to cut the apples and leave them as you cut them to form a set of concentric circles, which are easy and eye-catching. This is the most effortless way to go from the cutting board to pie crust and it just so happens that it’s also beautiful.
🛒 Ingredients
Below are the ingredients needed to make this Easy Apple Crostata.
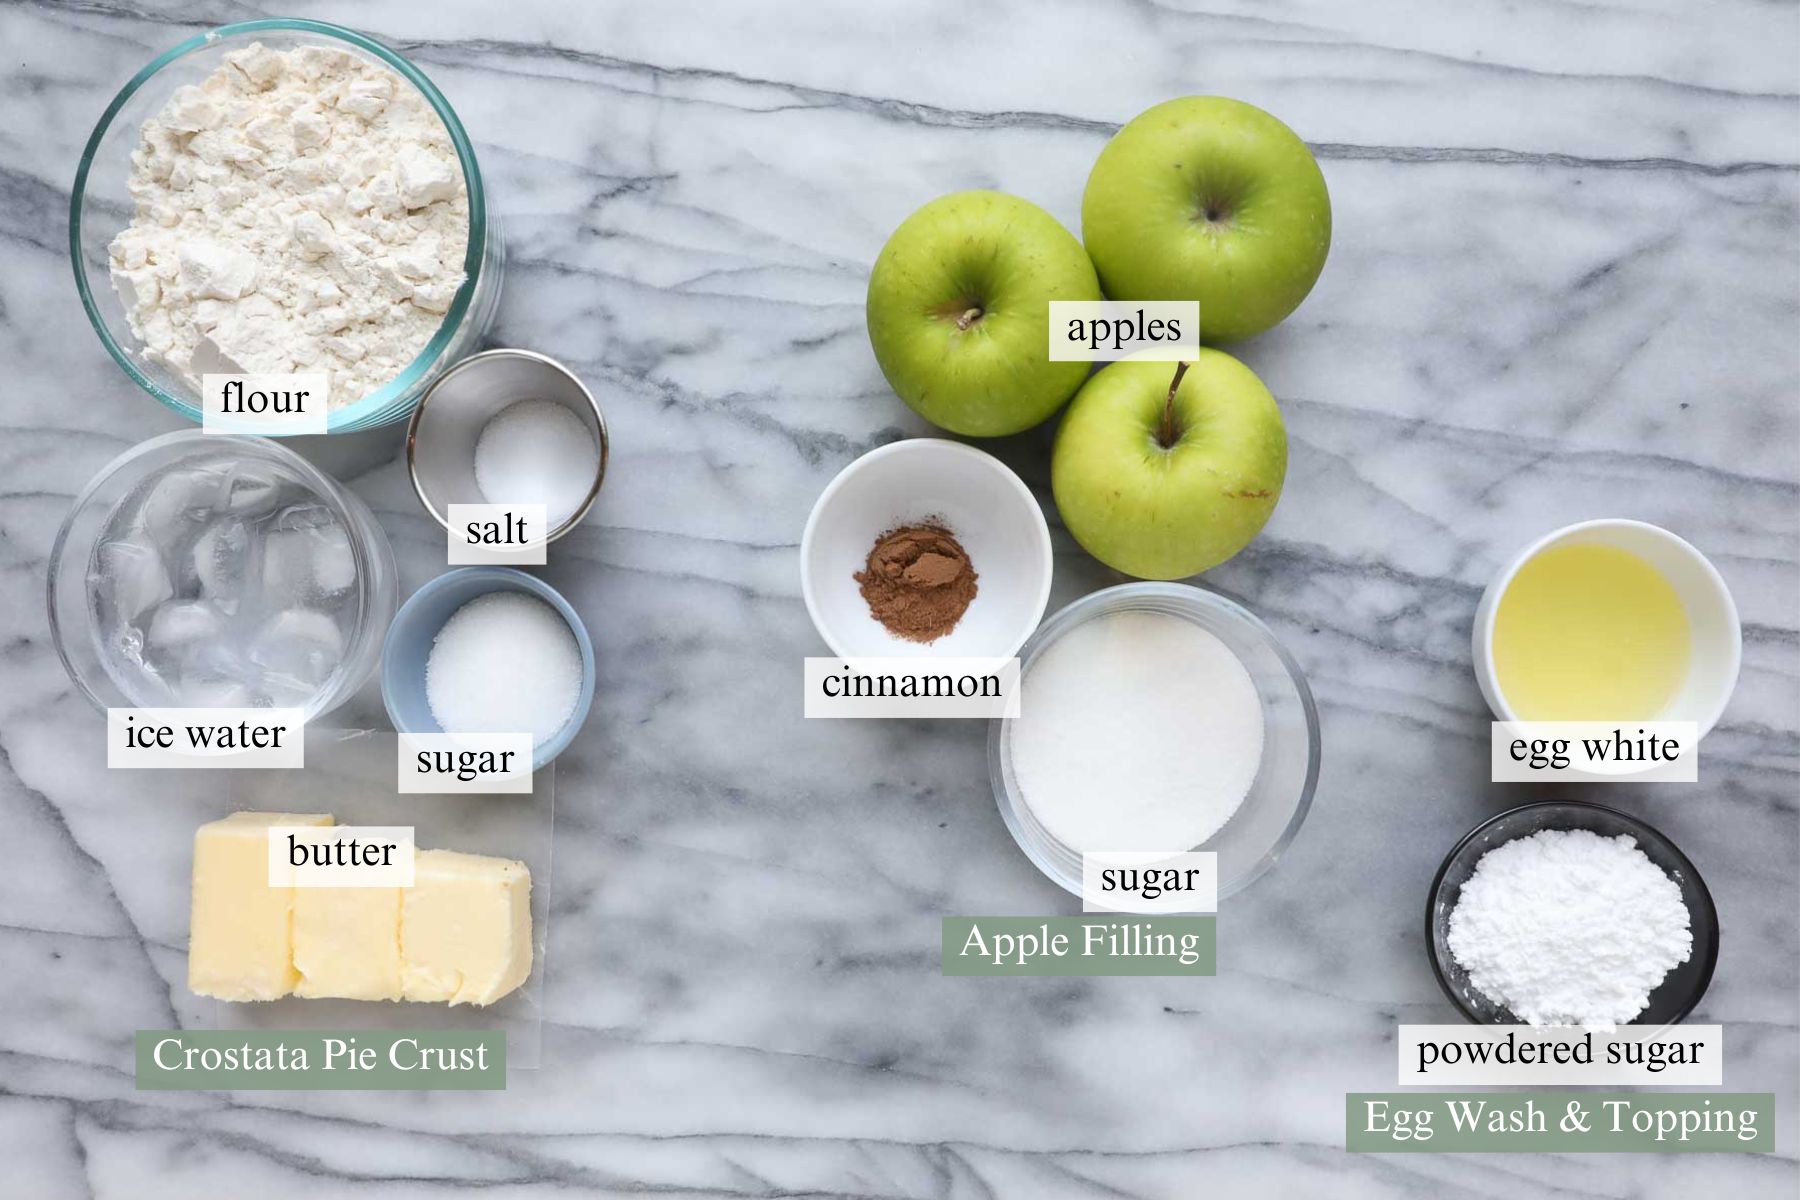
Crostata Pie Crust
- Flour: Use unbleached all-purpose flour.
- Salt: Brings out the flavor of the flaky crust.
- Granulated Sugar: Adds a super subtle sweetness.
- Butter: I use salted butter at a cool room temperature.
- Ice Water: Add ice to a cup of water to keep the water cool.
Apple Filling
- Granny Smith Apples: Granny Smith Apples are crisp and tart. They’re easy to find year-round and hold up well to baking. There are plenty of other varieties that you can use (like Honeycrisp or Jonamac), but Granny Smith apples are the most reliable. I also like to use these apples to make Apple Ricotta Toast.
- Granulated Sugar: A typical apple pie will call for up to a cup of sugar, but this recipe only calls for ¼ cup. This is because a crostata uses fewer apples (it's not piled high like a traditional pie), and the apples are sprinkled with sugar, rather than fully coated, but don’t worry it's still plenty sweet.
- Cinnamon: Use high-quality cinnamon, it is the one spice that makes the most difference. I like Ceylon Cinnamon by a brand called Simply Organic, which can be found at Whole Foods and some specialty grocery stores.
Egg Wash
- Egg White: You can make an egg wash with or without the egg yolk. I’ve made it both ways and prefer just using the egg white and a small amount of water.
- Water: Loosens the egg white and makes it easier to brush onto the pie crust.
Toppings:
- Powdered Sugar: For dusting the crostata right before serving. This is optional and if you don’t already have it, it’s not worth buying it.
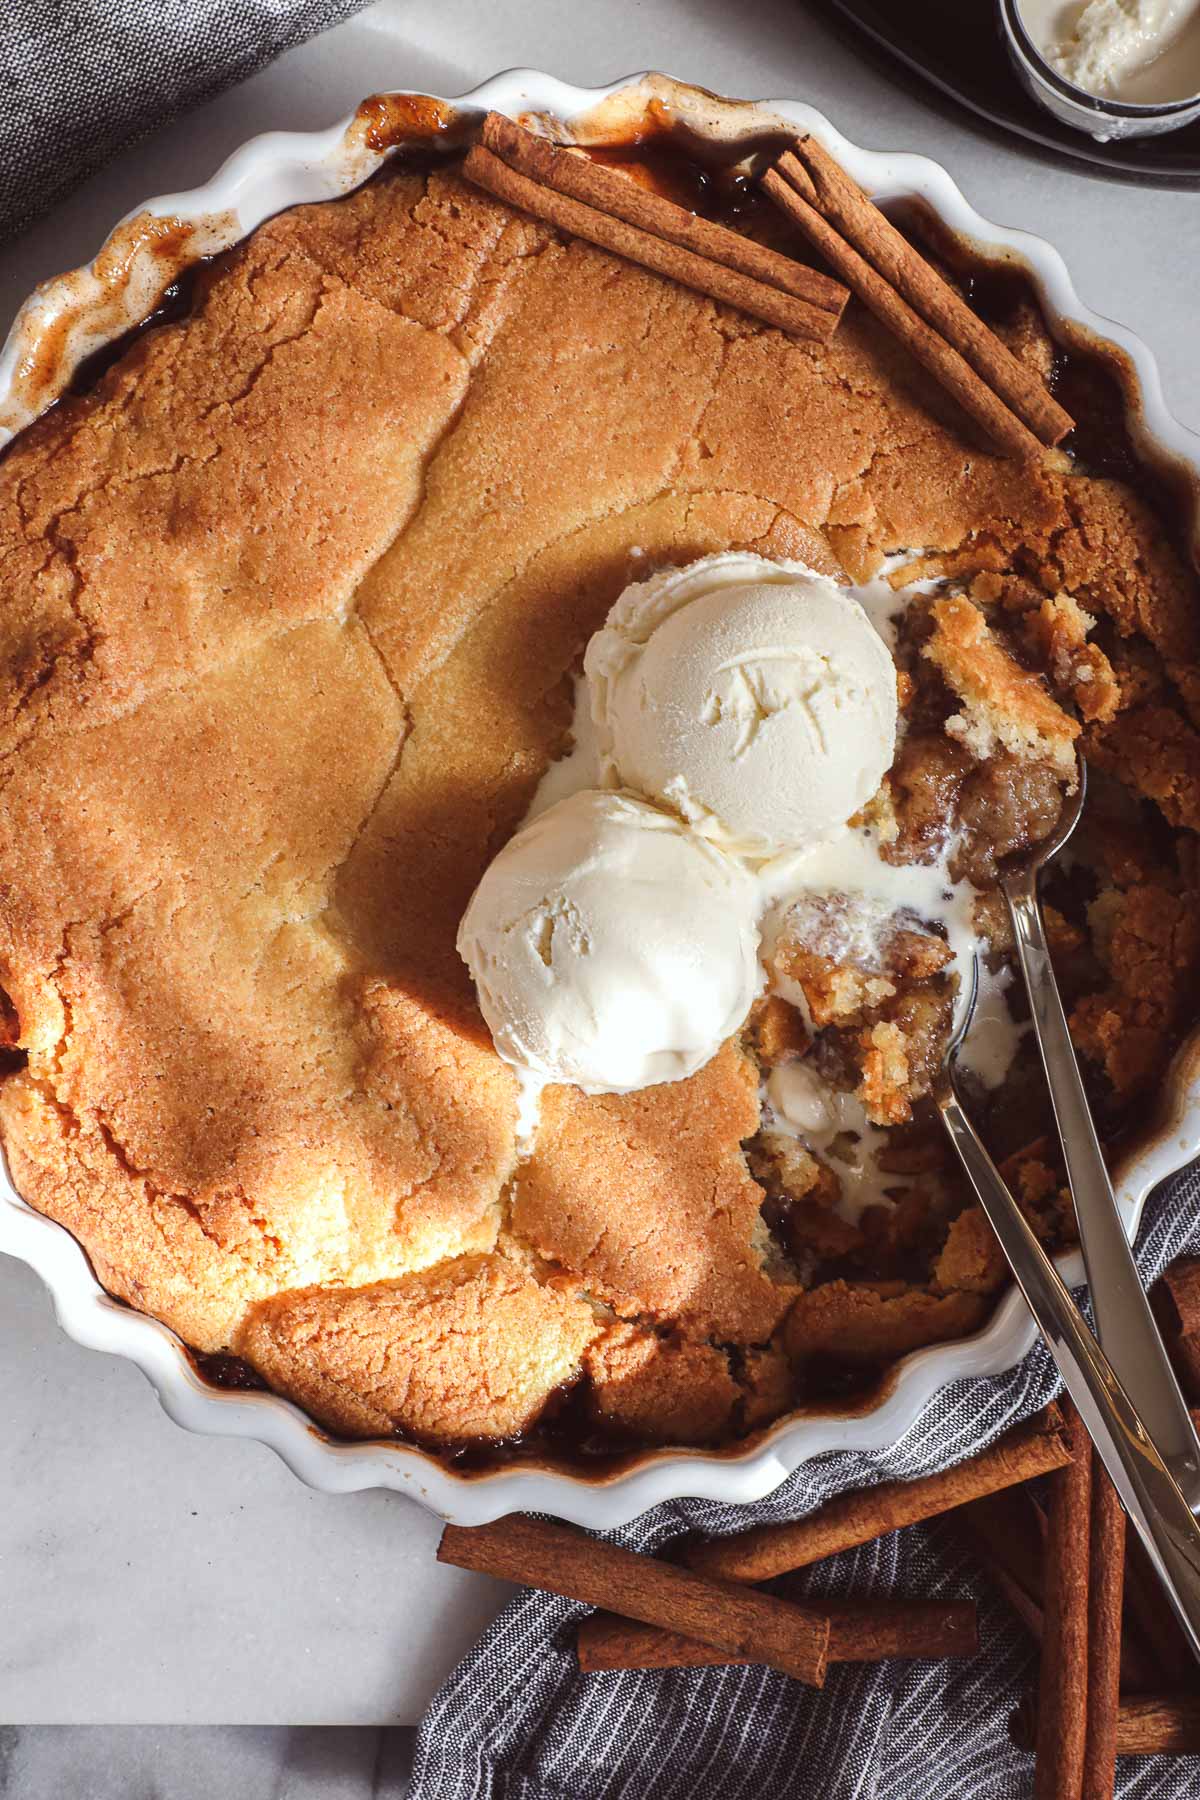
- Ice Cream: Also optional, but always a good choice for topping your Apple Crostata.
📝 How to Make this Easy Apple Crostata
Below are the step-by-step instructions and photos for how to make an Easy Apple Crostata.
*Note: The recipe card with instructions, ingredient list, and quantities is included further below these step-by-step photos.
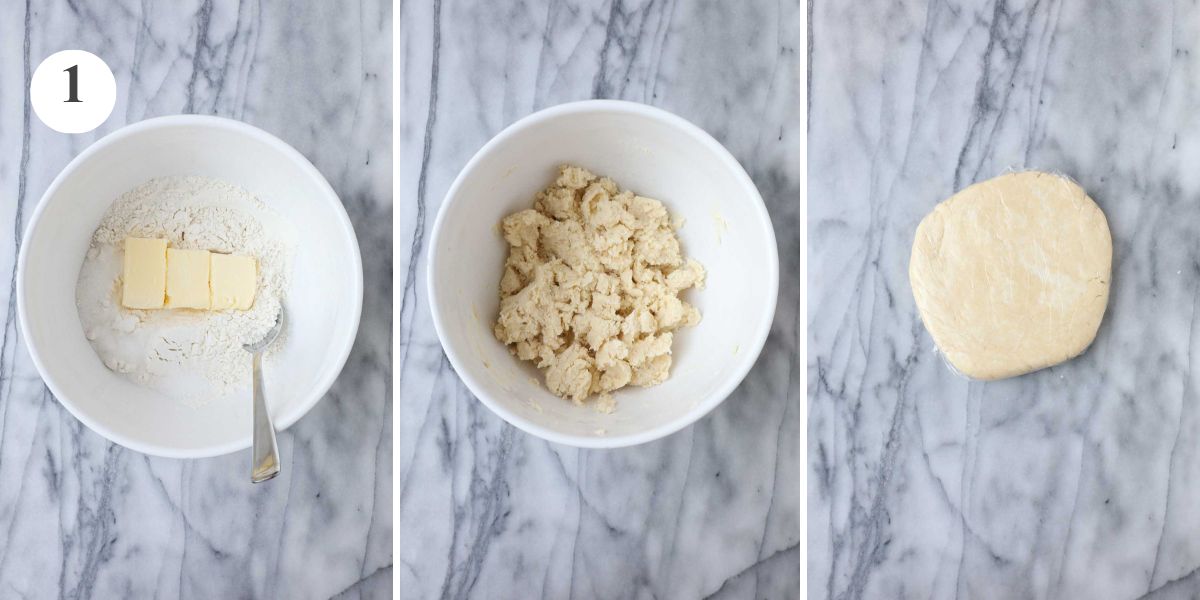
Step 1. Make the Crust: Add the flour, salt, sugar, and butter to a large mixing bowl. Combine with a spoon or your hands. Do not overwork the dough. Add the ice water starting with 4 tablespoons to enable the dough to come together. If needed add 1-2 more tablespoons of ice water.
Press the dough into a round disk and wrap it with plastic wrap. Refrigerate for 30 minutes to 1 hour or overnight.
Tip: Pressing the dough into a round flat disk, rather than a round ball, makes it easier to roll out the dough after it has chilled in the fridge.
Prep: Preheat the Oven to 375°F.
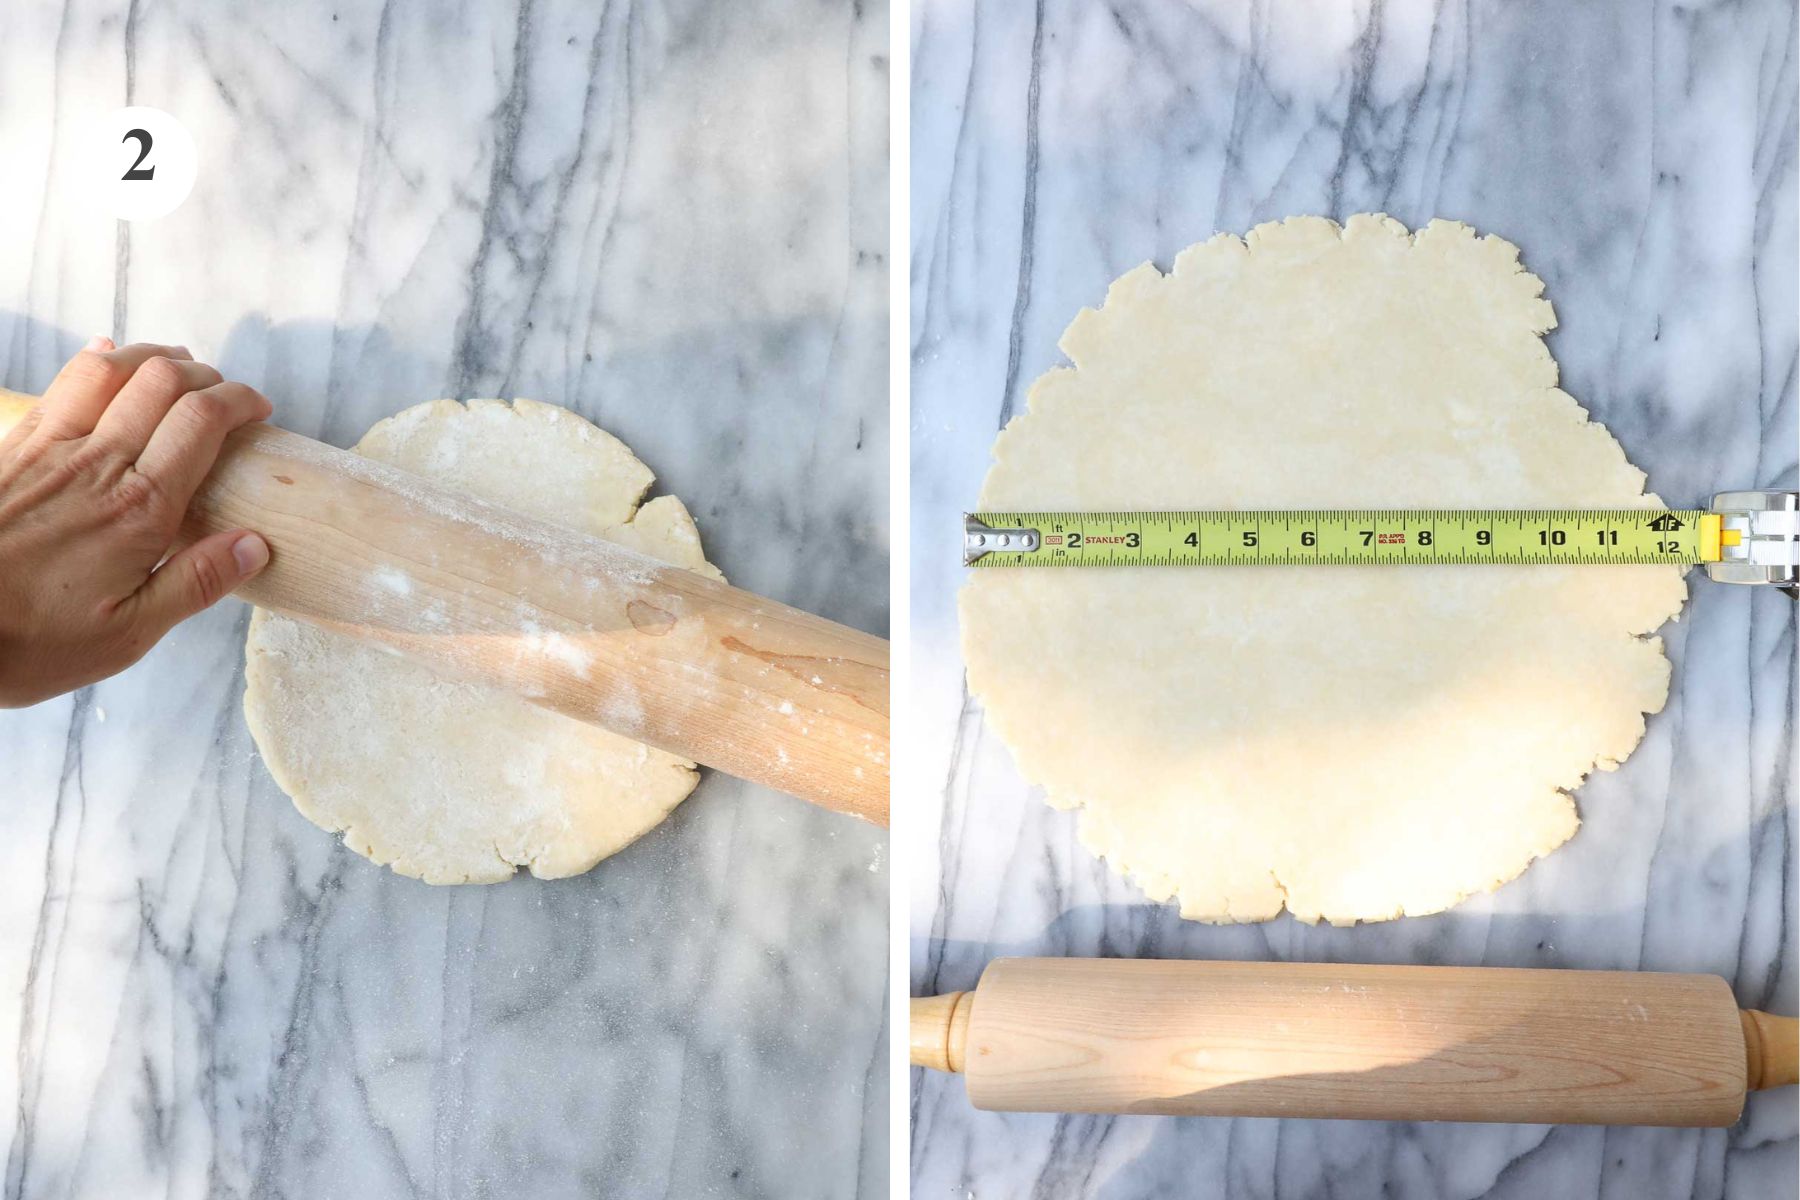
Step 2. Roll Out The Dough: Lightly flour a clean work surface. Roll out the dough with a rolling pin into a circle with a 12-inch diameter. Place the pie crust on a baking sheet.
If the work surface is lightly floured you should be able to use both hands under the dough to support it, pick it up, and move it. I find that easier than trying to wrap it around the rolling pin, or folding it into quarters and unfolding it.
Technique Tip: To roll out the dough start with the rolling pin in the center of the dough and roll outwards. Gently lift up the dough and turn it 90 degrees, (add a dusting of flour if needed) then roll again from the center outwards. Be sure not to press harder at the edges to avoid tapered edges. Rotate 90 degrees and repeat.
Picking up and rotating the dough ensures that the dough does not stick to the counter. Add more flour as needed to prevent sticking.

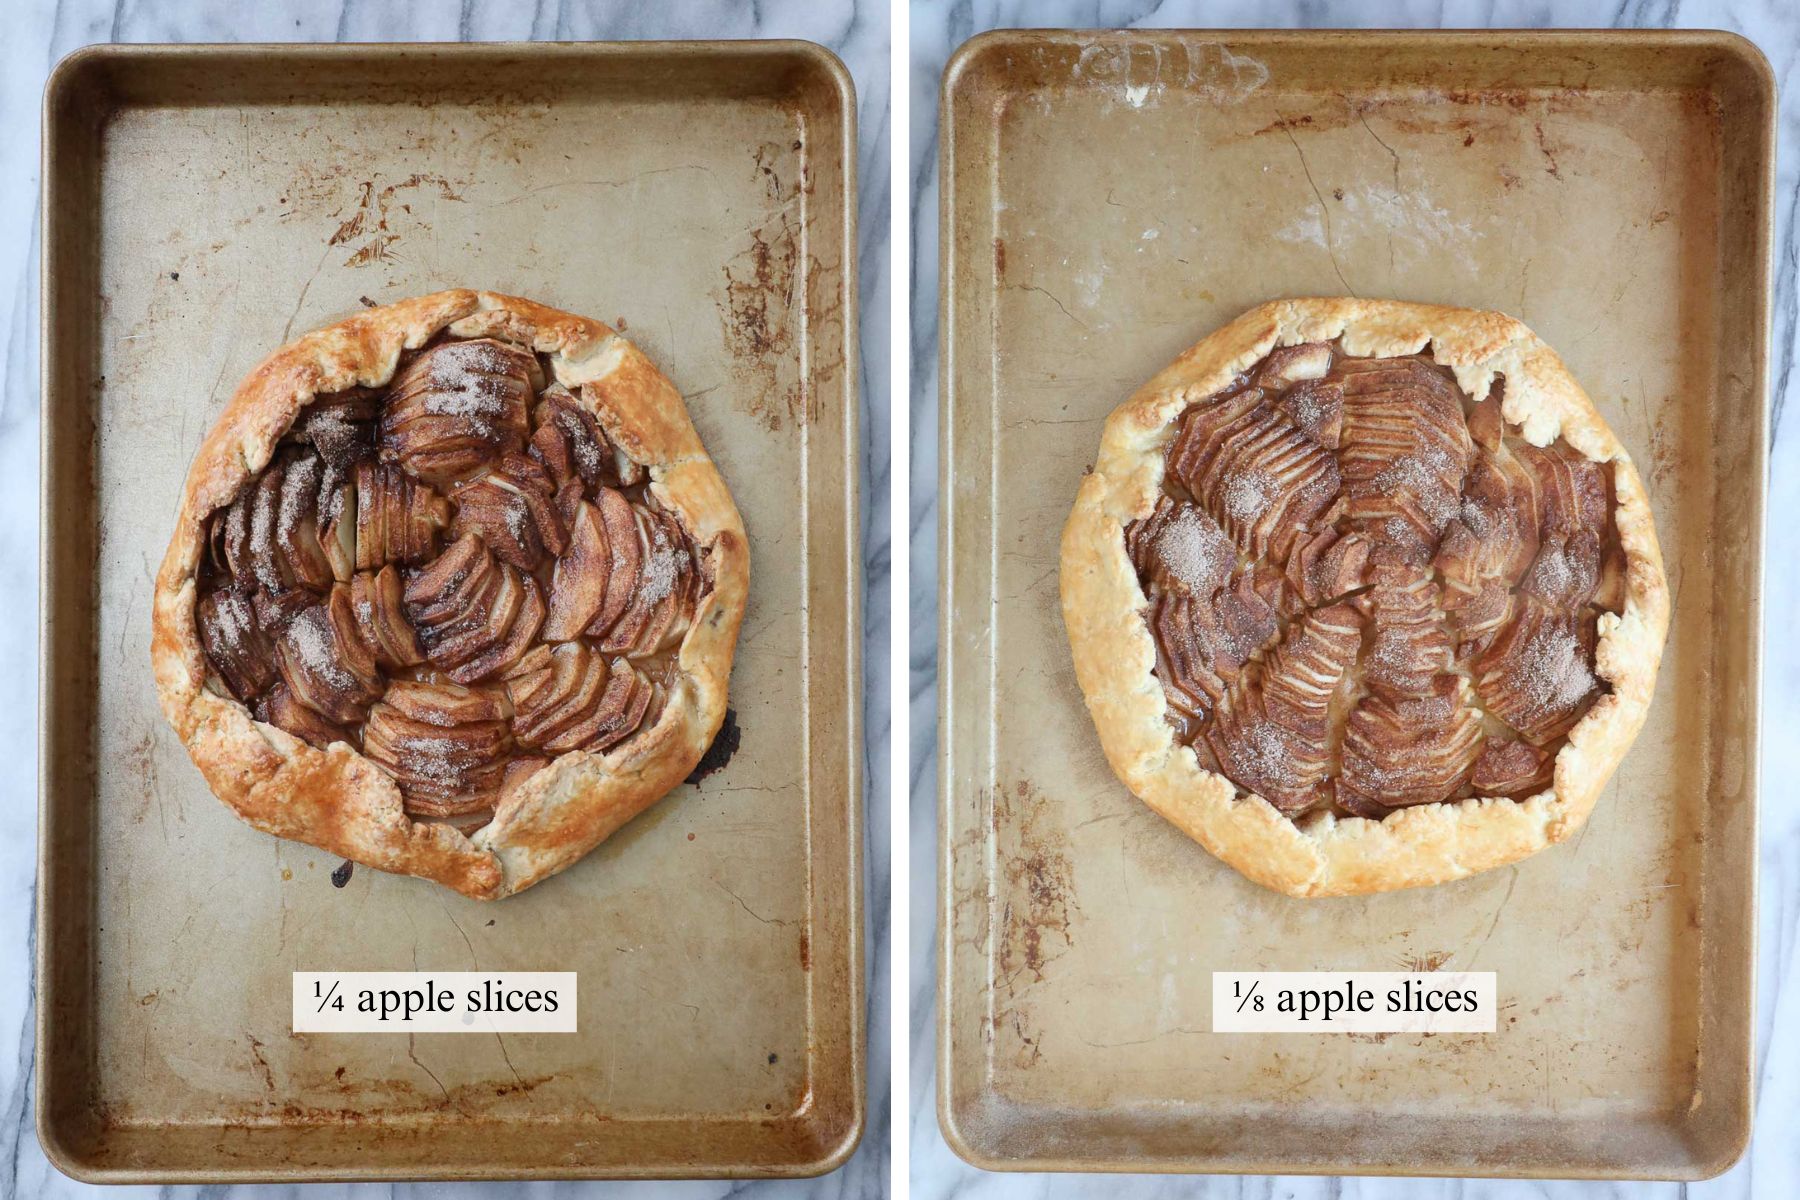
Step 3. Prep the Apples: Peel and thinly slice the apples to ⅛ of an inch thick. Press and gently flatten the groupings of apple slices as shown in the Step 3 photo above.
Tip: Slicing the apples very thin to ⅛ of an inch makes it easier to flatten out the apples and arrange them into the pie crust. If they are thicker (¼ inch) they will not flatten in layers and it will be more difficult to get the concentric semi-circle arrangement. See the photo below which demonstrates an apple crostata using ¼ inch sliced apples and one with ⅛ inch sliced apples.
Step 4. Arrange the Apples in the Crust: Arrange the apple slices in concentric semi-circles inside the pie crust, leaving 1½ inches of space on the outermost edge. Cut any remaining apples in half to fill any gaps in the arrangement.
Tip: Be sure to move the pie crust to the baking sheet before assembling the apples on top. It will be very difficult to move it once the apples are placed in the pie crust.

Step 5. Sprinkle with Cinnamon Sugar: In a small dish combine the granulated sugar and cinnamon. Sprinkle the cinnamon sugar mixture over the apples.
Step 6. Fold the Crust: Fold the edges of the crust over the apple slices.
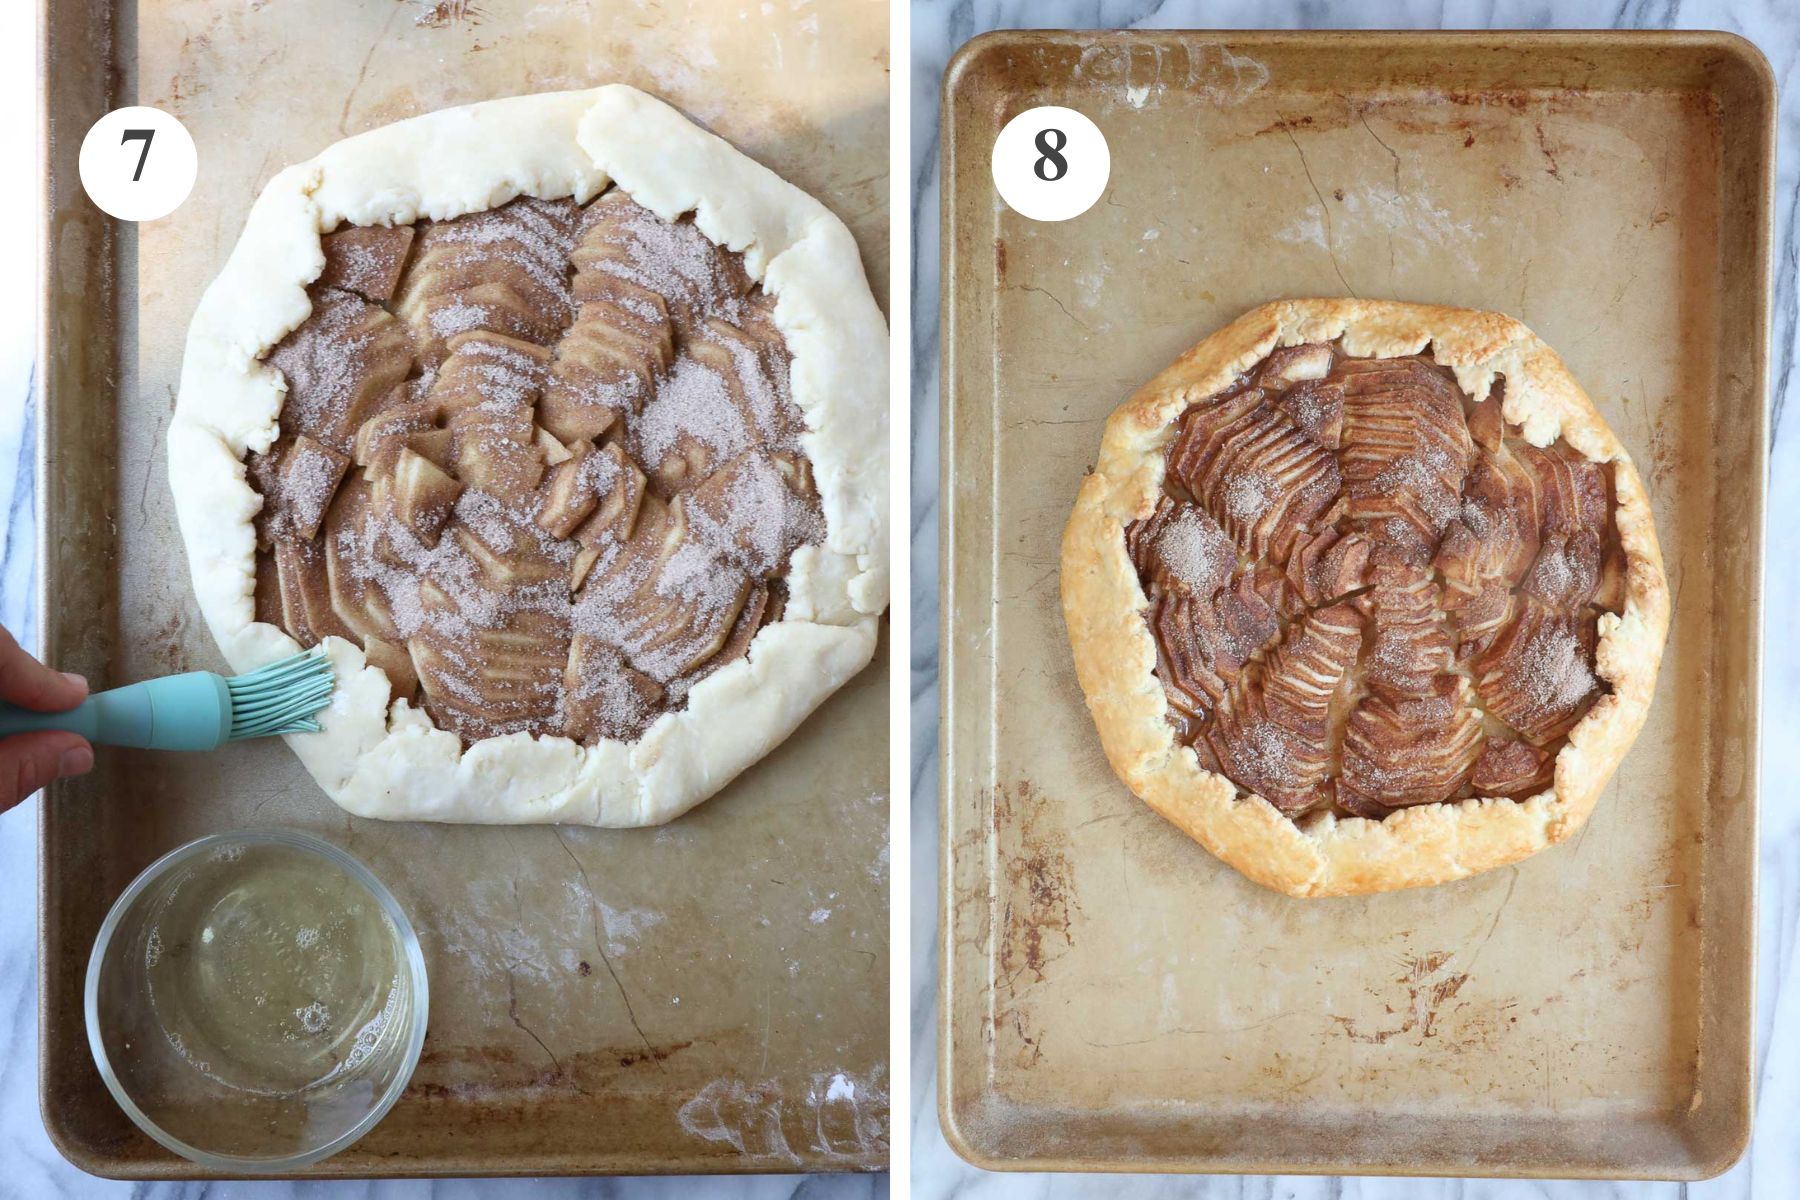
Step 7. Egg Wash: Combine the egg white and 1 teaspoon of water. Brush the edges of the crust with the egg wash.
Tip: Do not allow the egg wash to drip onto the baking sheet. This will cause the crust to stick to the baking sheet, making it more difficult to move or cut the crostata when it is fully baked.
Step 8. Bake: Bake the Apple Crostata at 375°F for 45 minutes or until the crust becomes golden brown. Remove and allow to cool. Serve dusted with powdered sugar, or with a scoop of vanilla ice cream.

🍴 How to Serve, Reheat, and Freeze
- To Serve: Serve warm with ice cream or dusted with powdered sugar. Or serve at room temperature if that makes life easier.
- To Reheat: To reheat the crostata bake it in the oven at 350°F for 10-15 minutes.
- To Freeze: Wrap the crostata tightly in plastic wrap, or place it in a gallon-sized freezer bag, pressing as much air out of the bag as possible. Lay flat in the freezer and store it for up to 3 months.
✏️ Apple Crostata FAQs
Yes, of course. Make the entire Apple Crostata ahead of time and reheat it in the oven for 15 minutes until warmed through. Then serve with powdered sugar or ice cream!
In general, you want the dough to be cold when rolling it out. However, this is meant to be an easy-to-make dessert. If its too hard to roll out, you can wait 10-15 minutes and roll it out, or bang on the edges of the dough with the heel of your hand, which will soften the dough slightly.
You can tailor this dessert to whatever spices and amounts that you enjoy. I personally do not like nutmeg in an Apple Crostata or an Apple Pie. I find even a small amount is overpowering and takes away from the flavor of the apples, but make any adjustments that work for you!
Yes, absolutely. This would be a great tool to make it even easier to put together the dough. If you use a food processor, use cold butter cut into cubes as the food processor is doing all the work.
For More Apple Desserts, You May Love These:


If you tried this Easy Apple Crostata or any other recipe on my website, please leave a 🌟 star rating and let me know how it went in the 📝 comments below. I'd love to hear from you!

Easy Apple Crostata
Ingredients
Pie Crust
- 1 ½ cups flour
- ¾ teaspoon salt
- 1 tablespoon granulated sugar
- 9 tablespoon butter, softened
- 5-6 tablespoon ice water
Pie Filling
- 3 granny smith apples
- ¼ cup granulated sugar
- 1 teaspoon cinnamon
Egg Wash
- 1 egg white
- 1 teaspoon water
Topping
- powdered sugar, optional
- vanilla ice cream, optional
Instructions
- In a large bowl, combine butter, flour, salt, sugar, and ice water with a spoon. Shape into a flat disk and wrap the pie crust in plastic wrap. Refrigerate for 1 hour or overnight.
- Preheat the oven to 375°F.
- Peel and thinly slice the apples to ⅛ inch thick. As you are slicing the apples leave the slices together so that you can arrange them neatly in the crust.
- Sprinkle a clean work surface with flour. Roll out the pie dough into a circle approximately 12 inches in diameter, sprinkling with flour as necessary to prevent the dough from sticking.
- Layer in the apple slices such that there is a 1 ½ inch margin of crust left.
- In a small bowl combine the granulated sugar and cinnamon. Sprinkle over the apple slices.
- Fold the crust in and over the edge of the apple slices.
- In a small bowl whisk together the egg white and 1 teaspoon water. Using a pastry brush, brush the egg white mixture over the outer crust of the galette.
- Bake for 45 minutes, or until the crust becomes golden brown.
- Allow to cool slightly, then serve warm. Dust with powdered sugar or serve with ice cream (optional).


Leave a Reply