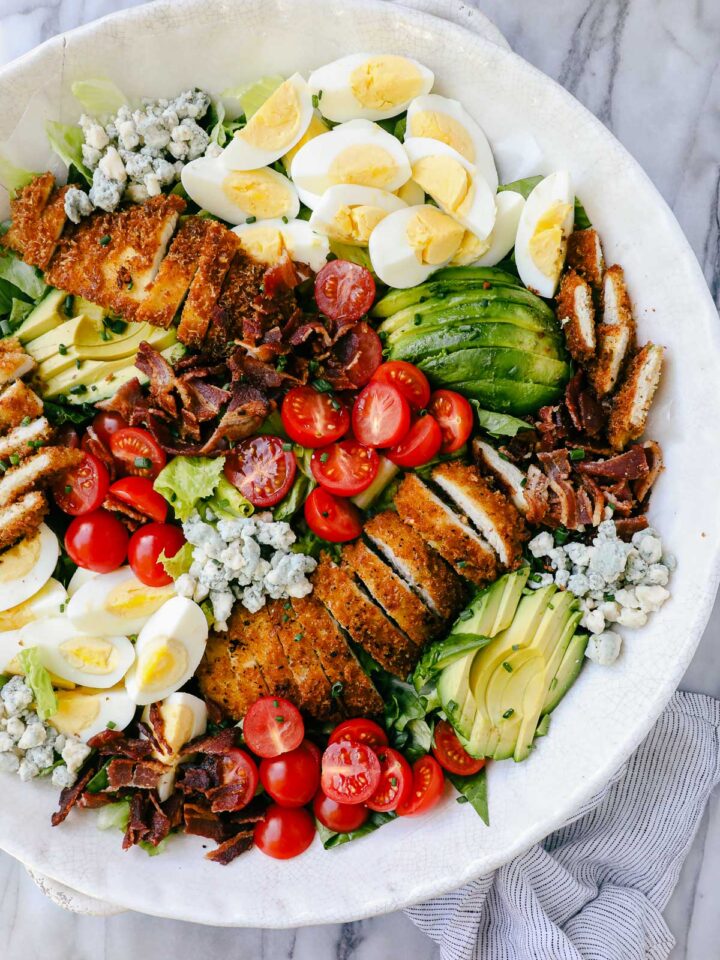
This Caesar Salad with Crispy Chicken is both light and hearty with fresh crisp romaine lettuce topped with panko and parmesan crusted chicken for a lunch or dinner that hits both your greens and your protein in one easy-to-put-together meal.
This crispy chicken is the number one dinner in our house (especially with many years of honing the recipe and a few tricks). It’s incredibly versatile, and we use it all the time in recipes like Crispy Lemon Chicken and Hot Honey Chicken.
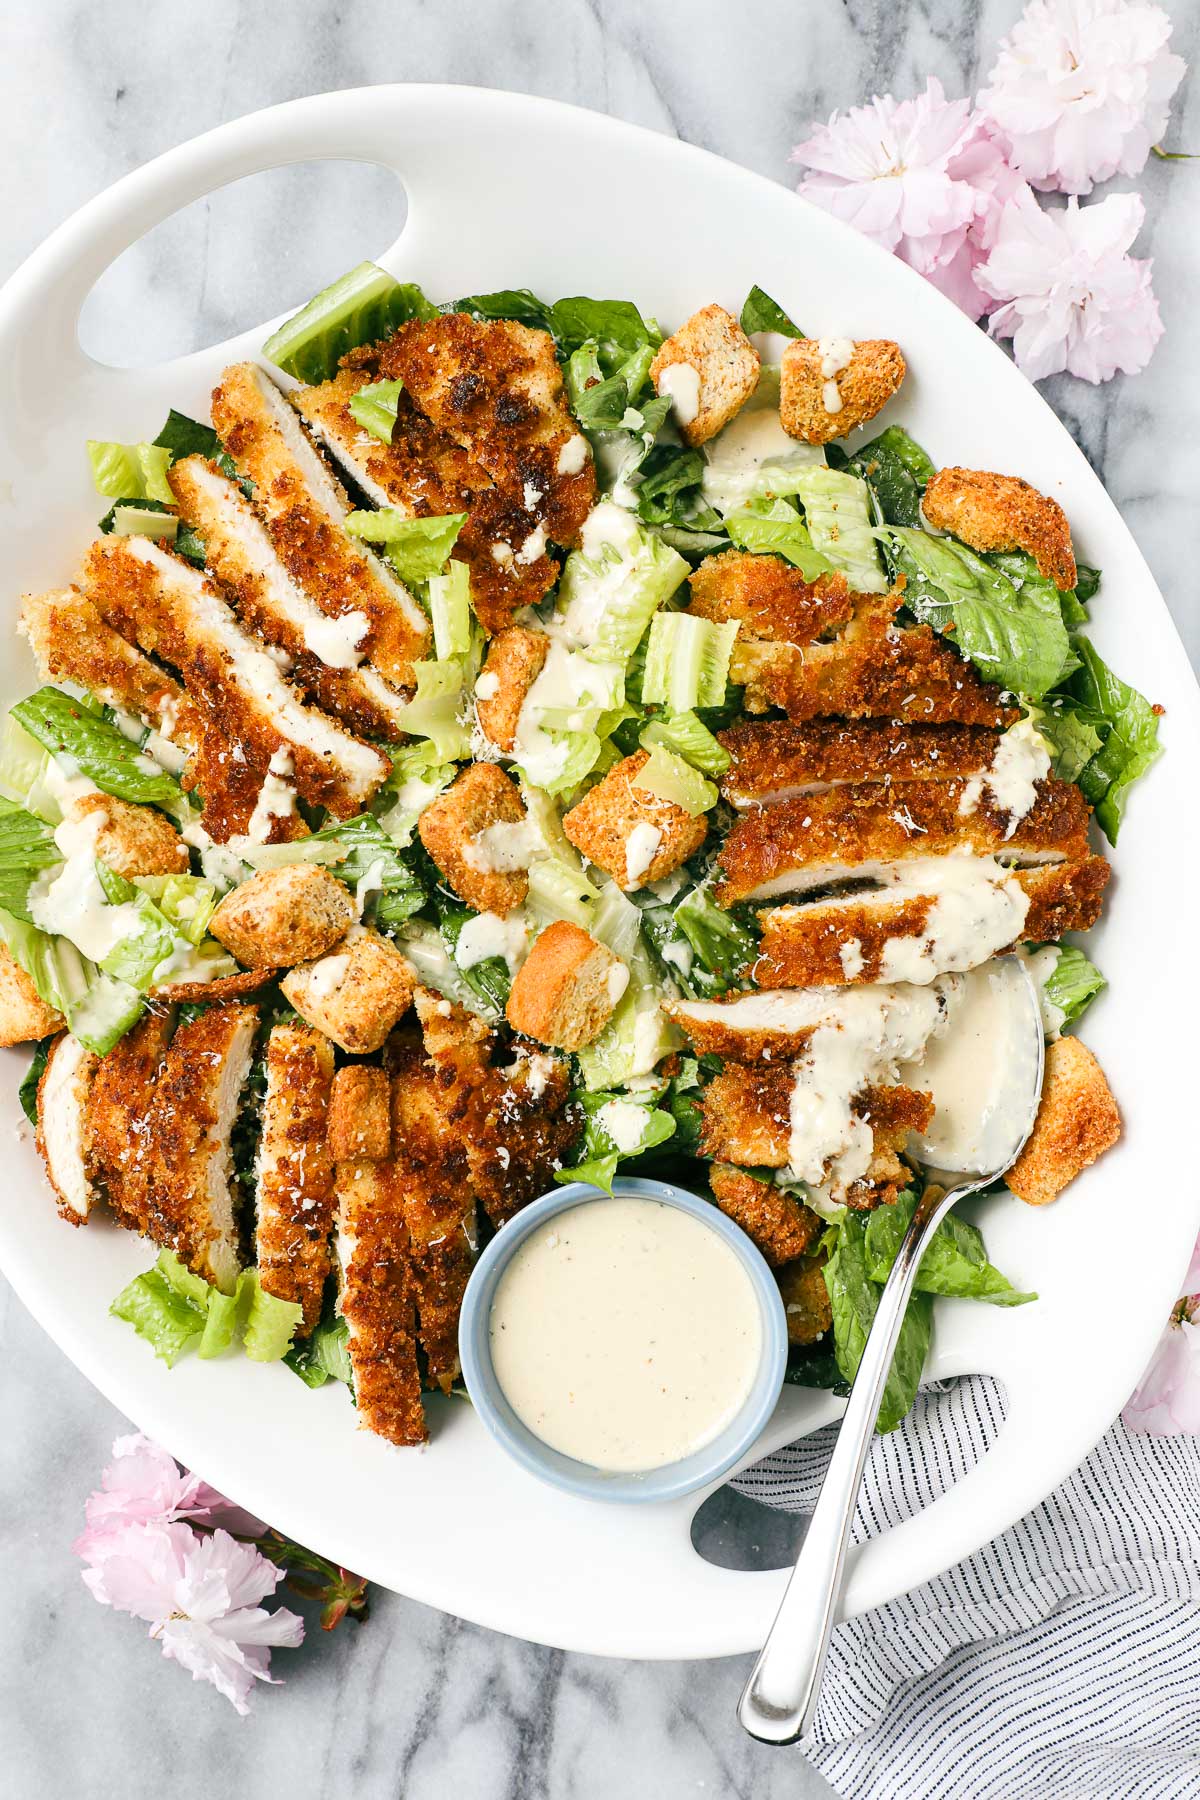
Chicken and Caesar salad are a classic pairing, but this panko Parmesan crusted crispy chicken takes it up a notch.
The Caesar dressing avoids anchovies, which are not original to the recipe developed by Caesar Cardini and popularized by Julia Child. It uses mayo instead of egg, and adds depth of flavor with freshly grated parmesan cheese, lemon, extra virgin olive oil, and garlic.
This recipe takes about 40 minutes and is great for leftovers.
Variations and Notes
- Chicken Variations: Chicken tenders or boneless skinless chicken thighs can be substituted for chicken breast, though chicken breast is the best cut for this recipe.
- Breading: Panko is the best choice here, but you can use Italian bread crumbs or crushed unsweetened organic cornflakes in a pinch.
- Great Family Meal: The crispy chicken is super kid-friendly, and the crunchy romaine lettuce with creamy dressing is a salad that a lot of kids happily eat. Double the chicken and have extra for leftovers, which you can turn into other dishes like Crispy Bruschetta Chicken.
- Salad on Top of Chicken: Adding the salad on top of the chicken has had a viral moment (upside down chicken Caesar salad, or inverse chicken Caesar salad). You can certainly eat it this way too, but be careful that the salad doesn't sit on top of the crispy chicken too long, or it will not stay crispy.
Ingredients
Below are the ingredients needed to make this Caesar Salad with Crispy Chicken.

Caesar Dressing
- Garlic: Slice the garlic in half, remove the center stem, then mince. Removing the center stem reduces the intensity of the garlic flavor.
- Mayo: Use real mayo, I prefer Hellman’s, but I’ve had success with store brands like Trader Joe’s. I do not recommend using mayo made with avocado oil as it has an off-putting taste when used in larger quantities. You can substitute a portion of the mayo with plain full-fat Greek yogurt. If using Greek yogurt, reduce the amount of lemon juice and Worcestershire sauce.
- Extra Virgin Olive Oil: Use a good quality extra virgin olive oil, one that is fairly neutral in flavor. If you need a place to start, look for extra virgin olive oil at Costco or Trader Joe’s.
- Lemon Juice: The acidity helps to balance the intensity of the mayo.
- Dijon mustard: Adds a tangy flavor.
- Worcestershire: Adds savory and salty notes.
- Parmesan: Key in this recipe, adds savory flavor. You can use Parmigiano Reggiano, which is imported from Italy (it’s like champagne from France, but Parmesan from specific regions in Italy), but I’ve used more mild parmesan in this recipe, which I really enjoy and may be more kid friendly.
- Salt and Pepper: Both are important, but only used in small quantities.
Crispy Chicken
- Bread Crumbs: I strongly recommend using panko over regular bread crumbs as the bigger crumbs soak up the extra virgin olive oil in the pan and result in a crispier chicken.
- Parmesan: Use the same Parmesan from the dressing above. I recommend getting a wedge and grating it yourself to avoid any anti-caking agents found in pre-grated cheese.
- Salt: A small amount to bring out flavor.
- Eggs: Use large eggs, pasture-raised if possible. Start with 2 and add a 3rd one if necessary.
- Chicken Breast: Use good-quality organic chicken if possible. Compare organic chicken with regular store-bought chicken side by side, and you will instantly tell the difference.
- Extra Virgin Olive Oil: Like in the dressing above, use a good quality extra virgin olive oil. The flavor of the olive oil makes a big difference in the crispy chicken. I do not recommend using vegetable or canola oil, which leaves a bad aftertaste. You can use avocado oil, but it does not impart the same satisfying flavor as extra virgin olive oil.
Salad
- Romaine: Use one large head of romaine lettuce.
- Croutons: For added crunch, choose any variety that you like, or use homemade Focaccia Croutons.
How to Make this Easy Caesar Salad with Crispy Chicken
Below are the step-by-step instructions and photos for how to make this Caesar Salad with Crispy Chicken.
*Note: The recipe card with instructions, ingredient list, and quantities is included further below these step-by-step photos.
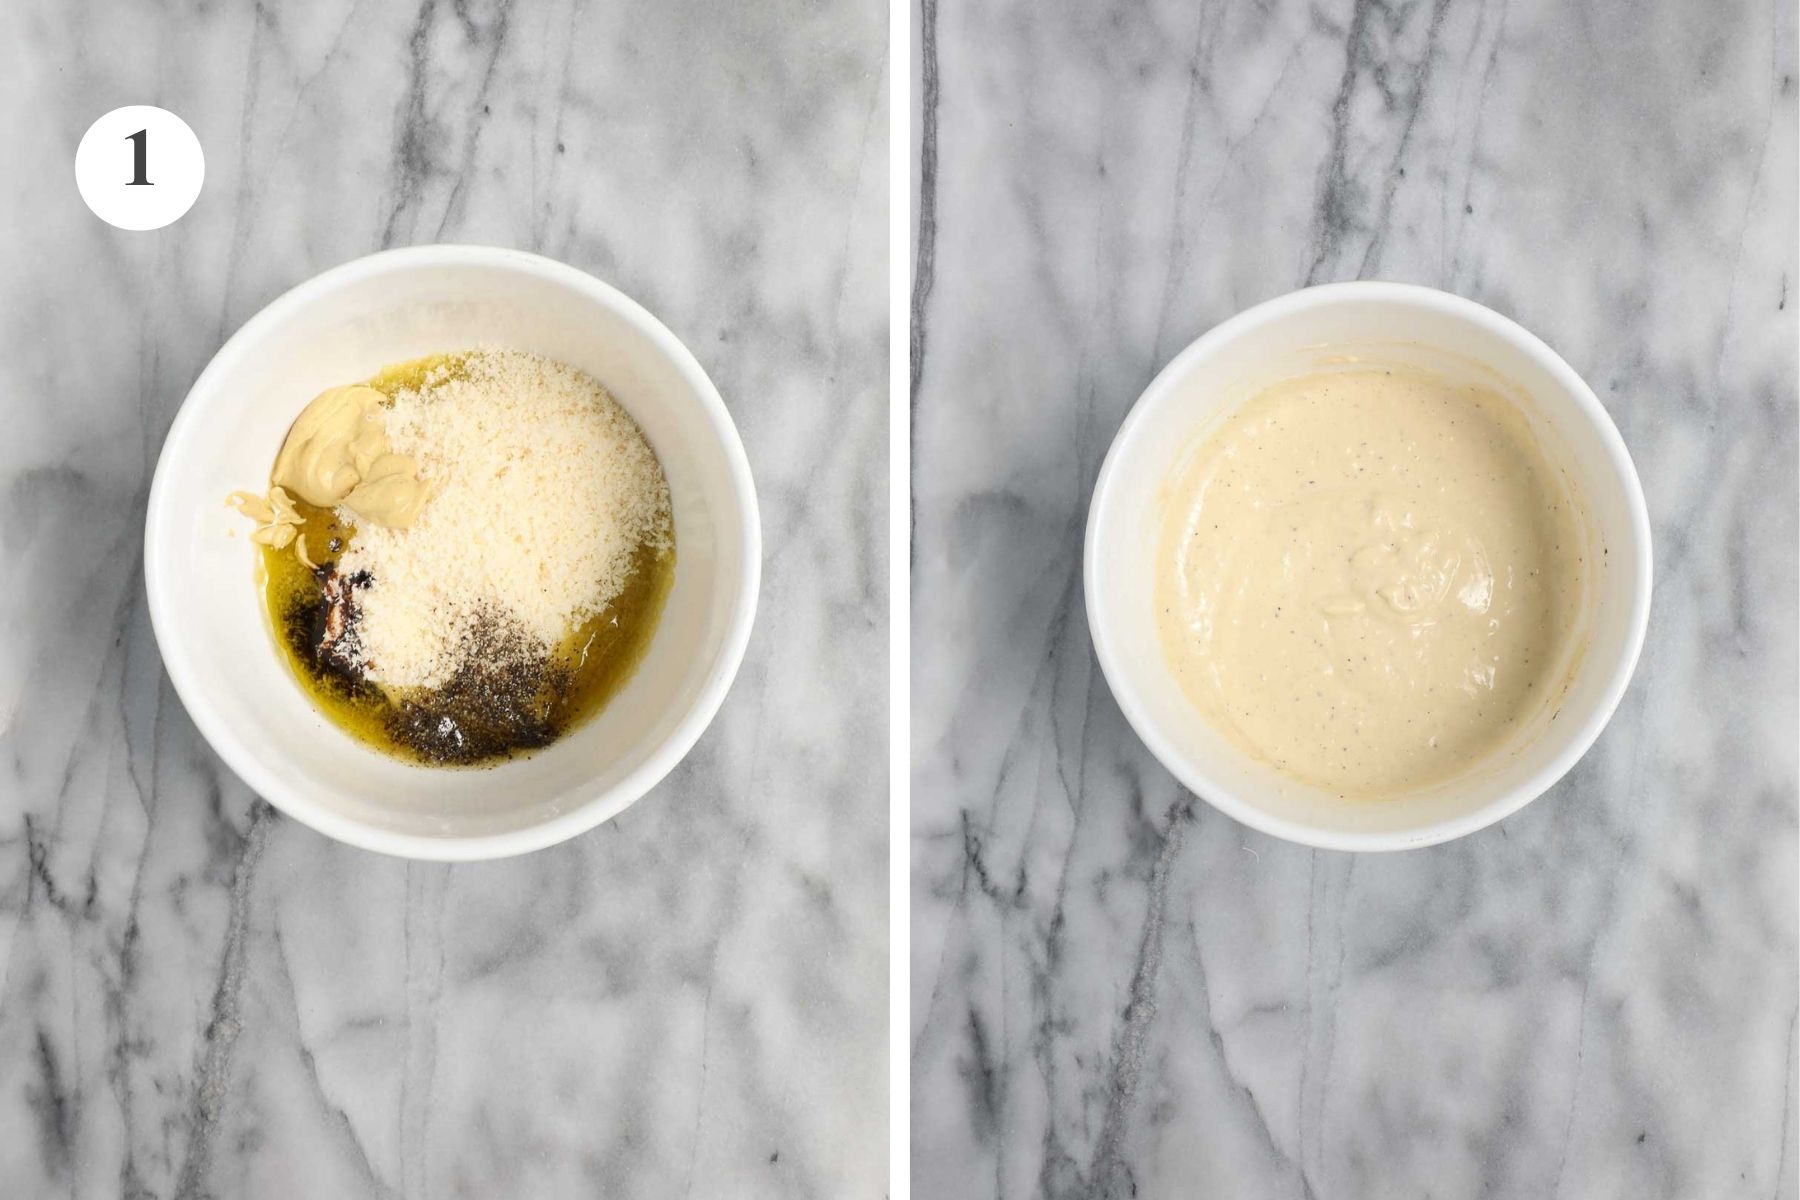
Step 1. Make the Caesar Dressing: In a medium bowl, combine the minced garlic, mayo, extra virgin olive oil, lemon juice, Dijon mustard, Worcestershire sauce, grated Parmesan cheese, salt, and black pepper. Cover and refrigerate while preparing the chicken.
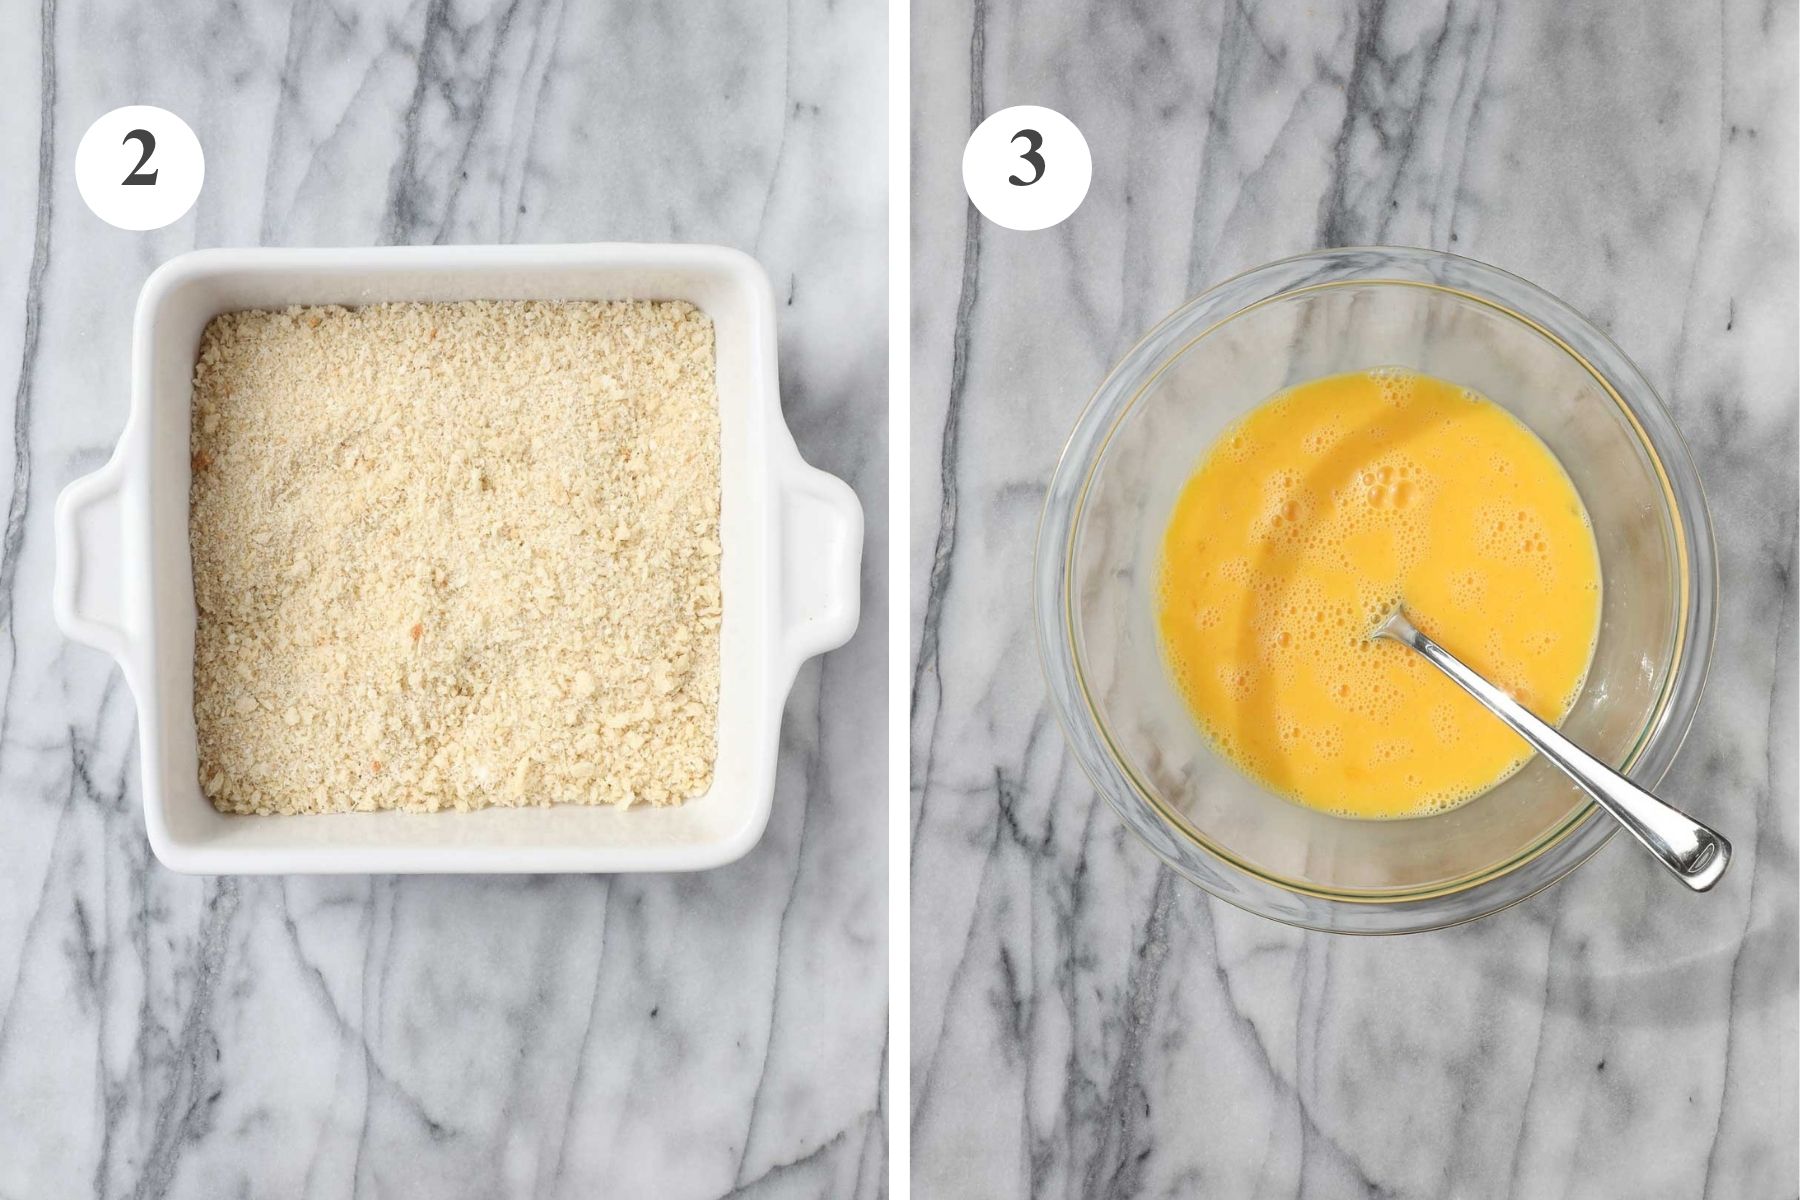
Step 2. Panko Mixture: In a medium flat bottom dish, add the panko, grated Parmesan cheese, and salt, and stir to combine.
Step 3. Egg Mixture: In a medium bowl, whisk the eggs.
Tip: Start with 2 large eggs and add a third if you start to run low once cooking the chicken.
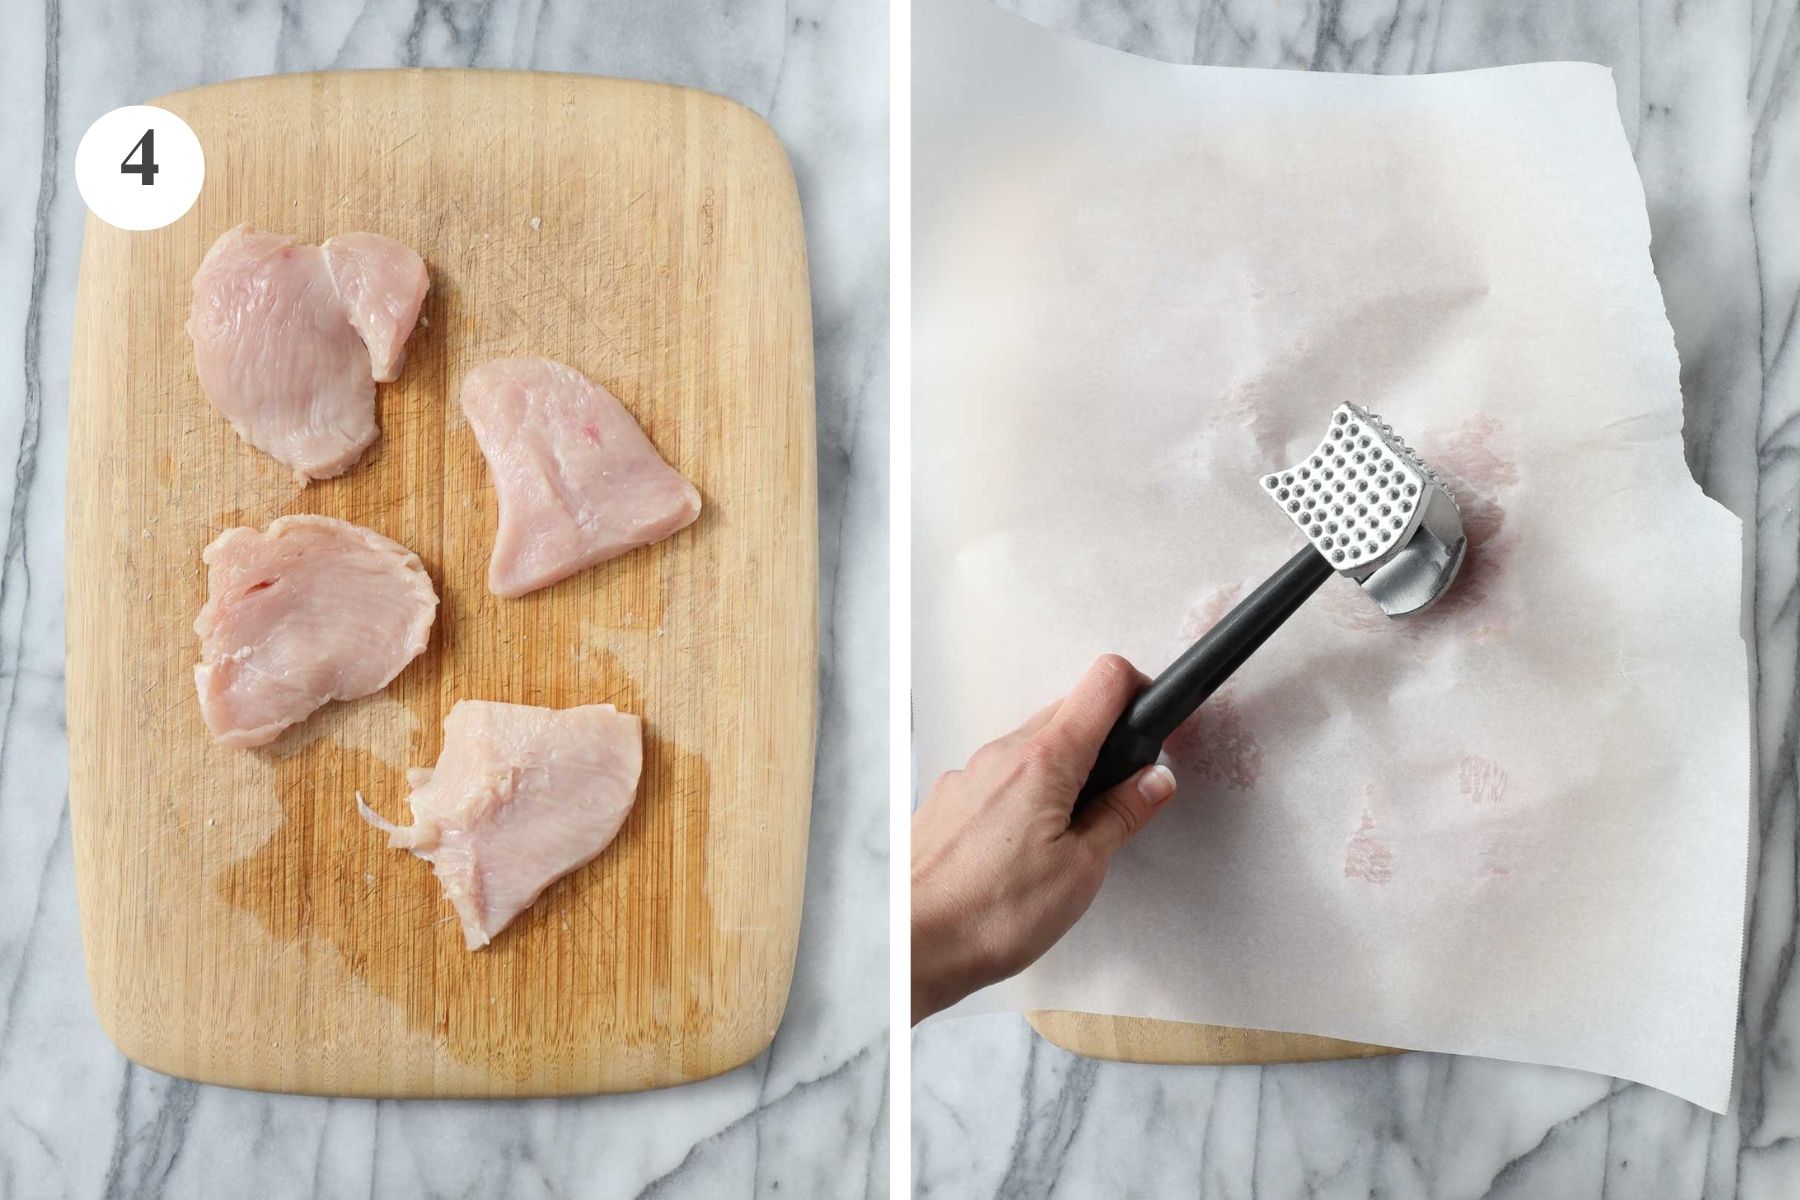
Step 4. Cut and Tenderize the Chicken: Cut the chicken in half horizontally to create two chicken cutlets. Then cut these two cutlets in half to make four smaller cutlets. This smaller size makes it easier to tenderize, dip in the egg and panko mixture, and maneuver in the pan.
Place each piece of chicken on a cutting board, cover with parchment paper, and use a meat hammer to tenderize the chicken, working until each piece of chicken is 1½ times the size of the original and an even thickness.
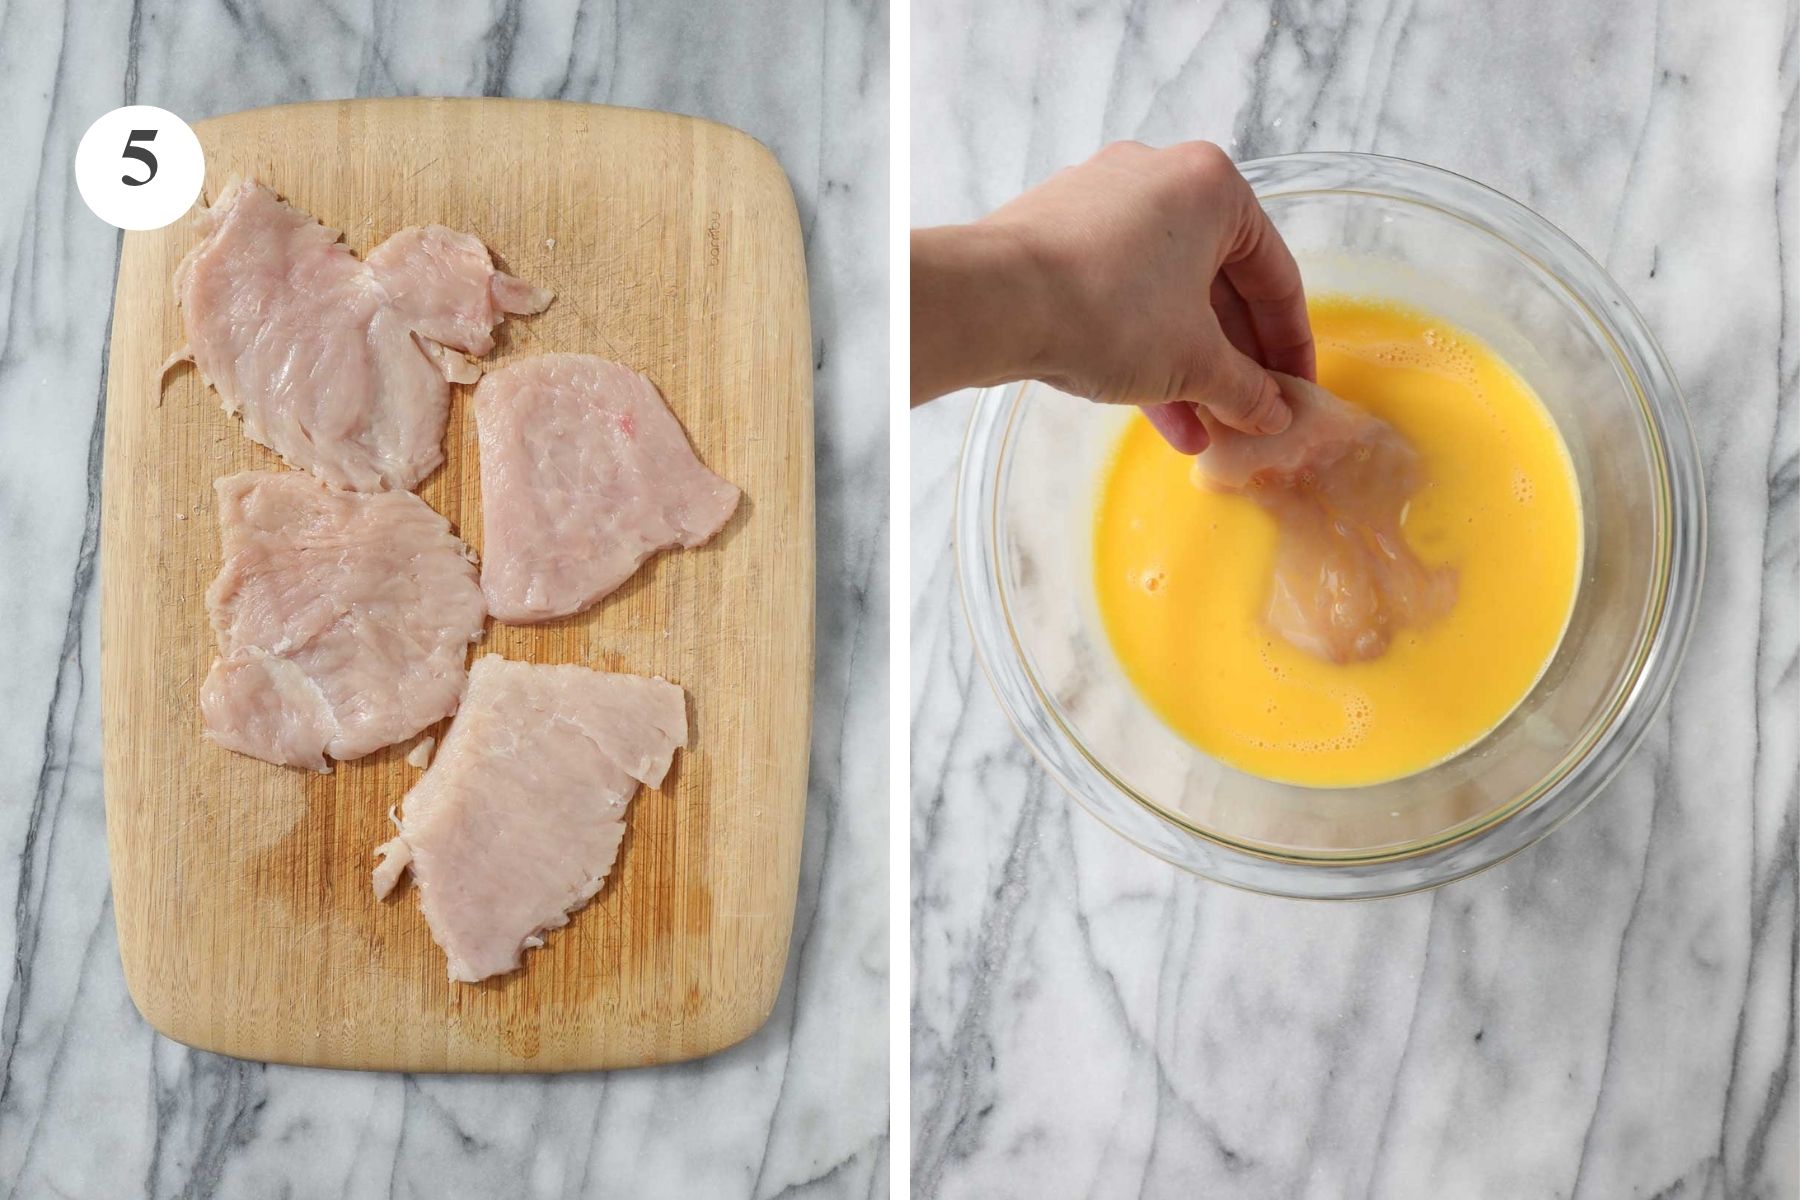
Step 5. Dip in Egg Mixture: Dip the chicken in the egg mixture, allowing the excess to drip off back into the dish.
Tip: You do not need to coat the chicken in flour before dipping it in the egg mixture. This actually makes it harder for the egg to coat the chicken, and it does not impact the taste. It is an unnecessary step.

Step 6. Coat in Panko Mixture: Place the chicken in the panko mixture. Then flip it upside down. Pick up extra bread crumbs from the dish and press them firmly into the chicken, coating both sides.
Tip: This extra step of adding additional bread crumb mixture and pressing it into the chicken with your fingers is what makes the chicken extra crispy.
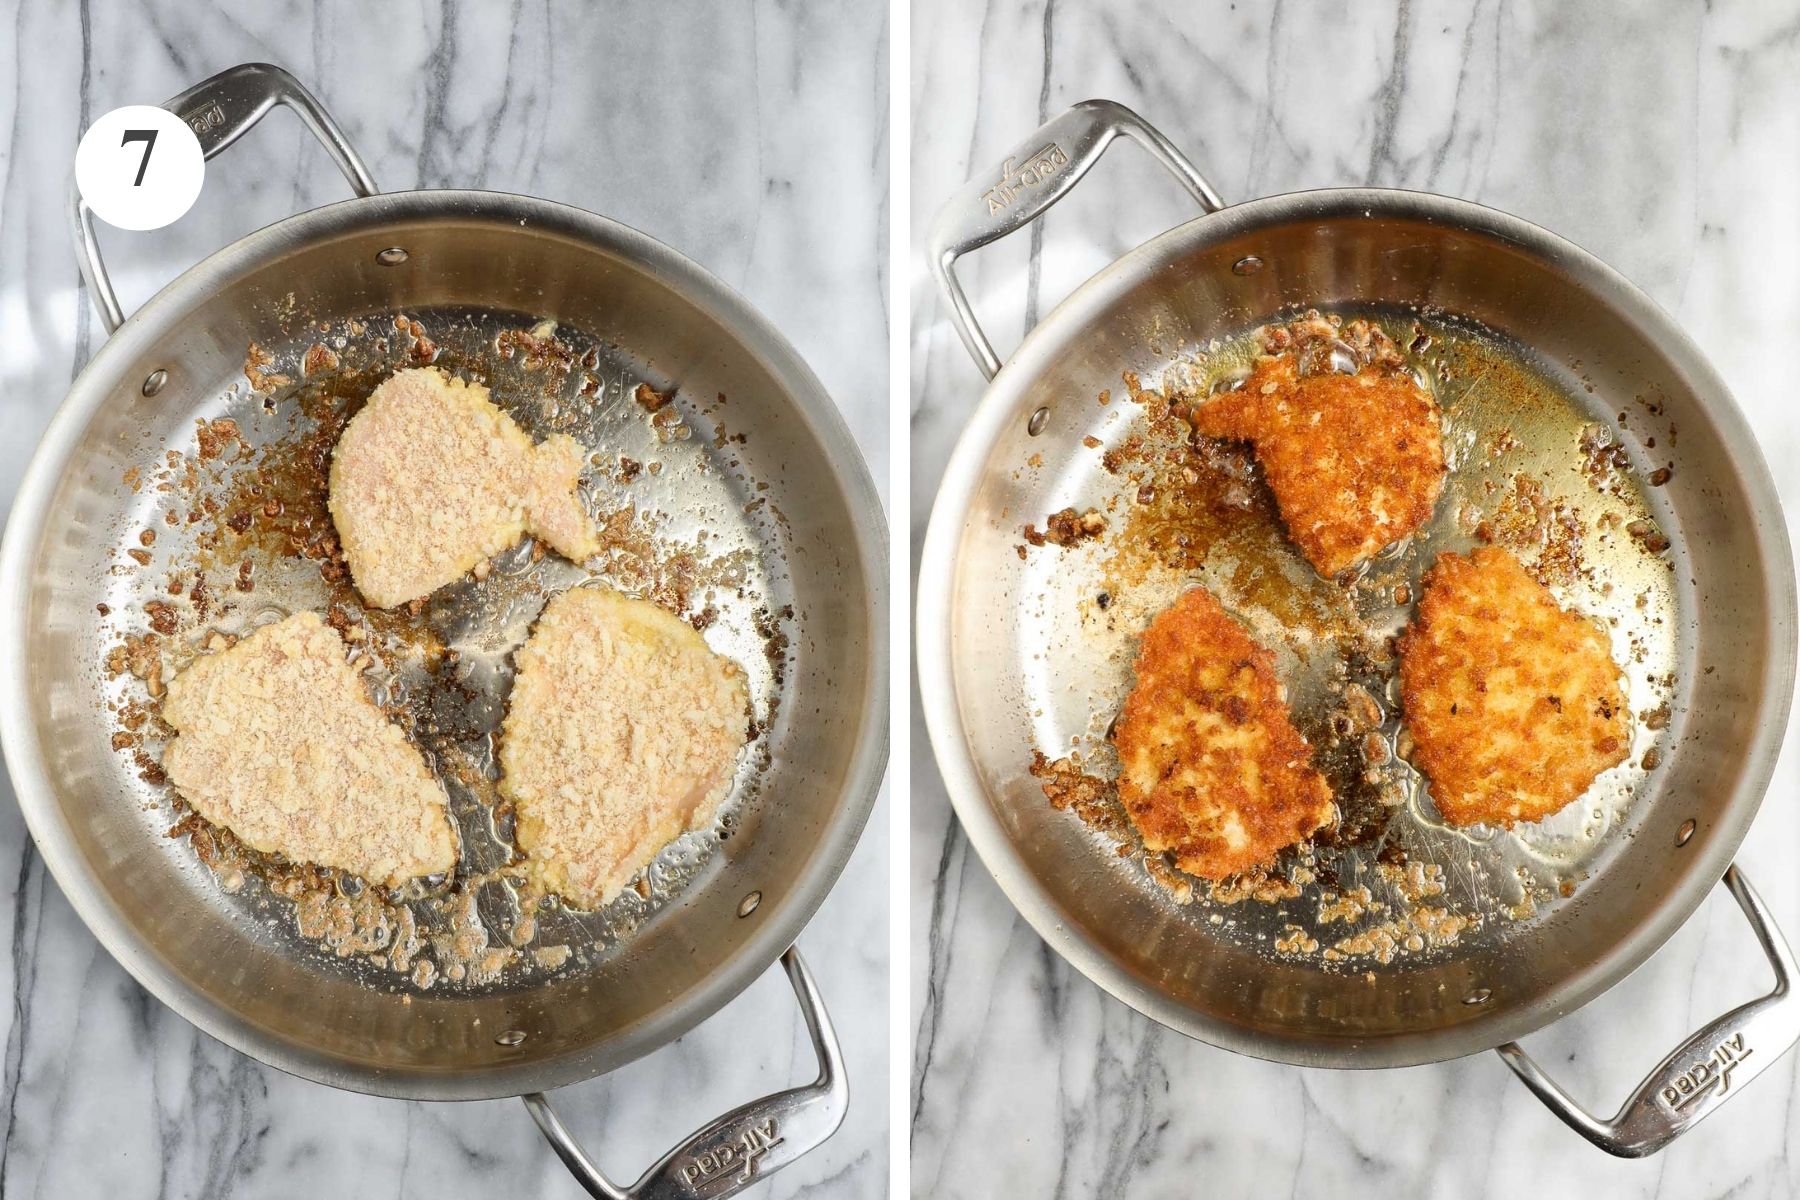
Step 7. Pan Fry: Bring a large sauté pan to just under medium heat (think #4 out of 10). Add two tablespoons of olive oil or enough to coat the bottom of the pan. Add the chicken and cook undisturbed for 3-5 minutes or until golden brown on the bottom.
Flip and cook for 2-4 more minutes until golden brown and the chicken is fully cooked. Continue working in batches, adding olive oil as needed. Do not overcrowd the pan, as this will lead to steaming rather than the chicken getting crispy.
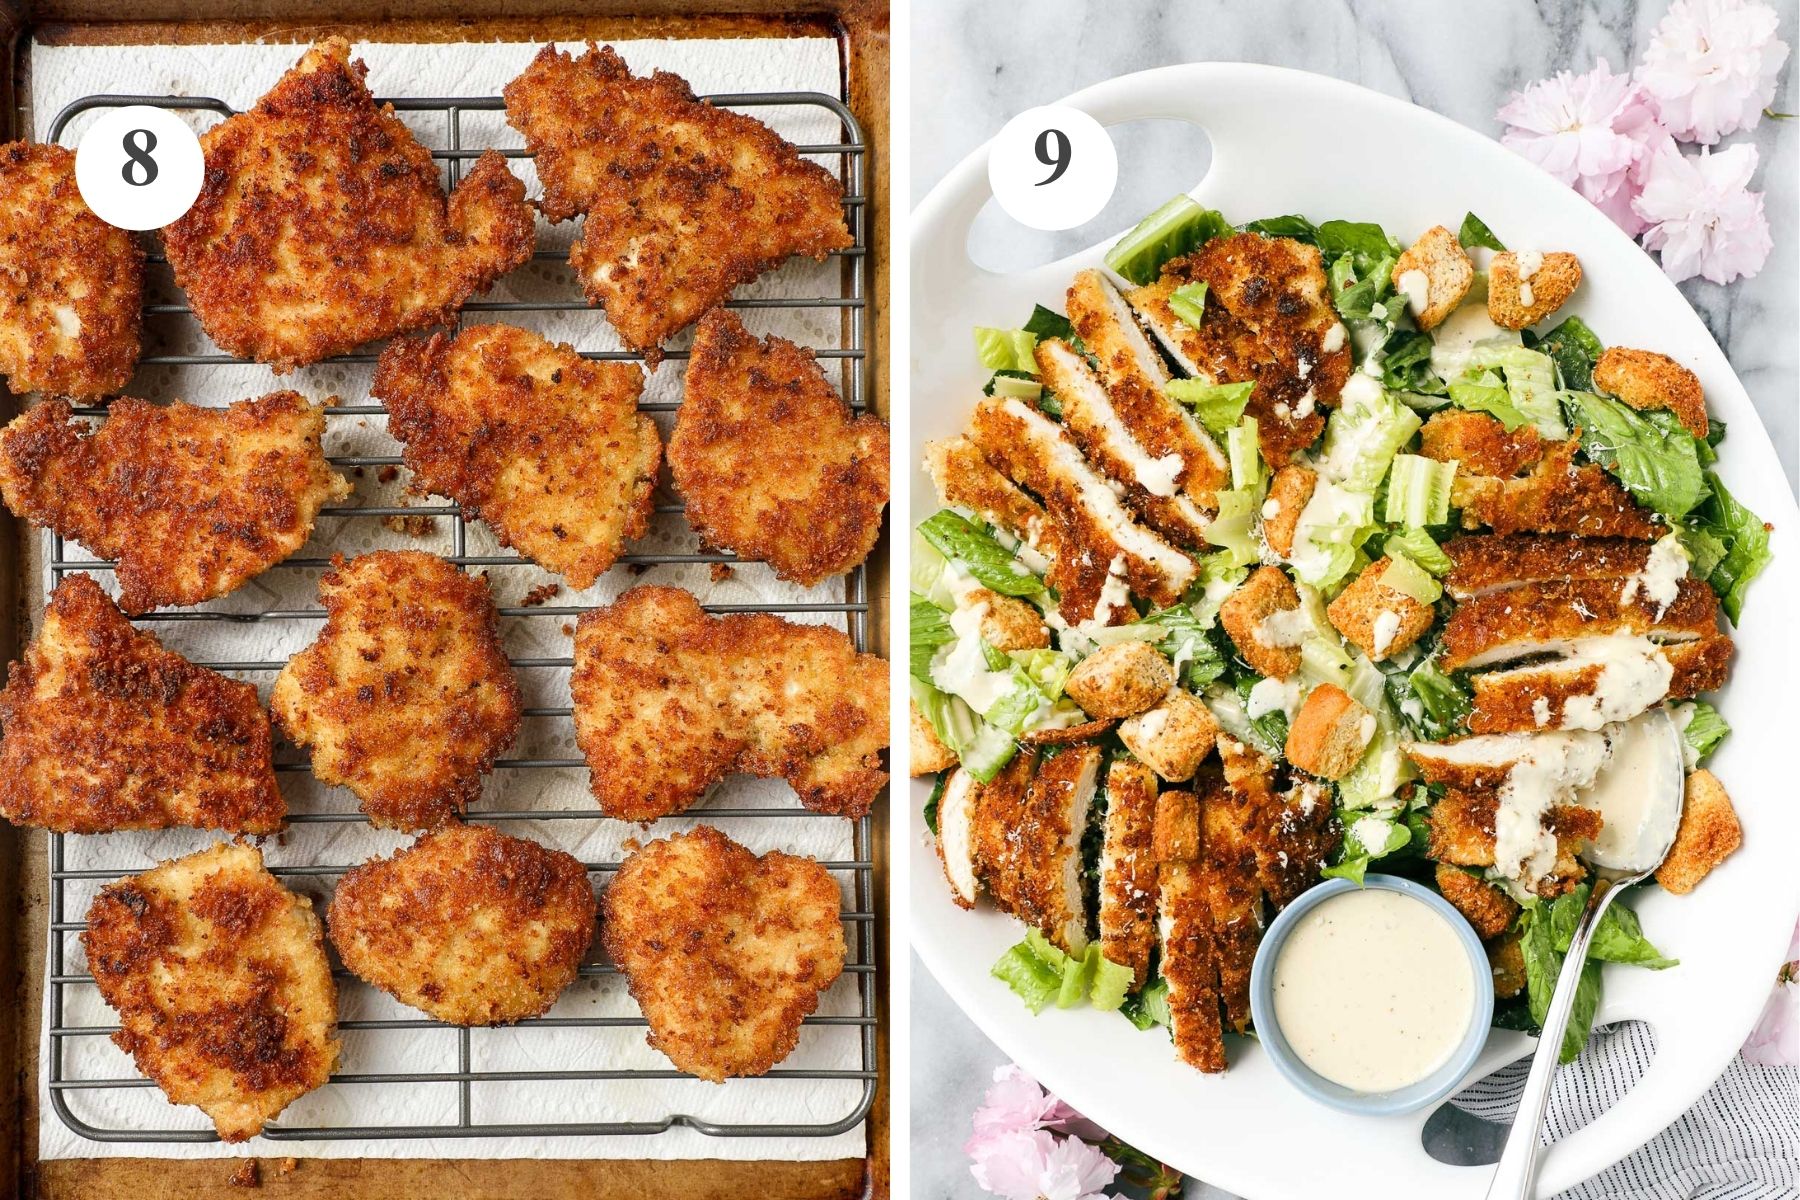
Step 8. Drying Rack: Set the chicken aside on a cookie drying rack with a sheet of paper towels underneath to catch any oil that drips down. This helps the chicken to stay crispy on the bottom.
Step 9. Assemble the Salad: Wash the romaine lettuce, pat it dry, and cut it into bite-sized pieces. Add the lettuce to a bowl and toss with the dressing to taste. Top with sliced crispy chicken and croutons.
Serving, Storage, and Reheating
For Serving: Serve with Cast Iron Focaccia, Lasagna Without Ricotta Cheese, or Italian Lentil Soup.
To Store: Store any leftover romaine lettuce, croutons, and chicken separately.
To Reheat: Bake the chicken either on a baking sheet in the oven at 350°F for 5-8 minutes, then on broil for 1-2 minutes, or in a sauté pan with a little olive oil.
Tips for Making the Best Crispy Chicken Caesar Salad
- Press the Panko: Press extra panko bread crumb mixture into both sides of the chicken. This makes it crispier.
- Tenderize the Chicken: This makes such a difference in the taste and texture of the chicken.
- Set up Your Workstation: To ensure success and low stress, set up a work station in the following order:
- Cut and tenderized chicken
- Egg mixture
- Panko mixture
- Stove and sauté pan
- Use Extra Virgin Olive Oil: The panko soaks up and pan-fries in the oil. Using a good quality extra virgin olive oil goes a long way in adding flavor to the chicken.
- Pan Temperature: On an electric stove, aim for a temperature that is roughly a "4" on a scale of "1-10". Anything higher than that and your bread-crumb coating is more likely to burn. It will also help to prevent the olive oil from smoking. If the olive oil is smoking, you know that the pan is too hot.
- Don't Overcrowd the Pan: To ensure crispy chicken, don't overcrowd the pan, which creates a steaming rather than crisping effect.
- Use a Cookie Drying Rack: You spent a lot of effort making crispy chicken. Don't let it get soggy by putting it on a plate or stacking the chicken on top of each other. This will soften the crispy bread crumbs. Place the chicken in a single layer on a cookie drying rack as you cook the rest of the chicken and until serving.
- Romaine: Ensure that the romaine lettuce has been washed and patted dry. Lettuce that is wet is hard to coat in dressing and wilts faster.
- Dressing the Salad: Dress the salad right before serving to prevent the romaine lettuce from wilting or getting soggy.
For More Recipes You May Love


If you tried this Caesar Salad with Crispy Chicken Recipe or any other recipe on my website, please leave a 🌟 star rating and let me know how it went in the 📝 comments below. I'd love to hear from you!

Caesar Salad with Crispy Chicken
Ingredients
Caesar Dressing
- 1 small clove garlic center stem removed, then minced
- 1 cup mayo
- 2 tablespoon extra virgin olive oil
- 2 tablespoon lemon juice
- 2 teaspoon Dijon mustard
- 1 teaspoon Worcestershire sauce
- ½ cup freshly grated Parmesan cheese or Parmigiana Reggiano
- ¼ teaspoon salt
- ¼ teaspoon black pepper
Crispy Chicken
- 2 cups panko bread crumbs
- 1 cup grated Parmesan cheese or Parmigiana Reggiano
- ½ teaspoon salt
- 3 large eggs
- 1 lb chicken breast about 2 chicken breasts
- 2 tablespoon extra virgin olive oil + more as needed
Salad
- 1 large head romaine lettuce 14oz
- 2 cups croutons
Instructions
Caesar Dressing
- In a medium bowl, combine the garlic, mayo, extra virgin olive oil, lemon juice, Dijon mustard, Worcestershire sauce, grated parmesan, salt, and black pepper. Cover and refrigerate while preparing the chicken.
Prepare Bread Crumb and Egg Mixture
- In a medium flat dish (like a square baker), combine the panko bread crumbs, grated parmesan cheese, and salt.
- In a separate medium dish or bowl, scramble the eggs.
Crispy Chicken
- Prepare the Chicken: Cut the chicken in half horizontally, so that you have two thin, large cutlets. Then cut these two pieces in half so that you have four smaller cutlets. This size cutlet makes it easier to tenderize and pan-fry the chicken.
- Tenderize the Chicken: Place the chicken pieces on a cutting board and cover with parchment paper. Use a meat hammer to tenderize the chicken so that each piece becomes 1 ½ times the size of the original size and even in thickness. Repeat with the remaining chicken. Set aside the tenderized pieces on a plate.If you don't have a meat hammer, use a rolling pin, or even the bottom of a large, hefty mug.
- Set Up Your Work Station: Place the dishes in the following order near the stove: plate with prepped chicken, dish with scrambled eggs, dish with panko mixture. The dish with the panko should be closest to the stove, and the dish with the chicken should be the furthest away. The ordering is helpful when pan-frying.
- To Pan Fry the Chicken: Bring a large sauté pan to just under medium heat (think #4 out of 10).
- Drizzle the sauté pan with 2 tablespoons of olive oil so that it is nicely coated. Dip a piece of chicken in the egg mixture, letting any excess drip off back into the dish. Then place the egg-coated chicken in the dish with the panko. Coat the chicken in the panko, picking up extra panko with your fingers and firmly pressing it into the chicken on both sides. This is important to get really well-coated crispy chicken.
- Place the panko-coated chicken in the preheated sauté pan and cook undisturbed until golden brown and crispy, about 3-5 minutes. Flip and cook on the other side for another 2-4 minutes until golden brown and the chicken is fully cooked. Set the chicken aside on a cookie drying rack with a set of paper towels underneath to catch any oil that drips off. Repeat with the remaining chicken, adding additional olive oil as needed so that the bottom of the pan is always coated in olive oil.
Assemble the Salad
- Wash the romaine lettuce and pat dry. Cut into pieces. Each piece should be manageable to get on a fork. Add the chopped romaine to a salad bowl, and toss with dressing to taste. Top with the crispy chicken (cut into slices if desired) and croutons.
Notes
- Press the Panko: Press extra panko bread crumb mixture into both sides of the chicken. This makes it crispier.
- Tenderize the Chicken: This makes such a difference in the taste and texture of the chicken.
- Set up Your Workstation: To ensure success and low stress, set up a work station in the following order:
- Cut and tenderized chicken
- Egg mixture
- Panko mixture
- Stove and sauté pan
- Use Extra Virgin Olive Oil: The panko soaks up and pan-fries in the oil. Using a good quality extra virgin olive oil goes a long way in adding flavor to the chicken.
- Pan Temperature: On an electric stove, aim for a temperature that is roughly a "4" on a scale of "1-10". Anything higher than that and your bread-crumb coating is more likely to burn. It will also help to prevent the olive oil from smoking. If the olive oil is smoking, you know that the pan is too hot.
- Don't Overcrowd the Pan: To ensure crispy chicken, don't overcrowd the pan, which creates a steaming rather than crisping effect.
- Use a Cookie Drying Rack: You spent a lot of effort making crispy chicken. Don't let it get soggy by putting it on a plate or stacking the chicken on top of each other. This will soften the crispy bread crumbs. Place the chicken in a single layer on a cookie drying rack as you cook the rest of the chicken until serving.
- Romaine: Ensure that the romaine lettuce has been washed and patted dry. Lettuce that is wet is hard to coat in dressing and wilts faster.
- Dressing the Salad: Dress the salad right before serving to prevent the romaine lettuce from wilting or getting soggy.


Leave a Reply