
These Chocolate Chip Cookie Bars in a 9x13 Pan are chewy, chocolatey, and super easy to make with pantry staples. It’s a classic dessert that feeds a crowd, and it's my go-to kids’ dessert for parties and get-togethers.
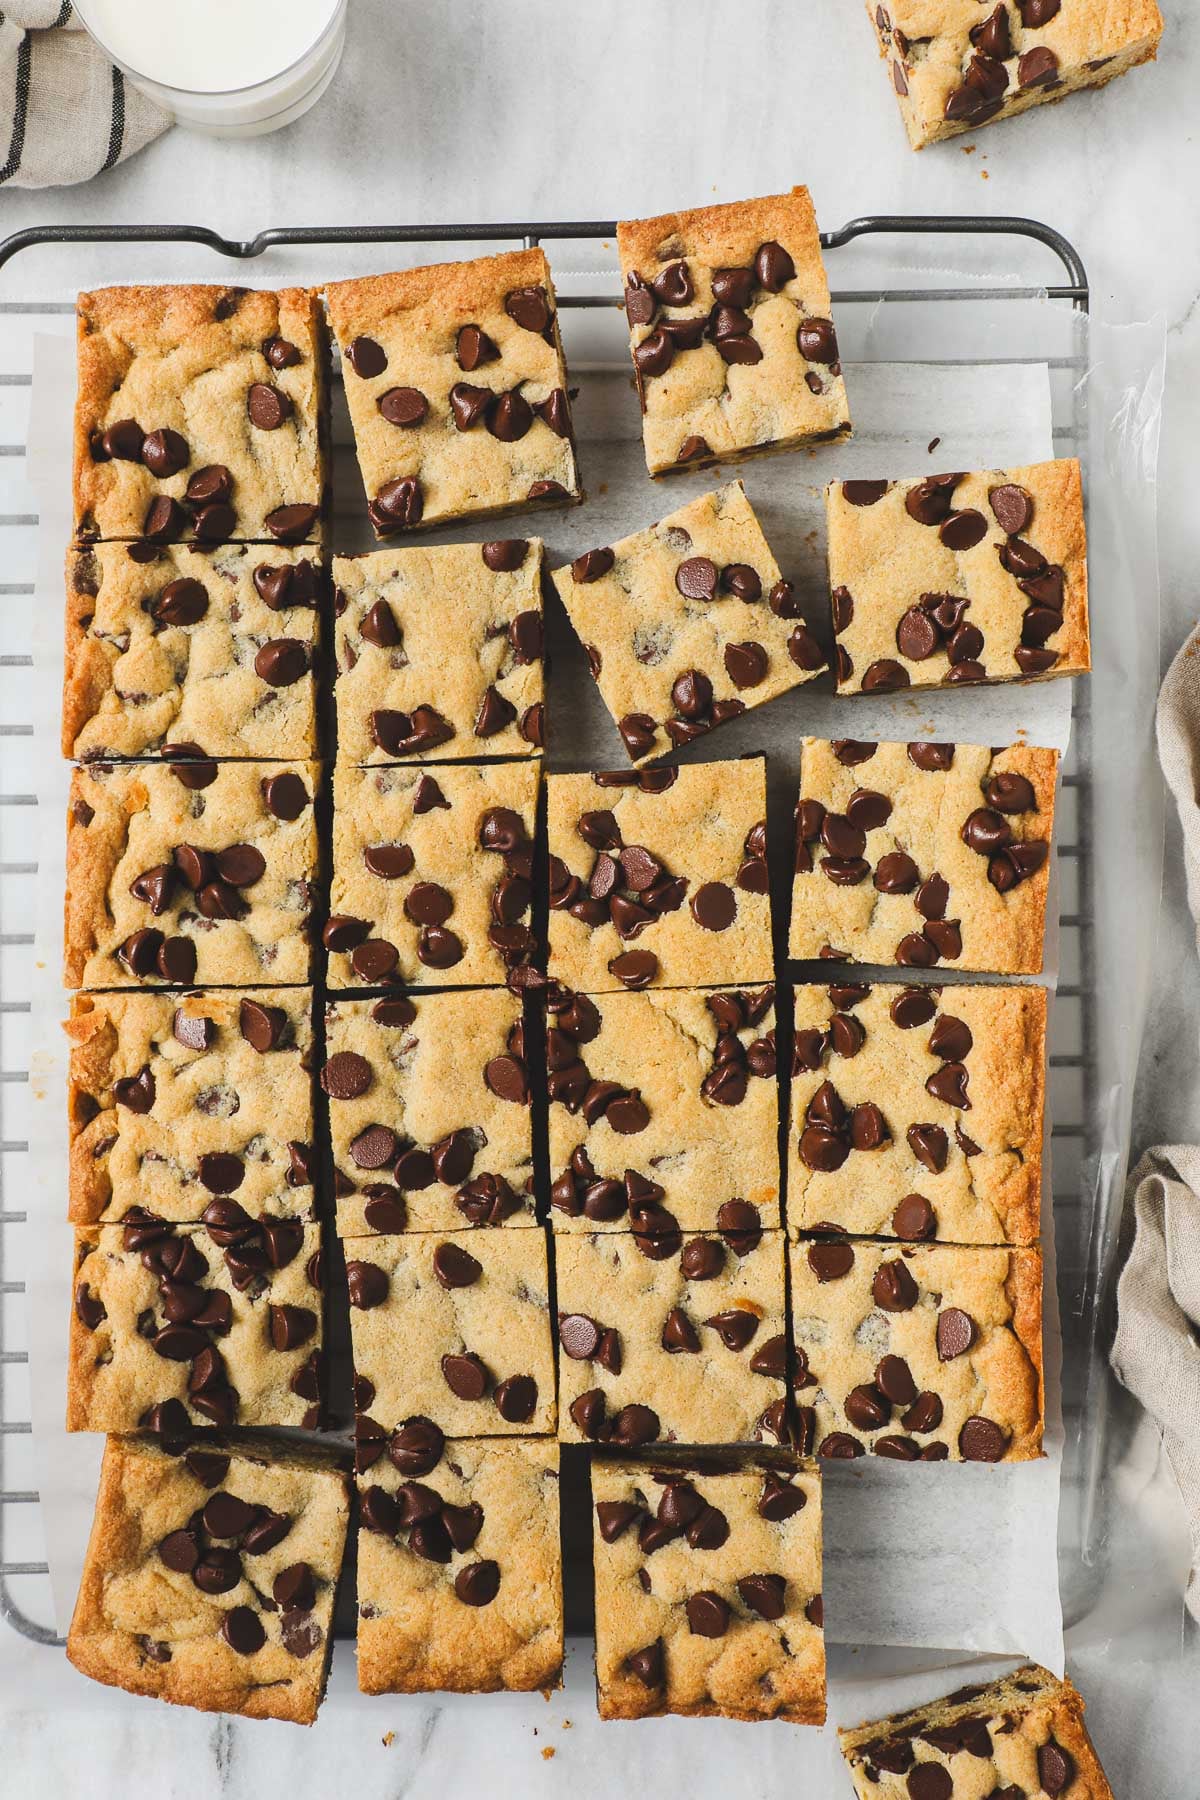
These chocolate chip cookie bars are designed to be soft, chewy, and a little melty without being raw or undercooked in the middle. The baking temperature is set to 325°F rather than 350°F for a slightly longer bake time that results in more evenly baked cookie bars.
I make these all the time when we have friends over for dinner, especially when I run out of time to make dessert (this recipe is an easy, no-brainer), or when I’ve had extra time and make a separate adult dessert and this one for the kids.
Recipe Testing
You’d be shocked at how much recipe testing these bars needed. Despite having almost a dozen chocolate chip cookie recipes on the site and everything from Double Fudge Brownies to Oreo Brookies and Biscoff Blondies, I needed to make them 8 times with various adjustments until they were just right.
It took some finagling of the ingredients and temperature to get that chewy, but not over- or undercooked center. These cookie bars require less leavening than a standard cookie, and they benefit from a lower baking temperature so they are not too crispy at the edges and undercooked in the middle.
Ingredients
Below are the ingredients needed to make these Chocolate Chip Cookie Bars in a 9x13 Pan.
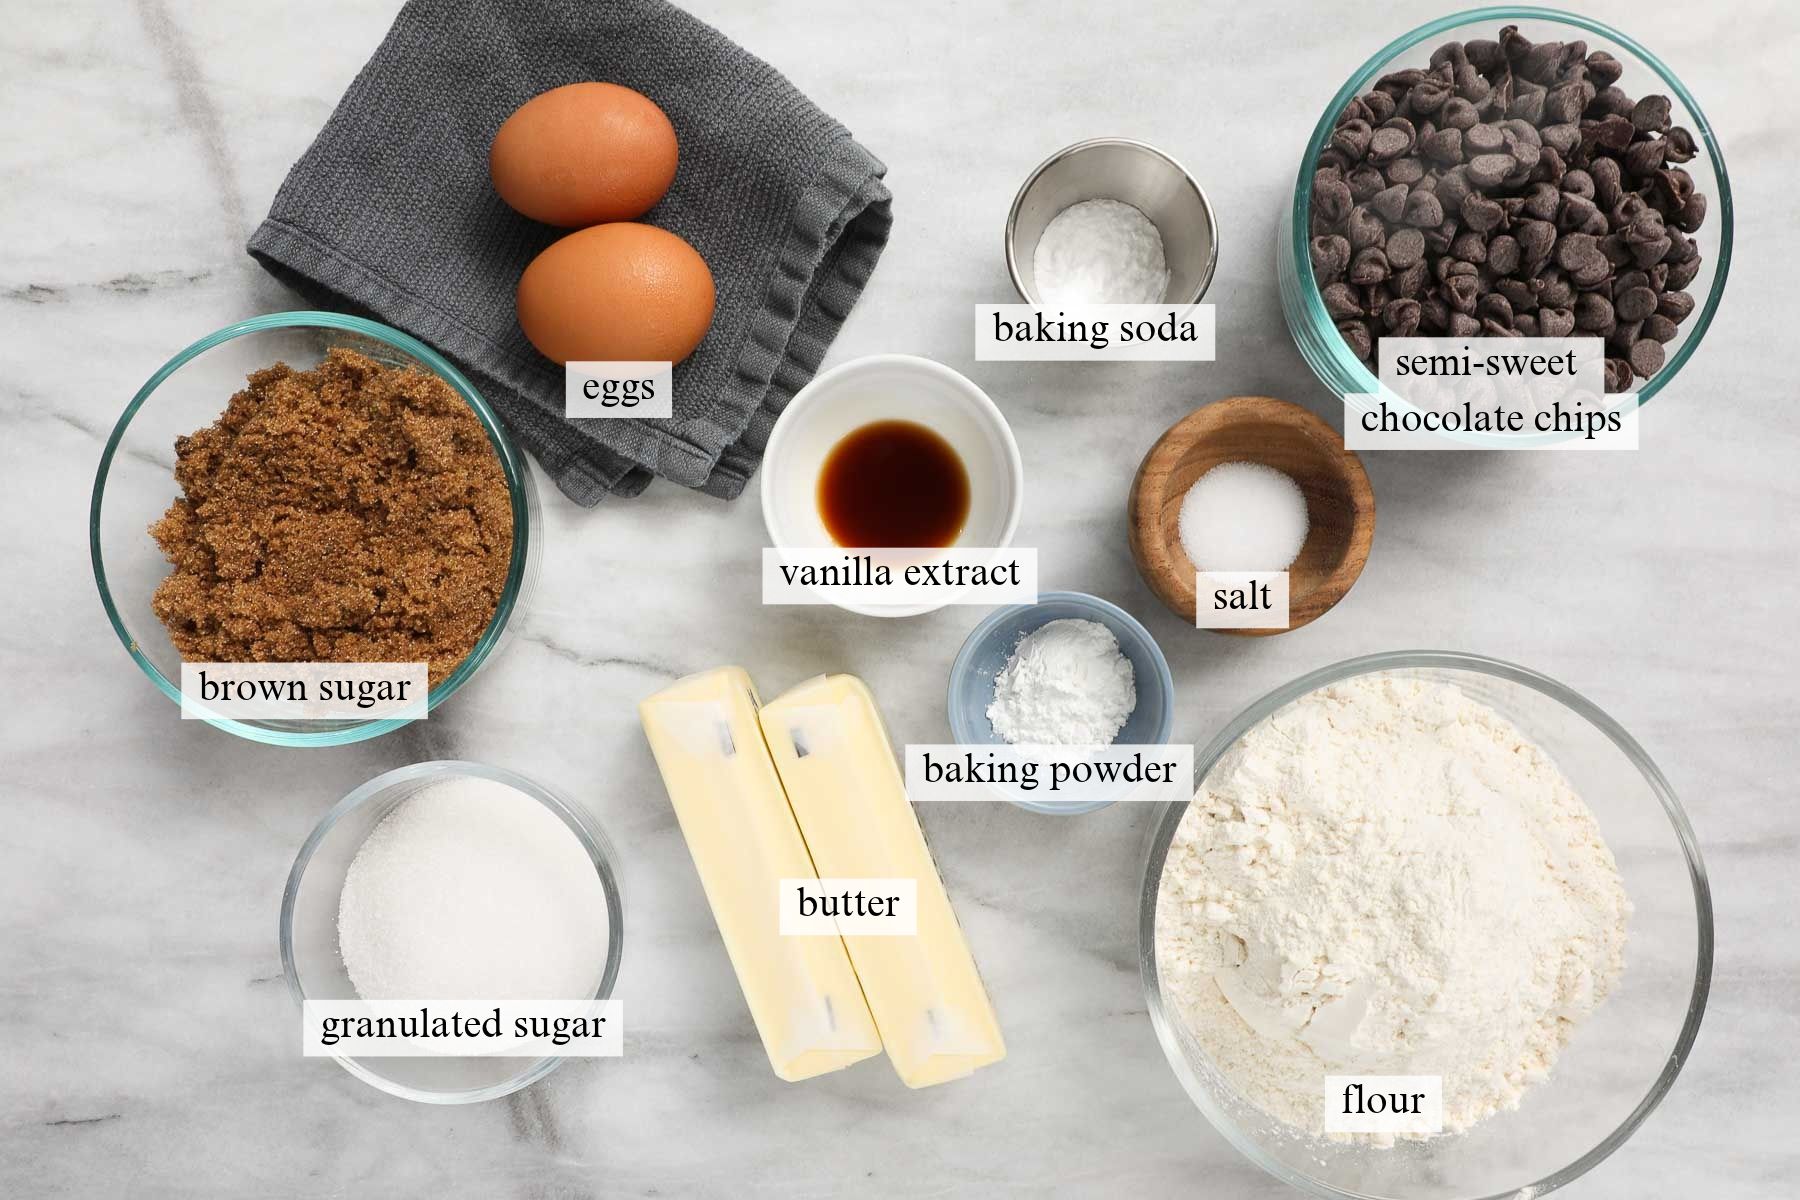
- Butter: Use softened butter. It should be at a cool room temperature, meaning that you could bend a stick of butter without it breaking or melting into your hands. I use salted butter because I like a slightly saltier cookie bar, but unsalted works too, especially if you prefer a less salty cookie bar.
- Brown Sugar: I recommend using dark brown sugar for a more classic chocolate chip cookie bar look. Dark brown sugar has more molasses in it and therefore a more caramel-like taste and a darker color. However, light brown sugar will work in a pinch.
- Granulated Sugar: This recipe uses less granulated sugar than brown sugar for a more caramel-like note in the cookies.
- Eggs: Use large eggs.
- Vanilla Extract: Use real vanilla extract, not imitation vanilla.
- Baking Powder and Baking Soda: For leavening. Cookie bars need less leavening than what you would use in a standard drop cookie.
- Salt: Brings out flavor.
- Flour: Use all-purpose unbleached flour.
- Chocolate Chips: Use semi-sweet chocolate chips. Bittersweet chocolate chips are a great alternative and are a little less sweet than semi-sweet chocolate. Any brand will work. Unlike these Bakery Style Chocolate Chip Cafe Cookies or these fancier cookies in my recipe for How to Make Chocolate Chip Cookies, you don’t need to use ultra-high-quality chocolate (though it doesn’t hurt).
See the recipe card for full information on ingredients and quantities.
How to Make Chocolate Chip Cookie Bars in a 9x13 Pan
Below are the step-by-step directions and photos for how to make Chocolate Chip Cookie Bars in a 9x13 Pan.
Note: The recipe card with instructions, ingredient list, and quantities is included further below these step-by-step photos.
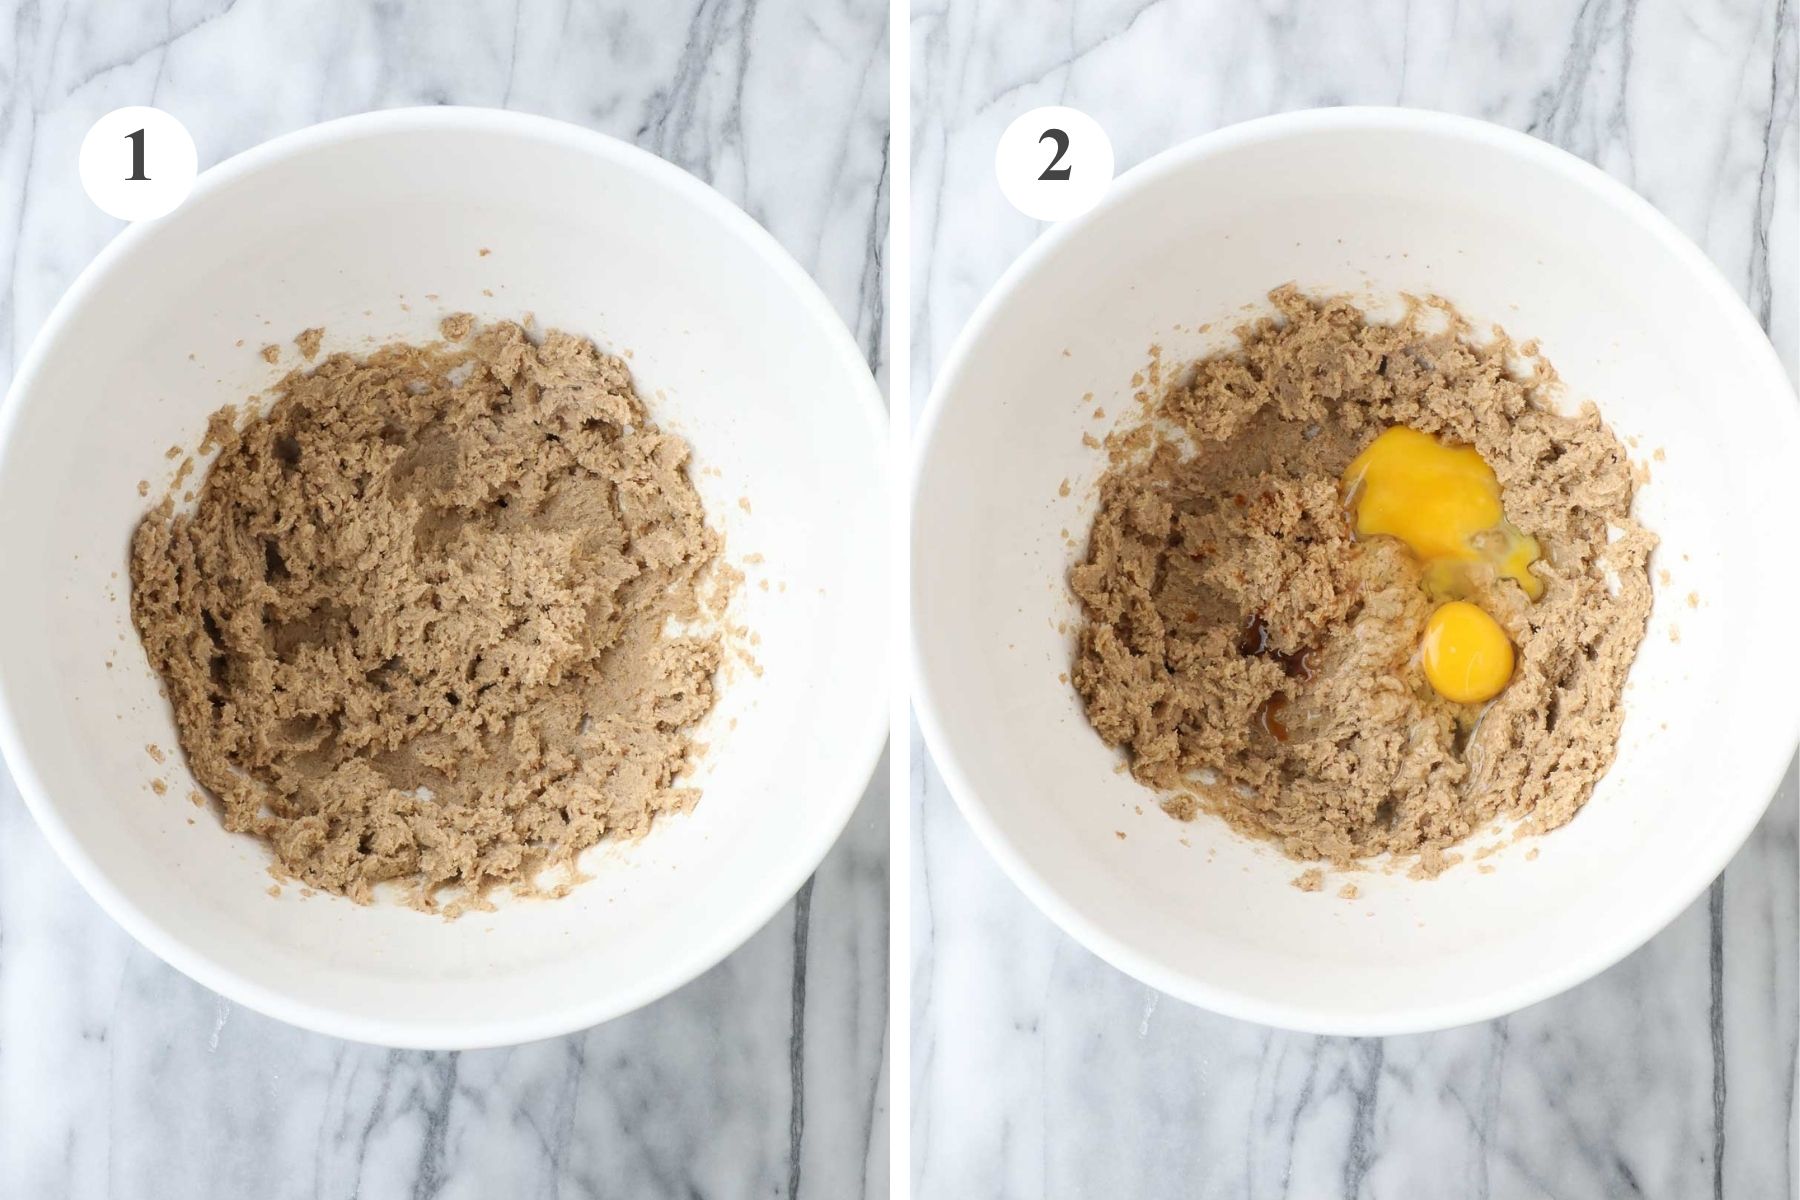
Prep: Preheat the oven to 325°F. Butter a 9x13-inch metal baking dish and line with parchment paper.
Step 1. Butter and Sugar: In a large mixing bowl, combine the softened butter, brown sugar, and granulated sugar. This can be done with a hand mixer, stand mixer, or by hand.
Step 2. Eggs and Vanilla: Add the eggs and vanilla extract and combine.
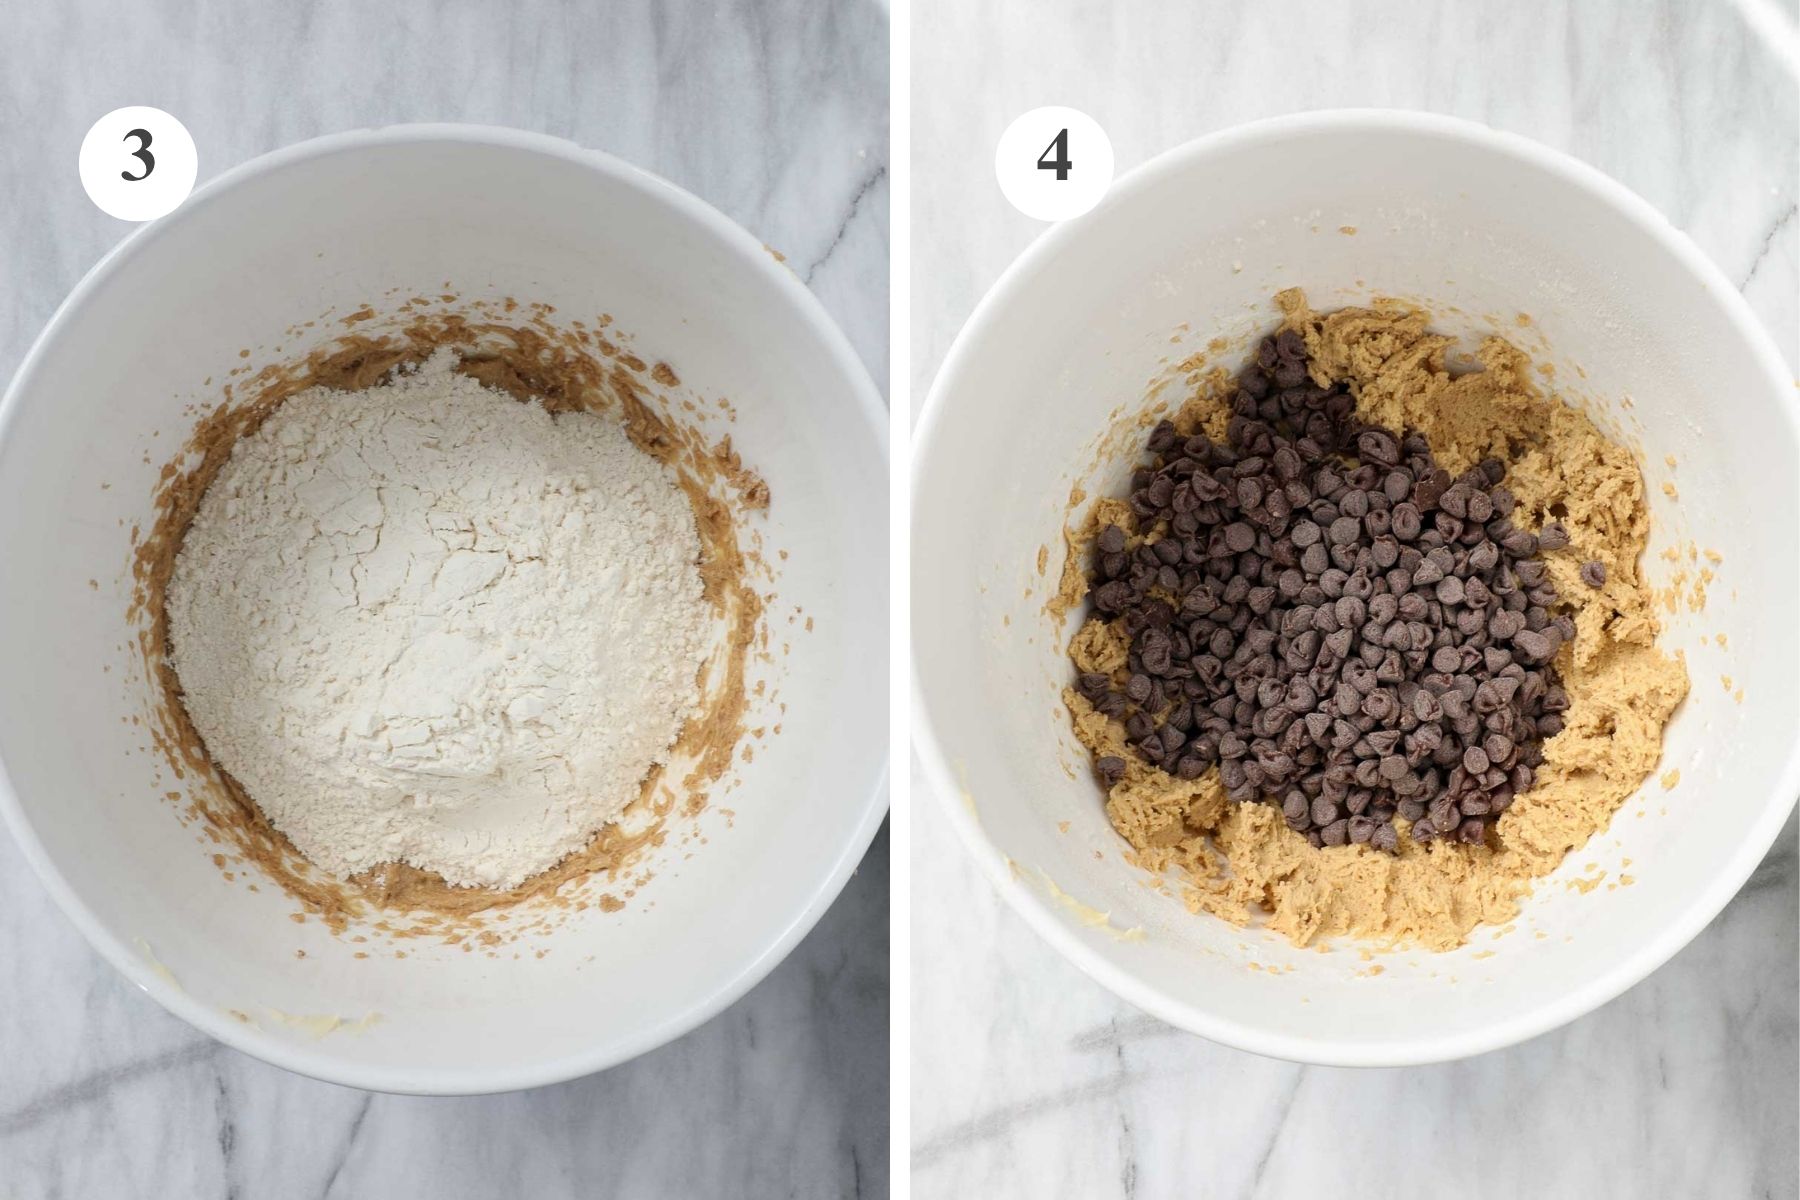
Step 3. Dry Ingredients: Add the baking powder, baking soda, and salt and combine. Add the flour and mix until just combined. Do not overmix.
Step 4. Chocolate Chips: Add 2 cups of semi-sweet chocolate chips and mix until just combined (the remaining half cup will be added to the top in the next step).
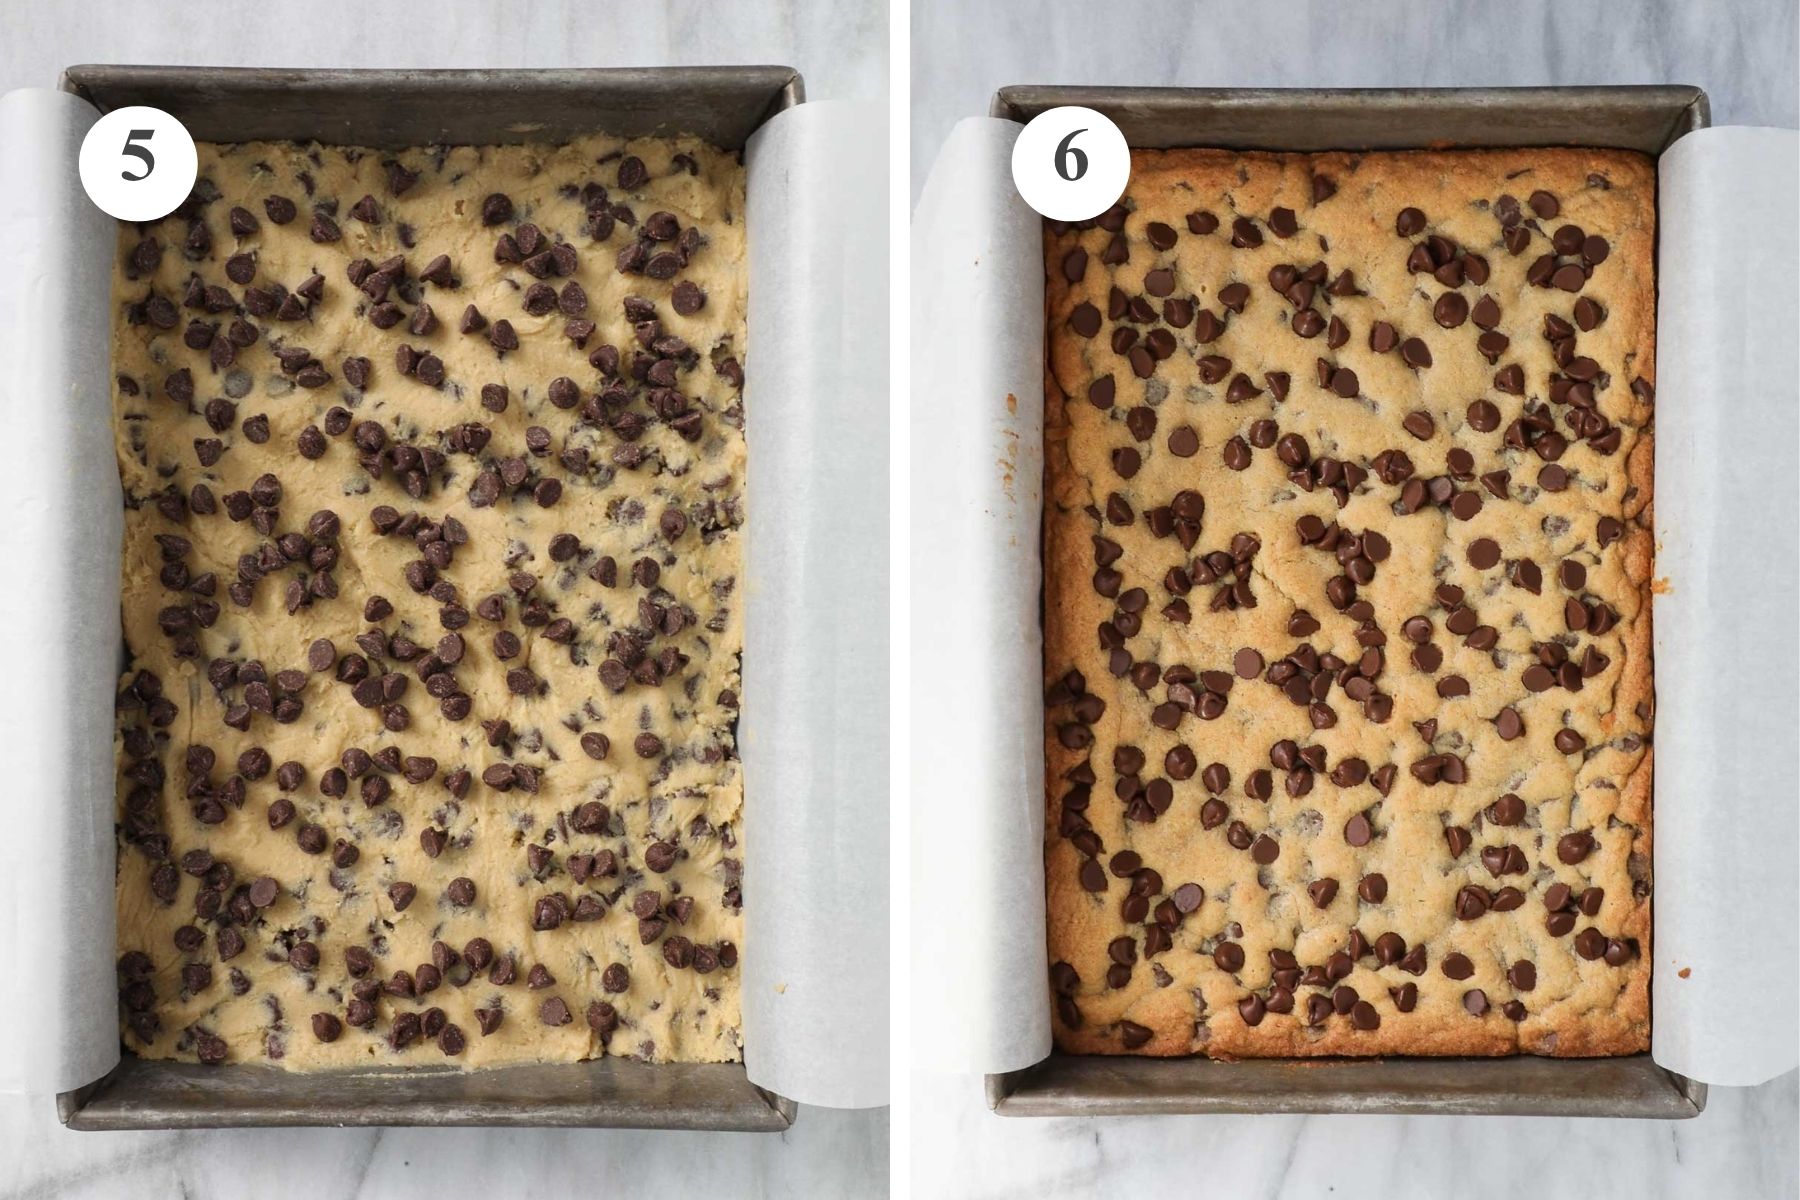
Step 5. Press into the 9x13 Baking Dish: Press the dough into the prepared 9x13 baking dish. Top the cookie dough with an additional ½ cup of semi-sweet chocolate chips.
Step 6. Bake: Bake the cookie bars at 325°F for 26-28 minutes. For more gooey cookies, bake for 26 minutes. For cookies that are more well-baked throughout, bake for 28 minutes. Look for the edges to be golden brown and the center to look set.
Let the cookie bars mostly cool in the pan. Then run a knife along the edges without parchment paper and use the parchment paper to lift up the cookie bars and transfer them to a cutting board. Cut into squares. If you just can't wait to let them cool, you can cut them in the baking dish, being careful not to damage the baking dish while cutting, and serve them warm (yum!).
Tips for the Best Chocolate Chip Cookie Bars in a 9x13 Pan
- Parchment Paper: Line the pan with parchment paper. This allows you to pull the entire sheet of bars out of the pan and then cut them cleanly and evenly on a cutting board. It also helps you to plate them on a serving dish if you are serving them at a party or get-together.
- Oven Temperature: Preheat the oven to 325°F for 30 minutes prior to baking. Ovens do not always display the correct temperature, and sometimes an oven will indicate that it has fully preheated when it is still not at the set temperature. Having a separately purchased oven thermometer can help you verify the oven’s actual temperature.
- Ceramic Baking Dish: If you are using a ceramic baking dish, you will need to extend your baking time by 5-10 minutes.
- Measuring Flour: For the best results, weigh your flour in grams. I use a conversion of 140 grams per cup of flour. There is no universal method for weighing flour using measuring cups, and depending on your method, you may be off by as much as ¼ cup. If you do not have a kitchen scale, use the dip-and-sweep method to measure flour.
- Pressing the Dough into the 9x13 Dish: Here's a little trick to make pressing the cookie dough into the dish easier. Place your hand inside a plastic sandwich bag and press and flatten the dough with your hand in the bag. That keeps your hands clean of dough and makes it a lot easier than using the back of a spoon.
- Additional Chocolate Chips: Adding extra chocolate chips makes the cookie bars look even more enticing. You can also always top the bars with M&Ms. This is a great step for kids to get involved. They love to sprinkle extra chocolate chips or M&Ms on top (and sneak a few while they’re at it).
- Allow to Cool: Allow the cookie bars to mostly cool before removing them from the baking dish so they don’t fall apart as you transfer them to a cutting board. Though if you just can't wait, you can cut them carefully in the baking dish (careful not to damage the baking dish) and serve while still warm. Or you can try your hand at moving them while still warm (careful!).
Storage Tips
To Store: Store the cookie bars in an airtight container at room temperature for 2-3 days.
To Freeze: It is much more difficult to freeze these cookie bars before baking than after, but it can be done. Place the dough in an airtight container or freezer bag and freeze for 1-3 months. You'll need to allow the cookie dough to thaw to roughly room temperature before being able to press it into the shape of a prepared baking dish. Or, freeze the cookie bars already baked, placed in an airtight container or freezer bag for 1-3 months.
For More Chocolate Chip Recipes You May Love:


If you tried this Chocolate Chip Cookie Bar Recipe or any other recipe on my site, please leave a 🌟 star rating and let me know how it went in the 📝 comments below. Every comment helps! I'd love to hear from you!
Chocolate Chip Cookie Bars in a 9x13 Pan
Ingredients
- 1 cup butter, room temperature 226g (2 sticks)
- 1 cup dark brown sugar 213g
- ½ cup granulated sugar 99g
- 2 large eggs
- 1 teaspoon vanilla extract
- ¾ teaspoon baking powder
- ½ teaspoon baking soda
- 1 teaspoon salt
- 2 ¾ cups all-purpose unbleached flour 385g
- 2 cups semi-sweet chocolate chips + ½ cup for topping 340g + 85g
Instructions
- Preheat the oven to 325°F.
- Butter a 9x13-inch metal baking dish and line with parchment paper so that the parchment paper overhangs the long edges of the baking dish.
- In a large bowl, combine the room temperature butter, brown sugar, and granulated sugar. This can be done with a hand mixer, stand mixer, or by hand.
- Add the eggs and vanilla extract and combine.
- Add the baking powder, baking soda, and salt and combine. Add the flour and combine. Do not overmix.
- Add 2 cups of semi-sweet chocolate chips and mix until just combined (the remaining half cup will be added to the top in the next step).
- Press the dough into the parchment-lined 9x13 pan. Sprinkle the top with an additional ½ cup of chocolate chips.
- Bake at 325°F for 26-28 minutes. For more gooey cookies, bake for 26 minutes. For cookies that are more well-baked throughout, bake for 28 minutes. Look for the edges to be golden brown and the center to look set.Remove and allow to cool in the pan.
- Slide a butter knife gently around the short edges of the pan. Pick up the cookie bars using the parchment paper and transfer to a cutting board. Cut into 24 squares.
Notes
- Parchment Paper: Line the baking dish with parchment paper. This allows you to pull the entire sheet of bars out of the dish and then cut them cleanly and evenly on a cutting board. It also helps you to plate them on a serving dish if you are serving them at a party or get-together.
- Oven Temperature: Preheat the oven to 325°F for 30 minutes prior to baking. Ovens do not always display the correct temperature, and sometimes they indicate that they have fully preheated when they are still not at the set temperature. Having a separately purchased oven thermometer can help you verify the oven’s actual temperature.
- Ceramic Baking Dish: If you are using a ceramic baking dish, you will need to extend your baking time by 5-10 minutes.
- Measuring Flour: For the best results, weigh your flour in grams. I use a conversion of 140 grams per cup of flour. There is no universal method for weighing flour using measuring cups, and depending on your method, you may be off by as much as ¼ cup. If you do not have a kitchen scale, use the dip-and-sweep method to measure flour.
- Pressing the Dough into the 9x13 Dish: Here's a little trick to make this easier. Place your hand inside a plastic sandwich bag and press and flatten the dough with your hand in the bag. That keeps your hands clean of dough and makes it a lot easier than using the back of a spoon.
- Additional Chocolate Chips: Adding extra chocolate chips makes the cookie bars look even more enticing. Note that one small bag of chocolate chips is 2 cups, so plan ahead if you need extra for topping the bars. You can also top the bars with M&Ms. This is also a great step for kids to get involved in. They love to sprinkle extra chocolate chips or M&Ms on top (and sneak a few while they’re at it).
- Allow to Cool: Allow the cookie bars to mostly cool before removing them from the baking dish so they don’t fall apart as you transfer them to a cutting board. Though if you just can't wait, you can cut them carefully in the baking dish (careful not to damage the baking dish) and serve while still warm. Or you can try your hand at moving them while still warm (careful!).
Leave a Reply