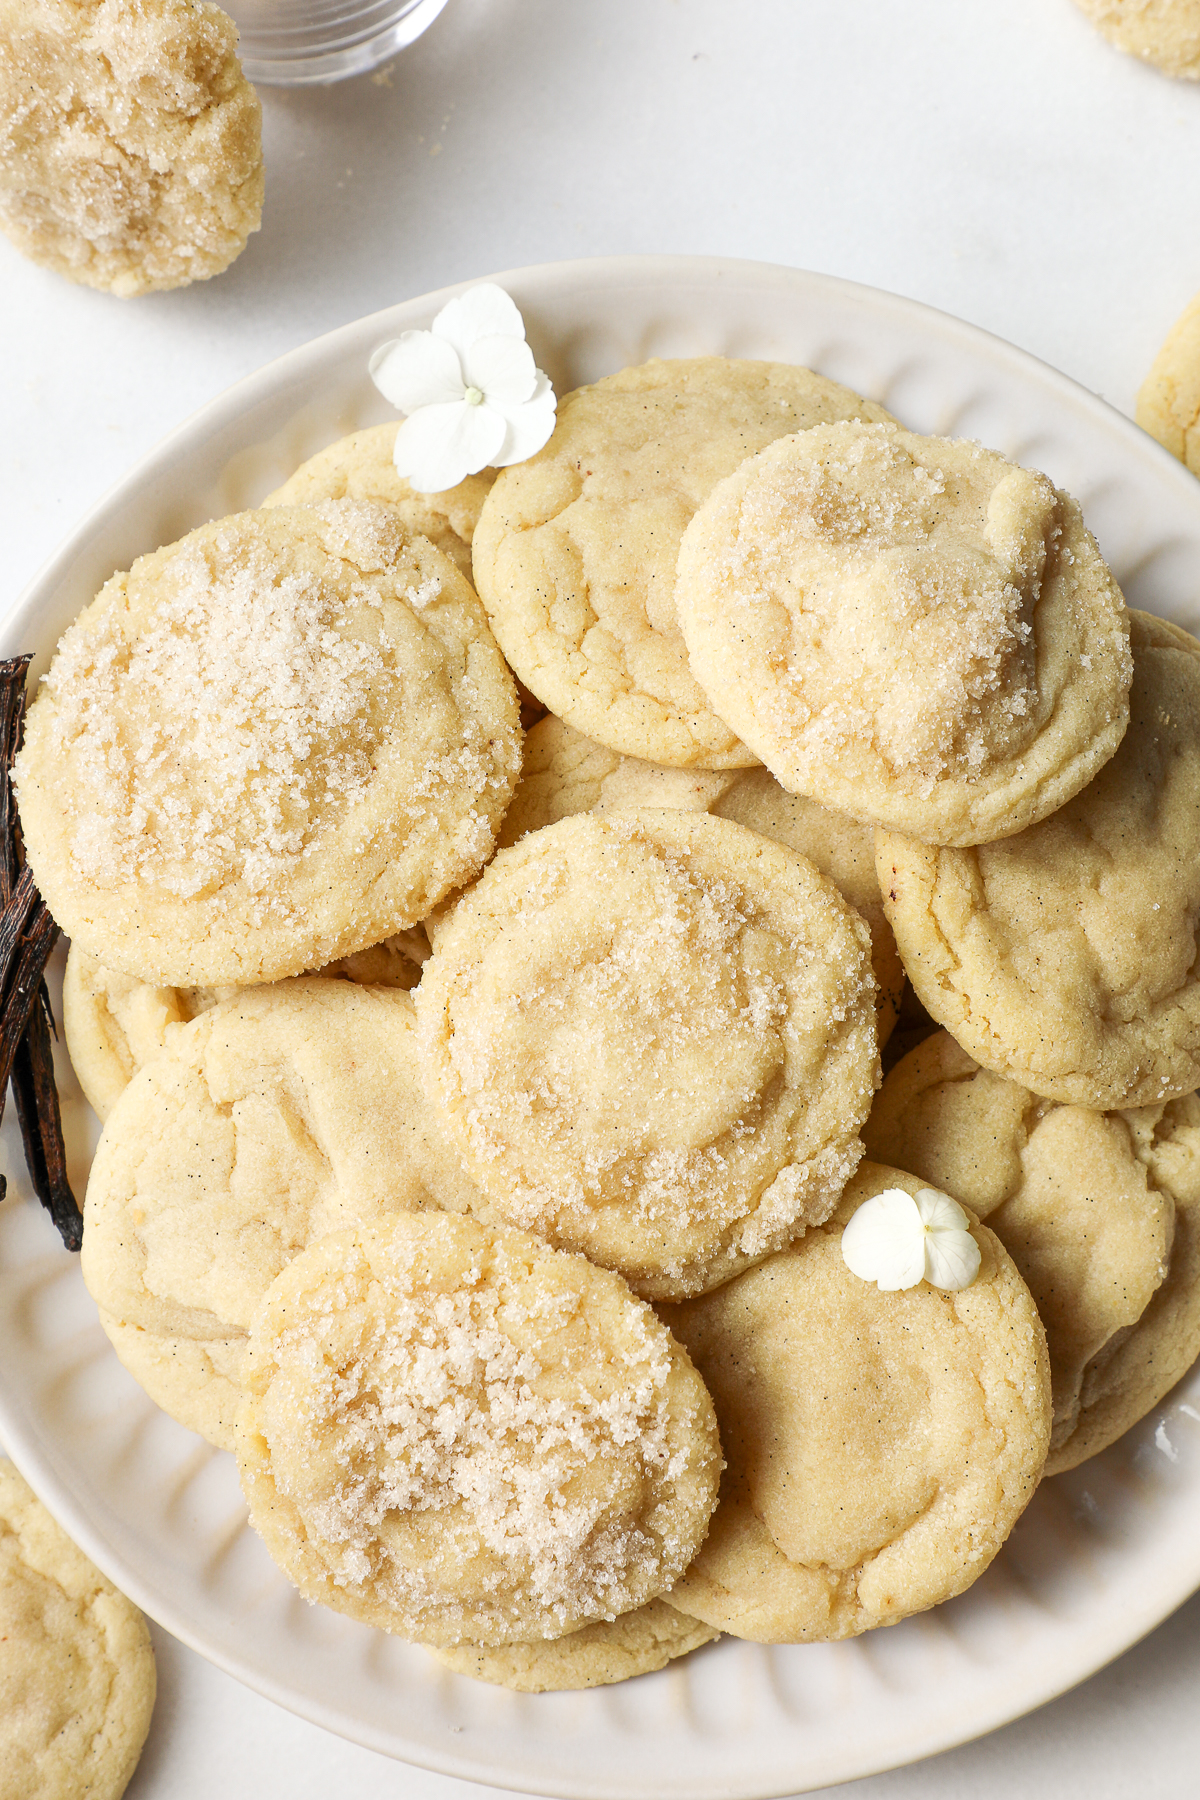
These Soft Cut Out Sugar Cookies are super thick, soft sugar cookies perfect for using cookie cutters for any season or holiday. The short ingredient list allows the simple flavors of the butter, sugar, and flour to shine.
They’re satisfying to sink your teeth into, and they melt in your mouth.
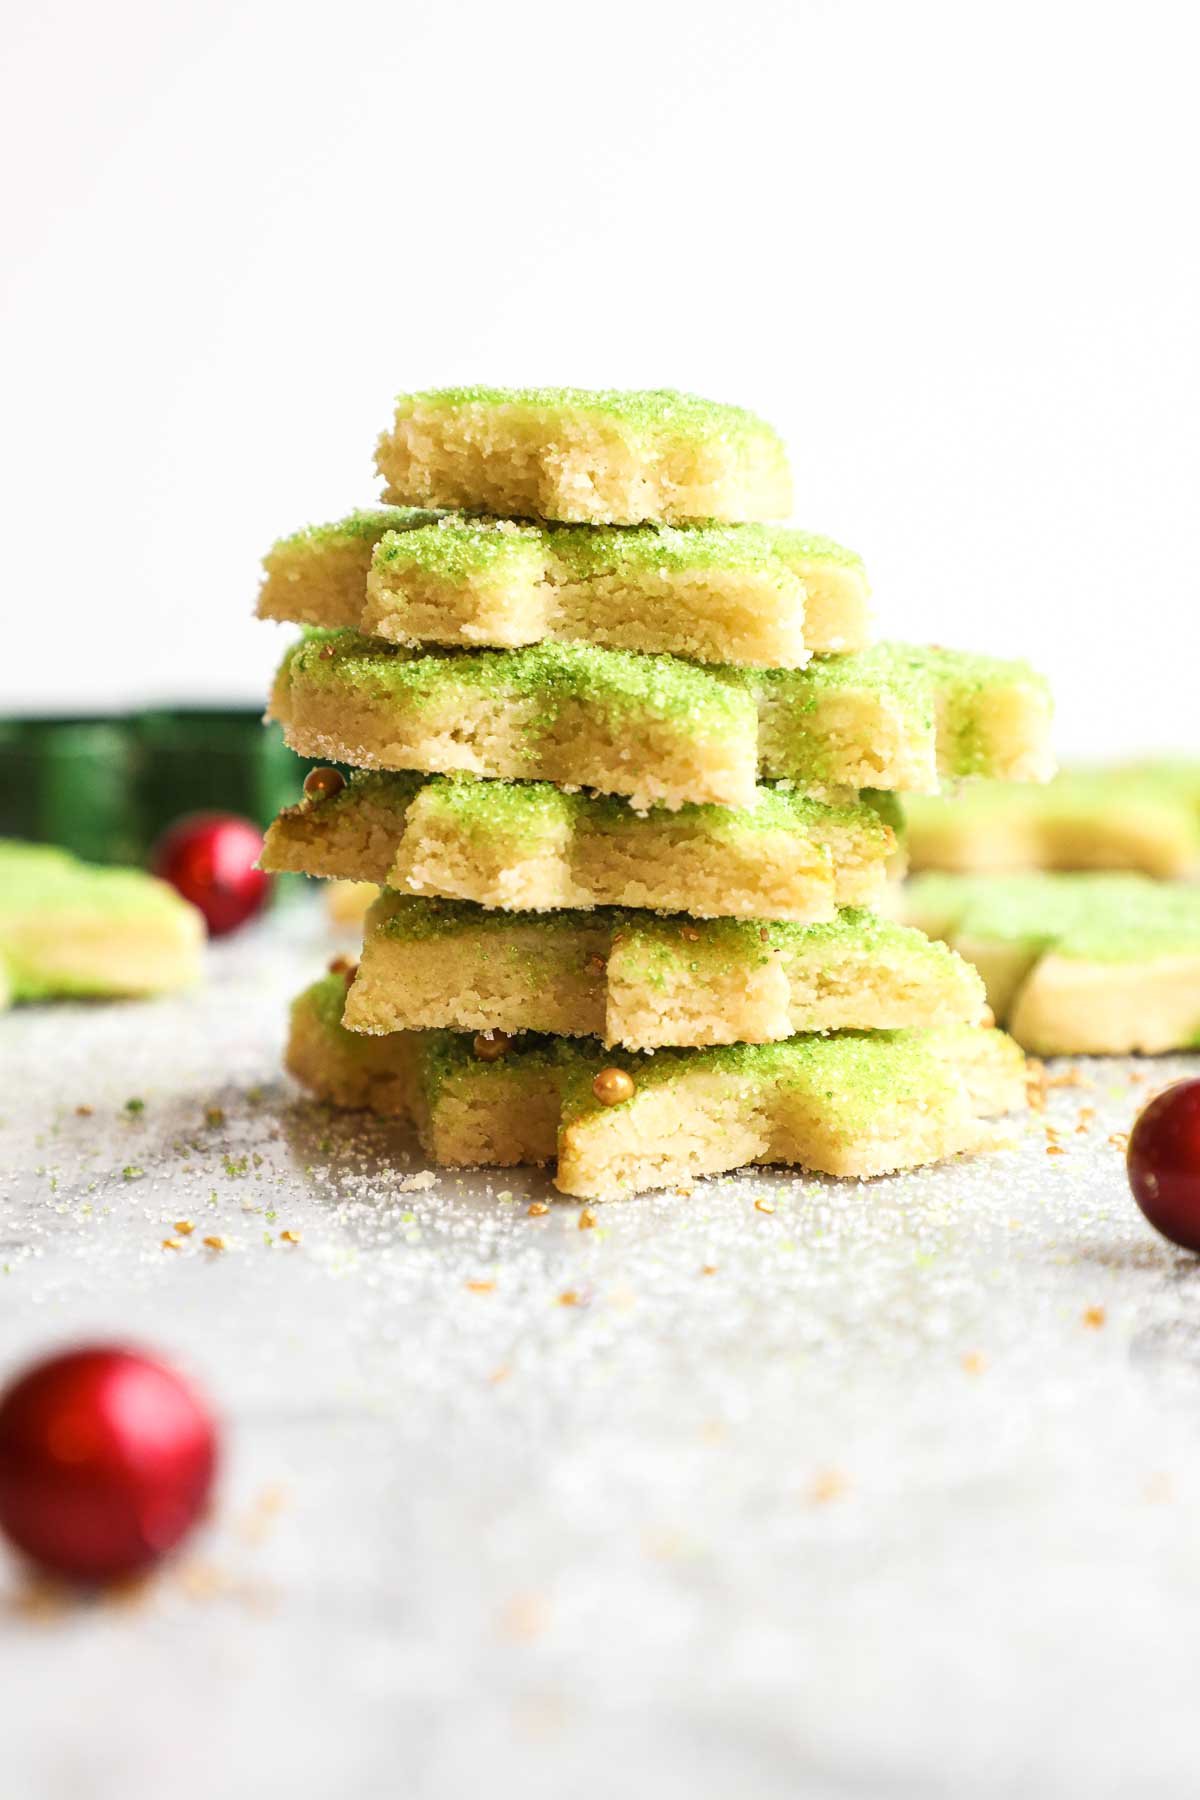
I’ve been making these cookies since I was a young kid with my mom, and now I make them routinely with my own children. They’re also the perfect cookie for decorating.
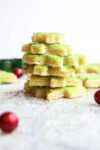
We make our own sanding sugar with granulated sugar and food coloring, but you could also use royal icing or store-bought cookie icing, sprinkles, or sugar.
This recipe is great for Christmas cookies or a Christmas Cookie Tree, but we've also used this recipe for giant cut out pumpkins for Halloween, hearts for Valentine's Day, shamrocks for St. Patrick's Day, and flowers for summer. If you don't have the time to make cut out sugar cookies, try these Soft Drop Sugar Cookies instead.
🛒 Ingredients
Below are the ingredients needed to make these Soft Cut Out Sugar Cookies.
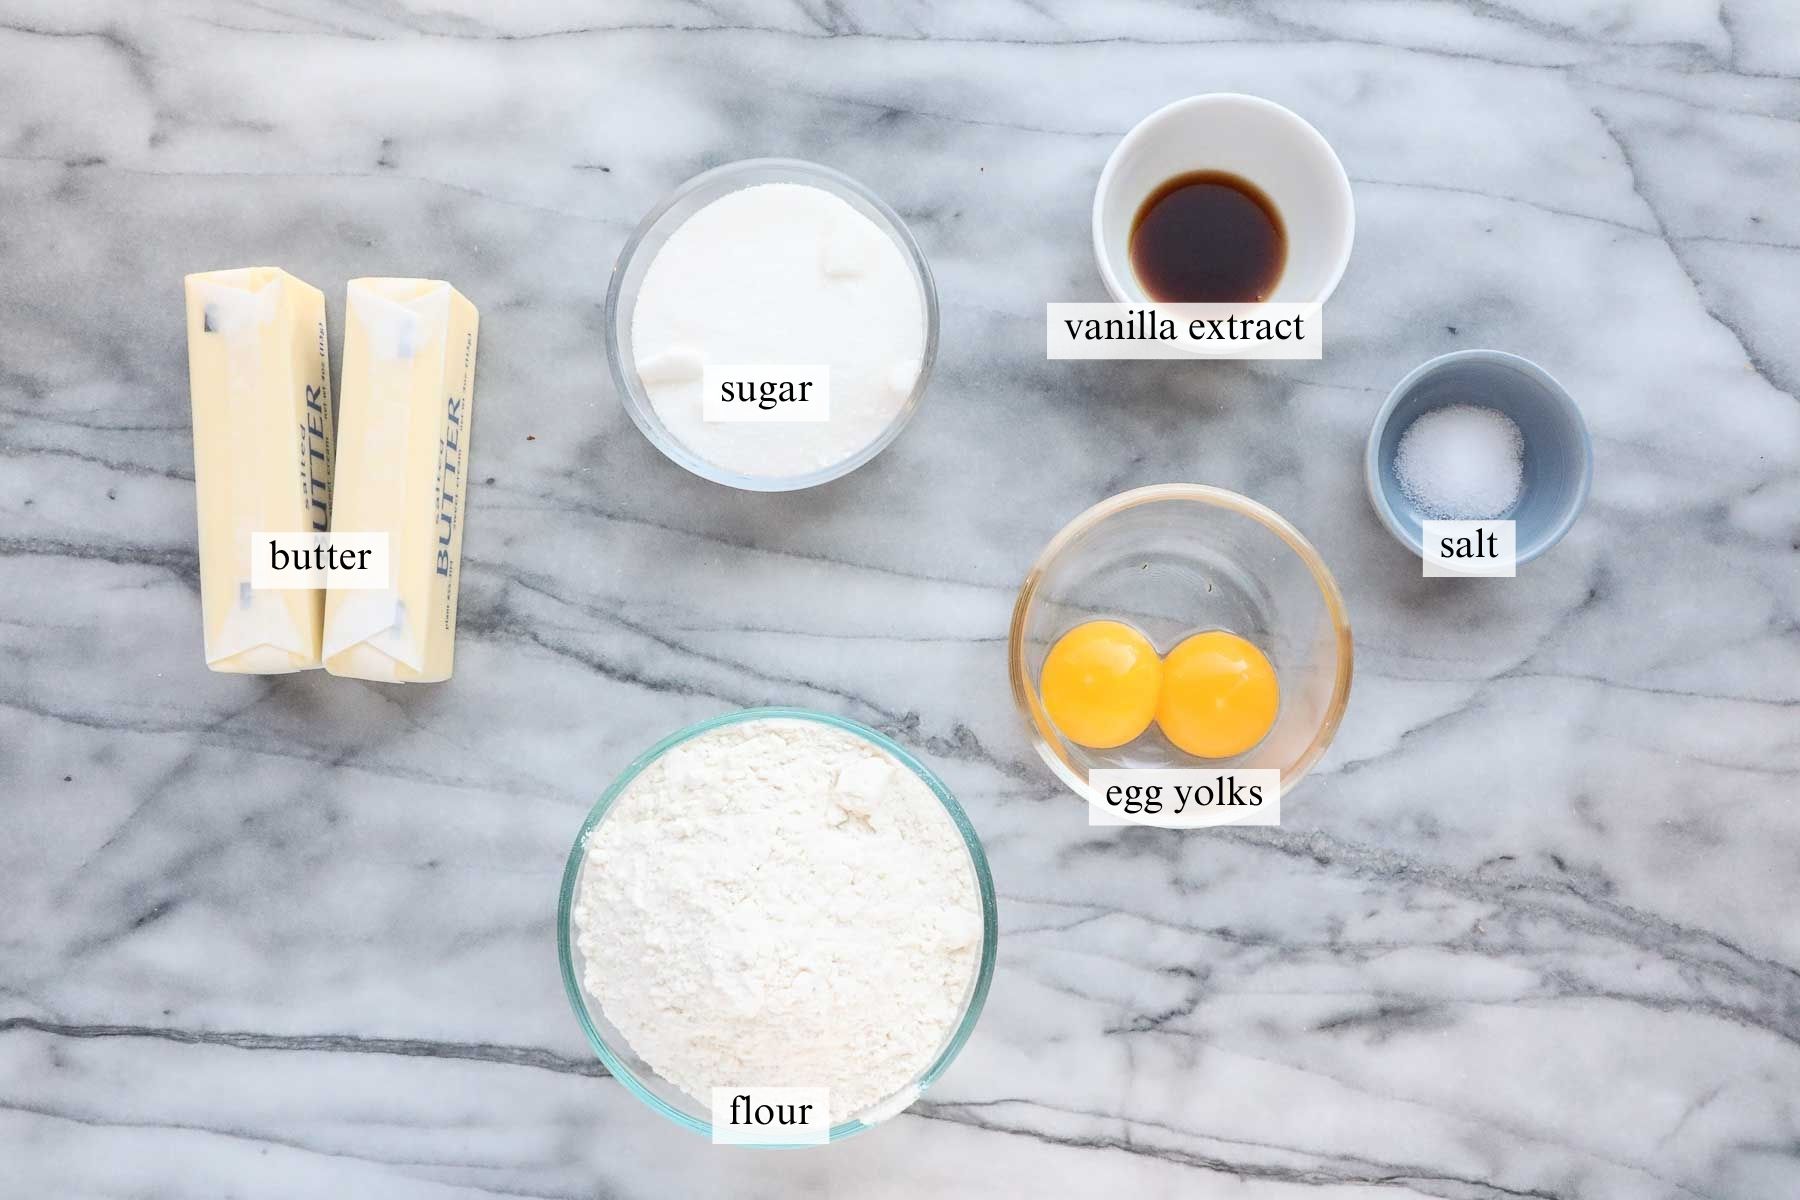
- Butter: The butter should be at a cool room temperature. I use salted butter.
- Sugar: Use granulated sugar. The cookies are sweet, but not overly sweet. You could easily eat a handful without feeling sugared out.
- Egg Yolks: Egg yolks add fat and richness without diluting the dough with the liquid content of the egg whites.
- Vanilla Extract: Use real vanilla extract. Costco sells a large bottle at a low cost per unit volume.
- Salt: To bring out and balance flavor.
- Flour: Use all-purpose unbleached flour.
See the recipe card for full information on ingredients and quantities.
📝 How to Make Soft Cut Out Sugar Cookies
Below are the step-by-step instructions and photos for how to make Soft Cut Out Sugar Cookies.
Note: The recipe card with instructions, ingredient list, and quantities is included further below these step-by-step photos.

Step 1. Cream Butter and Sugar: In a large mixing bowl, combine the softened butter and sugar until light and creamy.
Step 2. Eggs, Vanilla, Salt: Add the egg yolks, vanilla extract, and salt, and combine.
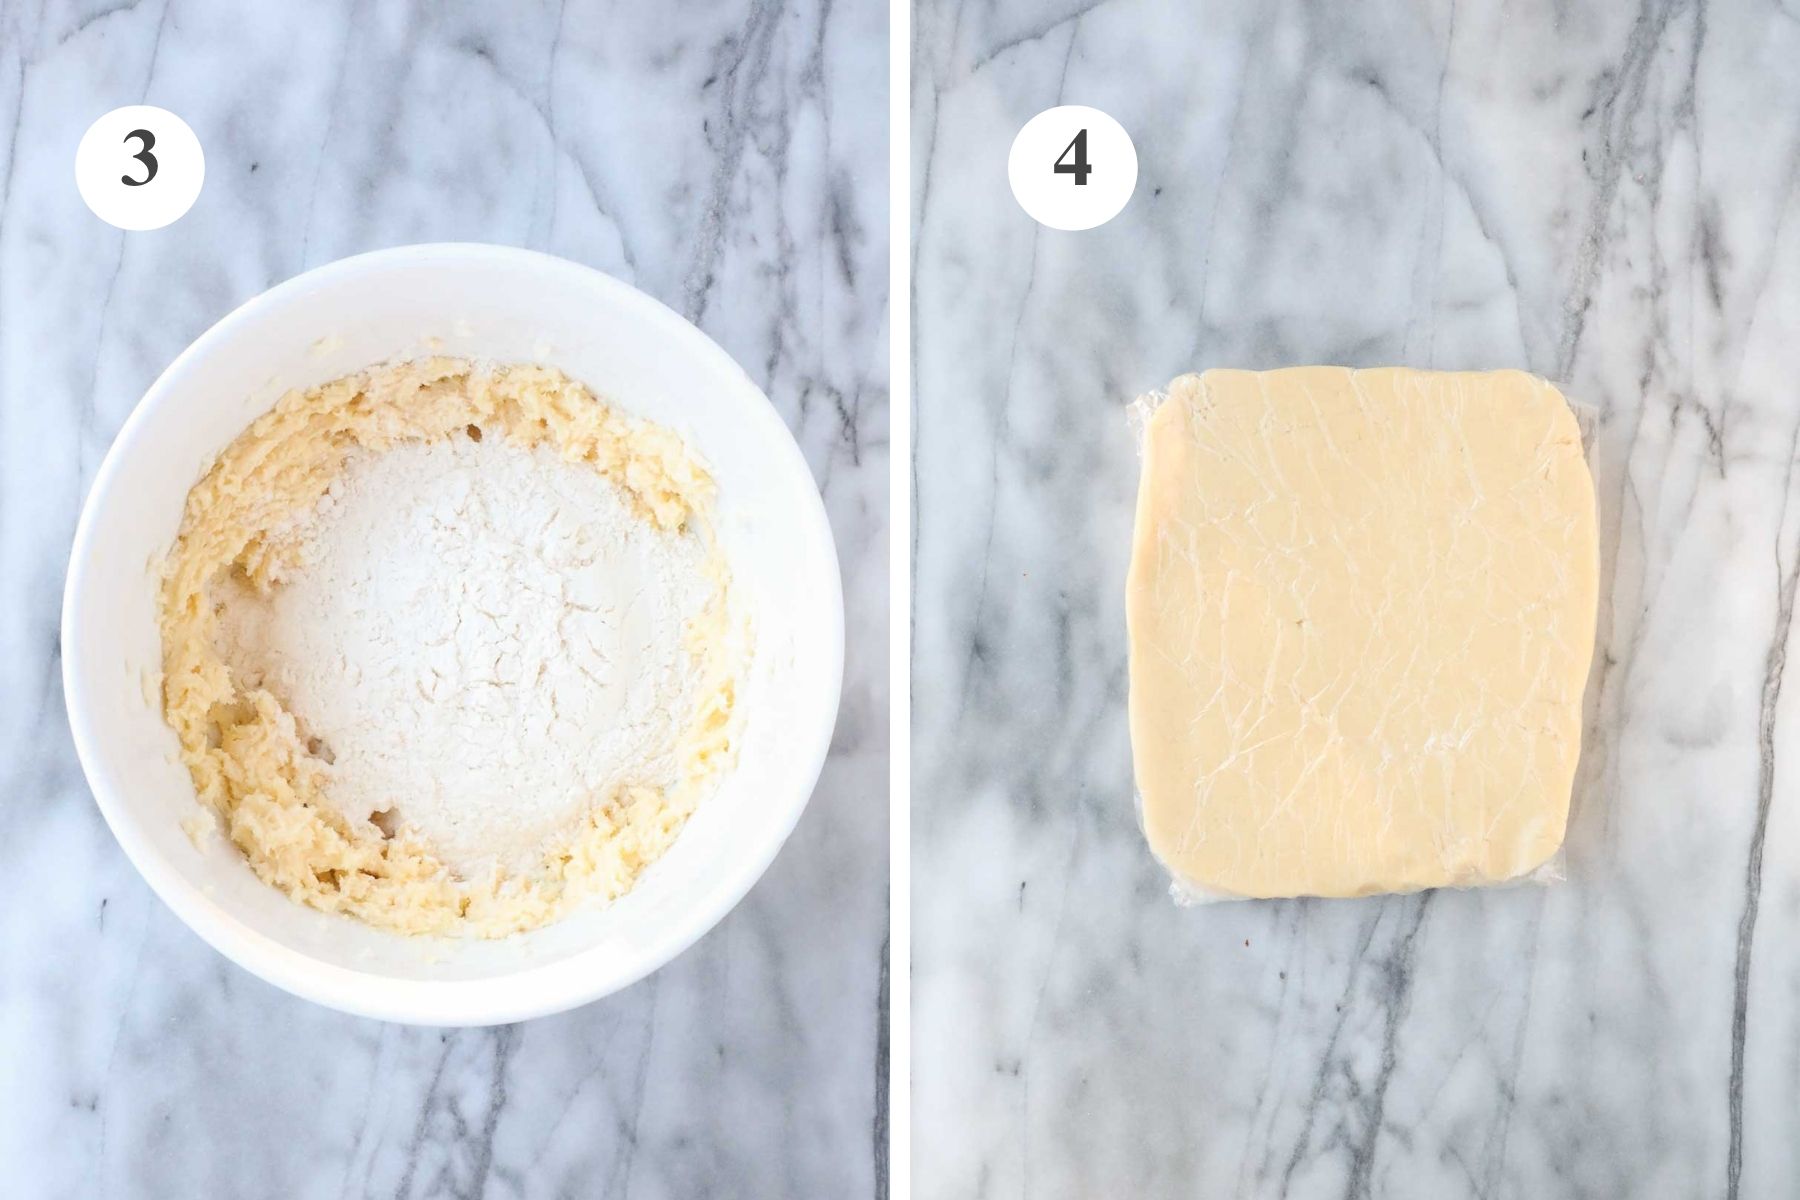
Step 3. Add Flour: Add the flour, combine, and shape into a round ball, then flatten into a thick rectangle. If the cookie dough is too soft to shape into a ball, add flour one tablespoon at a time.
Step 4. Wrap and Refrigerate: Wrap the dough in plastic wrap and refrigerate for 30 minutes to 1 hour, or overnight if needed.
Tip: Shaping the dough into a rectangle makes it easier to roll out the dough once it has had time to chill.
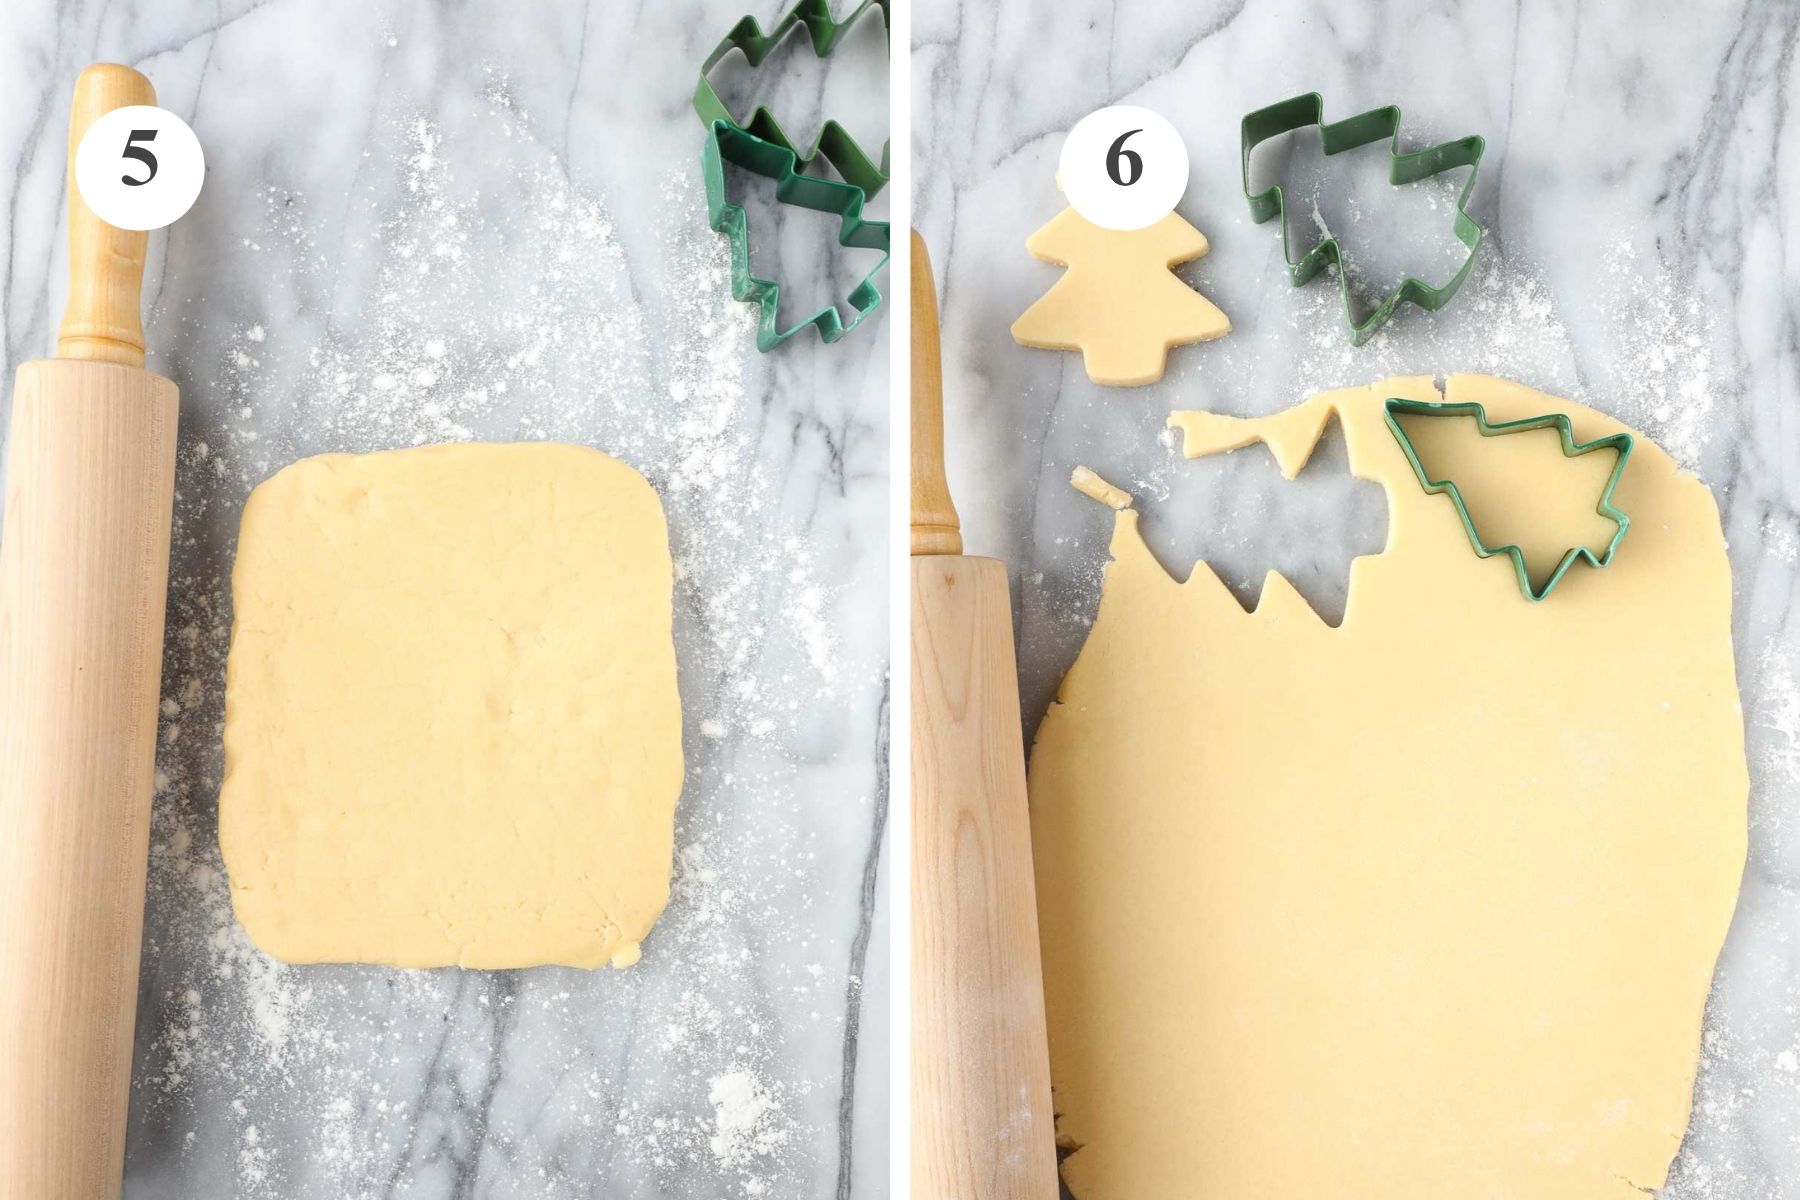
Step 5. Prep: Preheat the oven to 350°F. Take the dough out of the fridge and place it on a clean work surface that has been generously dusted with flour.
Tip: If the dough is too cold to roll out, just let it sit for 10-15 minutes at room temperature, and it will soften enough to roll out. You don't want the dough to be too soft, or the cookies will spread when baked in the oven.
Step 6. Roll Out the Dough: Roll out the dough so that it is quite thick, just under ½ an inch. Use cookie cutters to cut shapes from the dough.
Tip: To minimize handling of the dough, once a cookie has been cut, pick up the cookie cutter while keeping the dough inside. Then hold it over the baking sheet and gently push the cut cookie out of the cookie cutter onto the baking sheet.
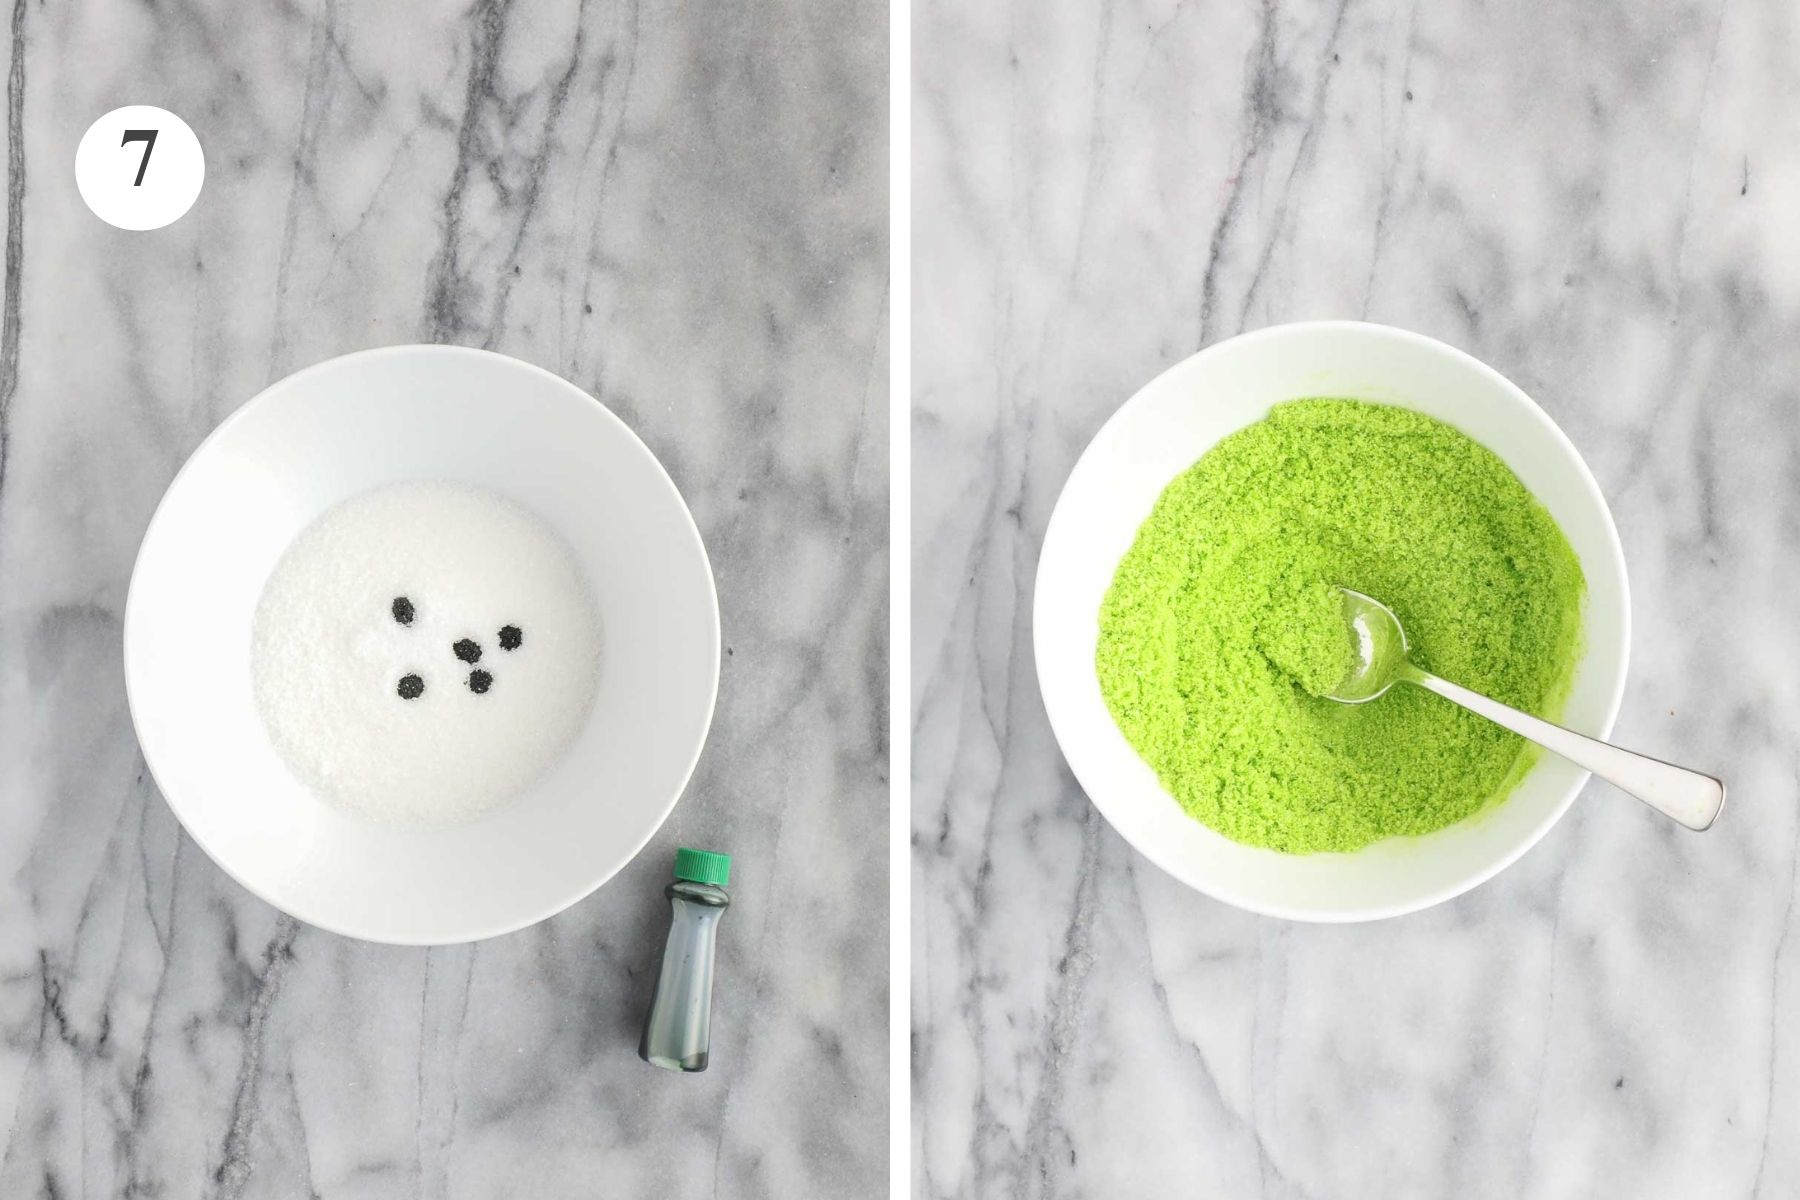
Step 7. Make Homemade Sanding Sugar (optional): If you'd like to make your own homemade sanding sugar, add 5-10 drops of food coloring (or you can use food gel) to ½ cup granulated sugar and combine, using the back of the spoon to mash any bits of concentrated food dye into the sugar.
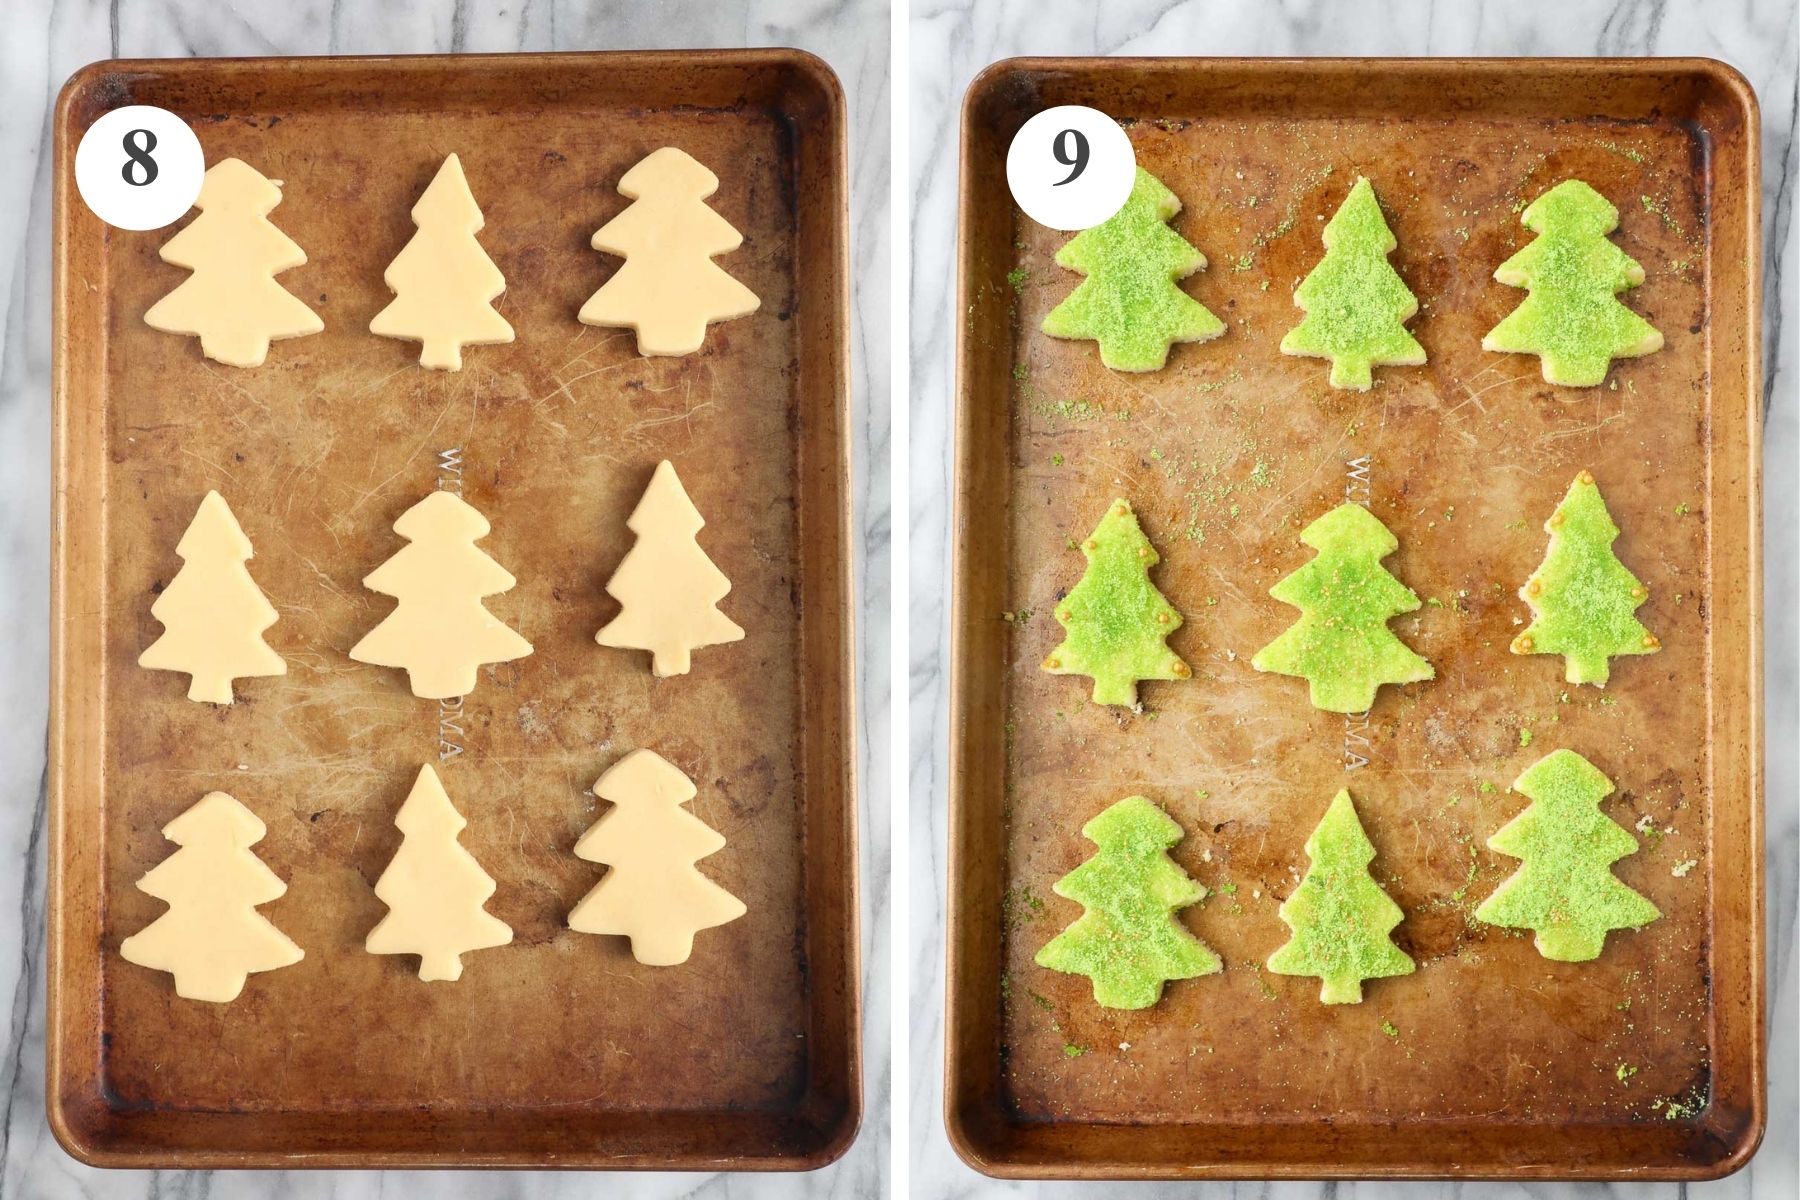
Step 8. Decorate with Sanding Sugar: Place the cookies on a baking sheet and decorate with homemade sanding sugar (if using icing to decorate, wait until after the cookies have been baked).
Tip: Using homemade sanding sugar before baking the cookies allows the sugar to slightly melt on the cookies for a cohesive look where the sugar sticks to the cookies. If you wait until after the cookies have baked, it's much more difficult to get the sugar to stick.
Step 9. Bake: Bake the cookies at 350°F for 8-10 minutes. Remove the cookies before they start to brown in the oven to maintain that soft texture and delicate flavor. Allow the cookies to cool slightly before moving them to a cookie drying rack.
Tip: If the cookies spread when they were in the oven (either because there was too little flour, or the dough was not chilled enough), and you still want perfect crisp edges, take your cookie cutters and recut each cookie after it has been baked. That way, you will get a very precisely cut cookie.
🫙 Storage
Store the cookies in an airtight container or on a plate covered with plastic wrap. They will last for up to a week (if not more).
The cookie dough can also be made in advance and kept in the fridge for up to a week.

💖 For More Cookie Recipes You May Love:


If you've tried this Soft Cut Out Sugar Cookie Recipe or any other recipe on my site, please leave a 🌟 star rating and let me know how it went in the 📝 comments below. I'd love to hear from you!
Soft Cut Out Sugar Cookies
Ingredients
Soft Cut Out Sugar Cookies
- 1 cup butter softened
- ¾ cup granulated sugar
- 2 large egg yolks
- 1 teaspoon vanilla extract
- ½ teaspoon salt
- 2 cups all purpose flour 280g
Sanding Sugar For Decorating (optional)
- ½ cup granulated sugar
- 5-10 drops food coloring
Instructions
- In a large bowl, beat the softened butter and sugar. Add the egg yolks, vanilla, and salt, and combine. Add the flour and beat until it comes together to form a rough ball. If the dough is too soft, add flour 1 tablespoon at a time until it becomes easy to shape into a ball.
- Flatten the dough into a thick round disk and wrap with plastic wrap. Refrigerate for 30 minutes to 1 hour or overnight.
- Preheat the oven to 350°F.
- Generously flour a clean work surface. Place the round of dough on the floured work space and use a rolling pin to roll out the dough. Keep the dough thick, at just under ½ inch thickness. If the dough is too cold, let it sit out for 10-15 minutes to warm up and soften slightly.
- Use cookie cutters to cut out shapes. Place the cut out cookies on a baking sheet, leaving a little room between the cookies. Decorate with sanding sugar if desired.
- To make homemade sanding sugar, add ½ cup granulated sugar to a bowl along with 5 to 10 drops of food coloring (you can also use food gel), and combine, mashing with the back of a spoon as needed to break up any concentrated clumps of the food dye.
- Bake for 8-10 minutes. Do not allow to brown. Remove and let cool before removing the cookies from the baking sheet.
- I recommend doing a test cookie before baking a whole batch to ensure that you have added the right proportion of butter and flour and the dough is the right temperature to prevent the cookies from spreading in the oven. That way, you can add more flour if needed or chill the cookies to reduce spreading.If the cookies did spread further than you would like, you can address this by quickly taking the same cookie cutters to re-cut the cookies after taking them out of the oven. You’ll need to do this when they are fresh out of the oven and still warm. This will give them nice, sharp, crisp edges.
Notes
- Refrigerating the Dough: Shaping the dough into a flattened rectangle makes it easier to roll out the dough once it has had time to chill.
- Rolling Out the Dough: If the dough is too cold to roll out, let it sit for 10-15 minutes at room temperature, and it will soften enough to roll out. You don't want the dough to be too soft, or the cookies will spread when baked in the oven.
- Transferring Cookies to a Baking Sheet: To minimize handling of the dough, once a cookie has been cut, pick up the cookie cutter while keeping the dough inside. Then hold it over the baking sheet and gently push the cut cookie out of the cookie cutter onto the baking sheet.
- Decorating with Sanding Sugar: Using homemade sanding sugar before baking the cookies allows the sugar to slightly melt on the cookies for a cohesive look, where the sugar sticks to the cookies. If you wait until after the cookies have baked, it's much more difficult to get the sugar to stick.


Leave a Reply